Continue with onX Maps
 Sign in with Facebook


Photos of BEAUTIFUL HARDWARE pt2


|
|
Julian Jwrote: I can supply these with the spine TIG welded to prevent theft from whatever the unit is attached to (glue-in or bolt hanger). |
|
|
Francis Hadenwrote: What is that? Do you have pictures? |
|
|
Julian Jwrote: Rams horn units can be removed easily as you said. The way to prevent theft is for the unit to be fitted to whatever anchor spec' or hanger in advance then the spine of the horn spot welded (tungsten inert gas - TIG) to prevent removal. This of course means no one can remove the unit once installed so will require cutting using a cordless angle grinder once worn beyond safe use. |
|
|
Wow, yikes on the price of those rams horns! Are they twice the price of elsewhere due to the crazy tariffs? |

|
Holy moly thats steep price for horns. |
|
|
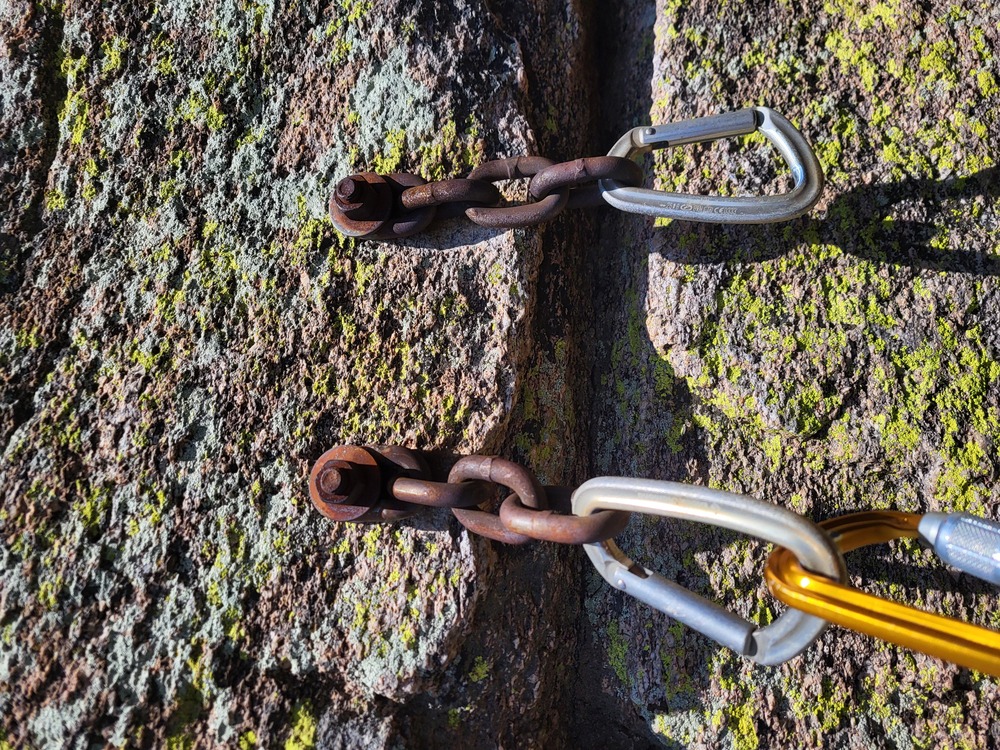
Matt Sammonswrote: The new-new anchor, as per some good suggestions here. Moved left bolt up into solid substrate away from the shallow horizontal, vertically offset, opposed mussys (the chain and QL really allow it to rotate into either orientation), and a patch on the old hole. Chain, bolts, and QL are all 304ss. 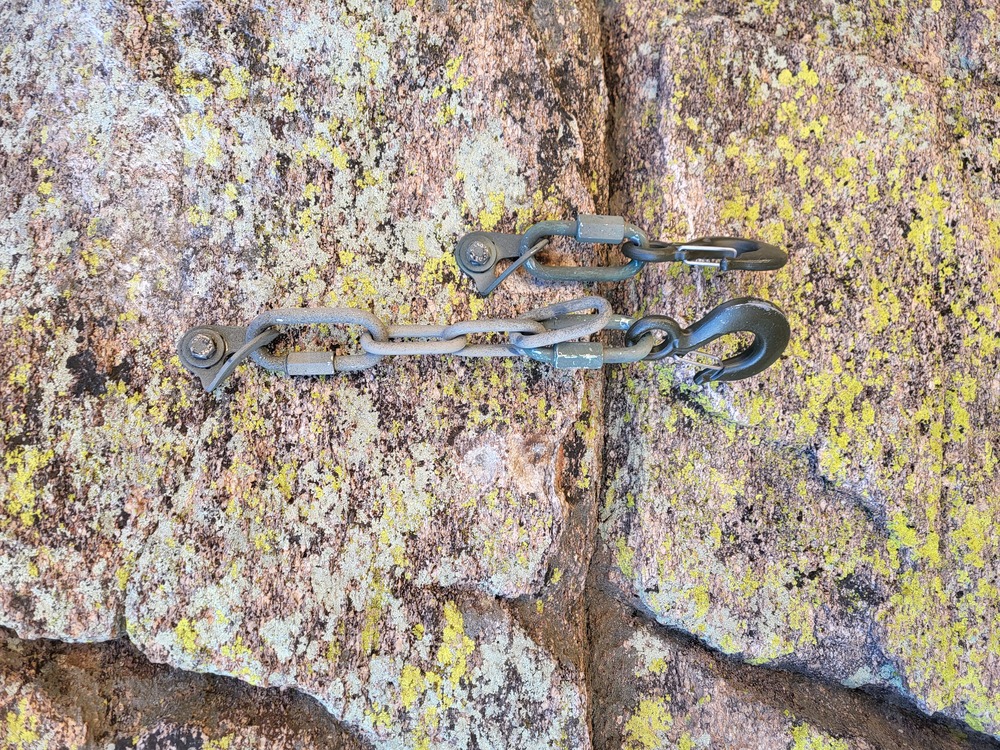 |
|
|
That’s noble of you to take the feed-back and return to fix that anchor Matt! As it is now its a much better solution. I can see two of your screw-links are still up-side down (screw down so you don’t…) a relatively minor issue. I also don’t see any reason to install such lower-off intended wire-gate mussy-hooks in an opposite and opposed orientation. It’s a non-issue that gathers too much over-thinking IMO. |
|
|
When the mussies are free hanging (and an inward facing mussy won’t scrape grooves into the wall) I think opposite and opposed is great. An added improvement that’s free. Either way, anchor looks great.
|
|
|
I actually noticed the screw-gates after the photo. flipped them over after the picture and before climbing out. |
|
|
I've got in the habit of using blue loctite on all stainless quicklinks, inevitably qls are going to get flipped around by users. The loctite makes it so orientation doesn't matter at all, while they're still easy to unscrew if something needs replaced down the road. Even on plated links the loctite is great because it keeps rust of the threads and makes them easier to open down the road vs using nothing. |
|
|
 First time setting up an open anchor with glue-ins. |
|
|
Hard to tell from the pics, are those glue ins light on glue or is it just the texture of the rock/process of cleaning the excess? Sometimes I have voids like that near the body of the bolt despite overflow due to “overcleaning” the excess and I’ll typically dab a bit extra in so it’s more of a flat surface - probably just a personal, irrational fear of creating a potential spot for water to pool |
|
|
Tal Mwrote: Which specific spot are you referring to? |
|
|
This spot in the left bolt, it looks like there glue has some voids in it/isn't fully filling the hole, but that might just be an illusion from the photos  |
|
|
Ok folks I come bearing gifts. You have given me some great advice on low-visual impact solutions, so here are some resulting pics
|

|
I literally have no idea where those bolts are in those pics. Nice work! |
|
|
Cory Nwrote: Such BEAUTIFUL HARDWARE! I can't even see it! |
|
|
Cory Nwrote: Ah, that's just MP squashing the image quality. There's 21 bolts in that pic, you can make out most of them in the full-res of the close up pic, but you basically can't see any in the further away pic. |
|
|
Alex Fletcherwrote: Proud. Would Whip. |
|
|
Ackley The Improvedwrote: People keep dying at anchors not being able to see that they are not into them properly. We can't over emphasize this reality. At ASCA all we are concerned with is that the anchor hardware is the "most fool proof" set up we can devise so as to minimize catastrophe. Climb Tech mussies seem to be the current consensus easiest to use for a lower off anchor. Quick links to solid rings for rappel anchors linked via chain in a vertical-ish orientation (to minimize twist) seems to be consensus here. Anything superior (input please) is welcome (given reasonable cost-effectiveness). But let's not judge others, shall we? We've all arrived at an anchor pumped out of our skulls/gripped with fear/storm/darkness approaching or on us or crag dog/pretty girl/bluetooth speaker/rabid racoon distracted and with our judgement consequently compromised. If you climb long enough you will have your "lucky to have survived my own stupid error" story or tragedy. |