Continue with onX Maps
 Sign in with Facebook






What does your Woody look like??? 2.0


|
|
Wall angle adjusts from 0-90 degrees via winch on the right. 5 adjustable cracks currently set at BD 0.4, 0.5, 0.75, 2, and 6. Portion on the left will likely house jugs or a campus setup. 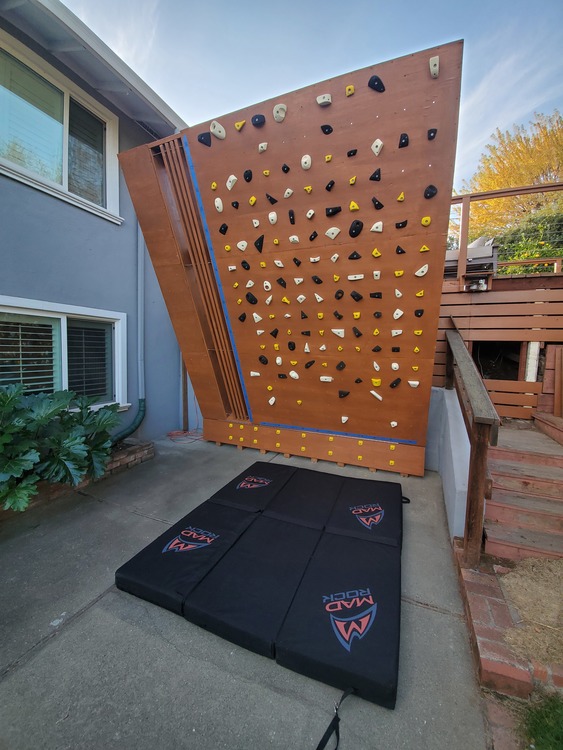 |
|
|
Jeff S wrote: Can you post a picture of the back structure? Did you build it onto your deck? I just moved and I’m thinking my next wall will be incorporated into my deck somehow. |
|
|
Caleb Jones wrote: Yep, the wall is supported by the deck in back and the concrete patio down below. It uses a system similar to other adjustable walls on this site: winch to adjust the angle and two chains to support the load. I used 1/2" concrete expansion bolts to attach the kicker to the patio. For the deck anchor points, I used climbing bolt hangers with 1/2" grade 8 bolts that pass through the rim joist underneath the deck. The existing rim joist used doubled 2x6s, and I added a third on the outside 'cause why not. Steel plates on both sides of the rim joist are used to support the wood where the bolts pass through. I also added a few extra 1/2" Spax Powerlags that pass through the main deck beams to further support the rim joist. The two 2x4's you see screwed onto either side of the wall are to stabilize the wall against the deck when the wall is completely vertical and the winch is tightened. 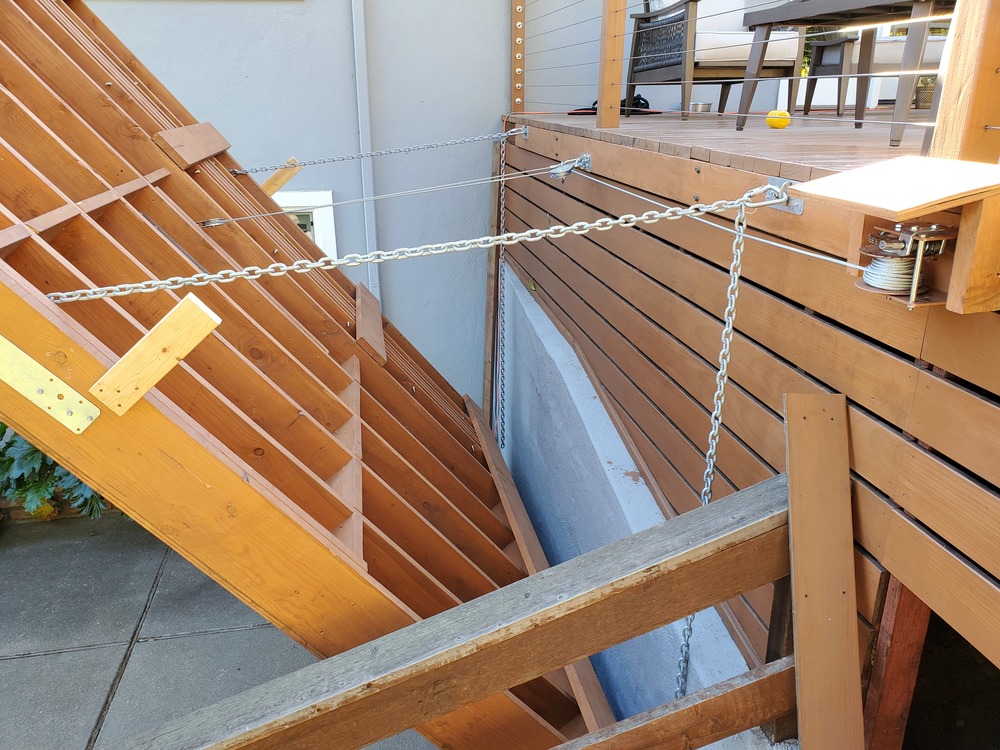 Thanks to folks on this site for inspiration! This page was also quite useful as a reference: |
|
|
WOW! That's a really bomber deck to take a lateral load like that! |

|
Anthony R wrote: Thanks Anthony! Sorry I didn't respond sooner -- I don't check the forum's very often these days. Anyways, my hinge is attached to a 2x8 so the bolts are only a couple inches long. Not sure where you're building the wall, but you could consider bolting the hinge directly to the floor if it's concrete. |
|
|
Thanks for the link Jeff. I enjoyed reading it and it definitely captures a lot of what I would do differently next time. Really awesome build and I love the addition of the cracks. I imagine that added quite a bit of weight. |
|
|
Monty wrote: No worries and thanks so much for the response, Monty! I’m really psyched to start my build. Unfortunately I can’t go directly into concrete because that would mean ruining some fireplace tiling. Good to hear that you are going into a 2x8. What brand and diameter bolts did you use for the hinge? Also, I’m curious, is it basically just the hinge that keeps the board stable? Obviously the chains are bearing a lot of the the weight, but for example imagine you finish a problem with a dynamic move to the top corner on one side of the board, what prevents it from “twisting” and lifting the opposite side up? |
|
|
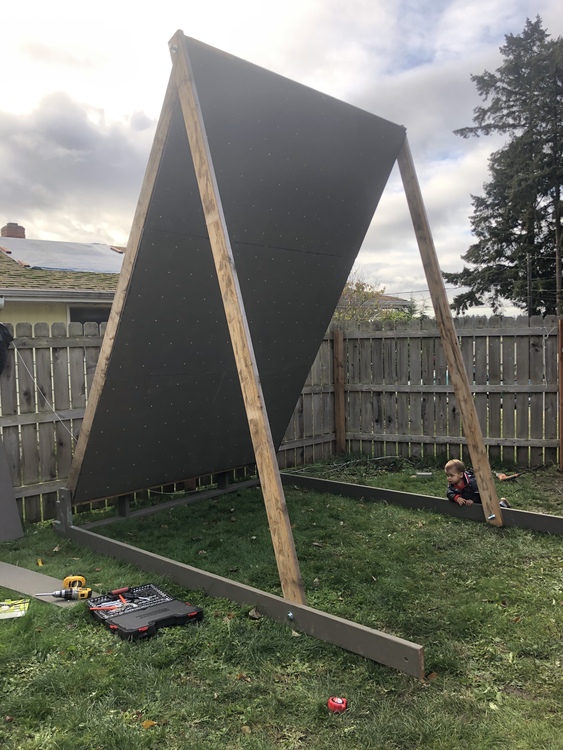 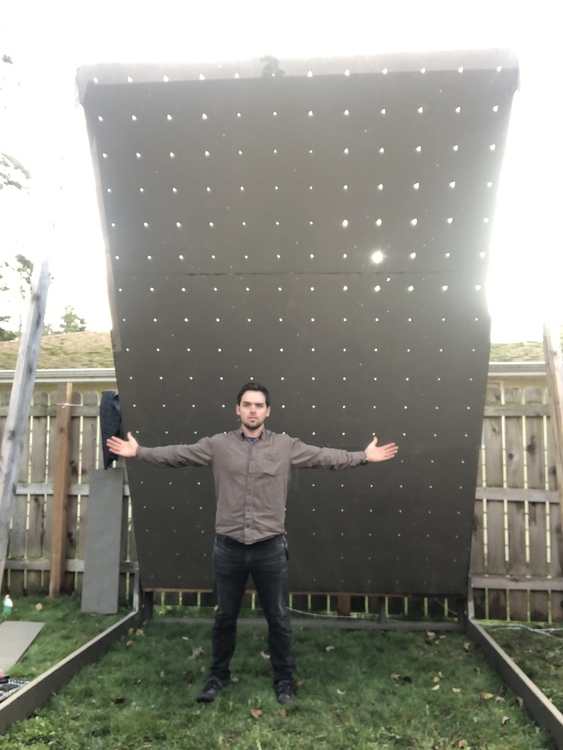 Buddy of mine had this 90% built in his yard before his landlord told him to forget it. So far the cost of a Uhaul rental and $100 in plywood, I now have my own wall. He gave me the holds he had and everything. Currently 11.5 feet at the peak sitting at 30*, adjustable down to 45*. |
|
|
Anthony R wrote: I used 16 total (8 top and bottom) 1/2" x 2.5" SS bolts to secure the hinge to the wall. I can't remember if I got them from Home Depot or if I ordered them. You are correct though, the hinge is bearing the majority of the load. The hinge I linked from Tractor Supply is more than capable and has done really well for us. One thing worth noting is that you want to offset the holes for the hinge a bit so the heads don't touch at lower angles (see pic). 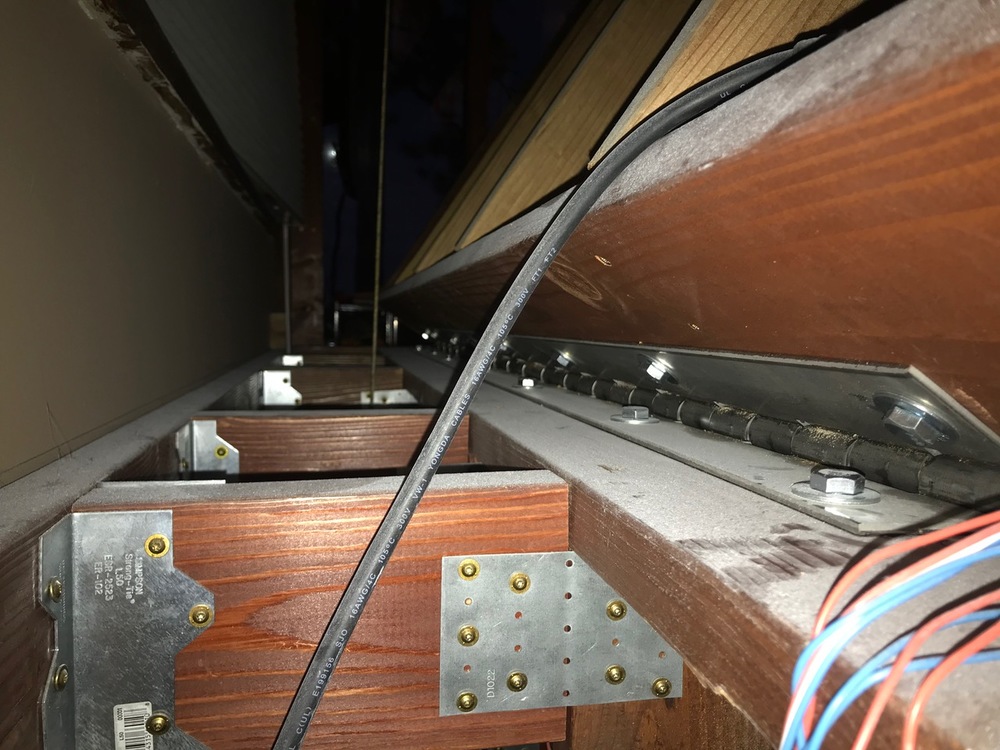 |
|
|
Monty wrote: Thanks for all the help Monty! Good point on offsetting the bolts. Last questions. What size holes did you pre-drill into the 2x8s to insert the bolts? Are the bolts secured on the other sides of the 2x8s with nuts or was that unnecessary? My 2x8 base will be laying on the ground so I don’t have that option unless I put the bolts in from the opposite side. |
|
|
The holes are drilled at 1/2" as the bolts are secured with nuts and washers. I wouldn't trust the threads alone in 2 x 8, but that's just me. One idea is that you could use a carriage bolt and counter sink the head in a 1/4" using a paddle bit. There are probably more elegant solutions, but this would let the 2x8 sit flat on the ground with the bolt sticking out of it. You'd want to get shorter bolts for this though otherwise they are going to prevent the hinge from closing all the way. |

|
I would highly recommend anyone with an outdoor wall to consider putting some foam board insulation in the back between the vertical supports. Even in Oakland I was getting hot bolts from the direct sun and the wall ended up feeling quite warm even with fans. I actually had a few resin holds warp because of it. I used the 2 inch R16 stuff and it dramatically reduced the temperature. |
|
|
https://www.instagram.com/p/CIOMkt8Dne1/?igshid=1w33412lcqgay
|
|
|
Monty wrote: Monty, does the pin part of your hinge hang over the edge or sit entirely on the 2x8? I wasnt totally sure from the picture but it looks like its entirely on the 2x8. Mine came today, this thing is a beast! thanks for the recommendations! |
|
|
Anthony R wrote: Ya, they don't mess around with this hinge! I'm glad you're pleased with it. On my board the pin sits flush on the plywood, but is solidly attached to 2x8. 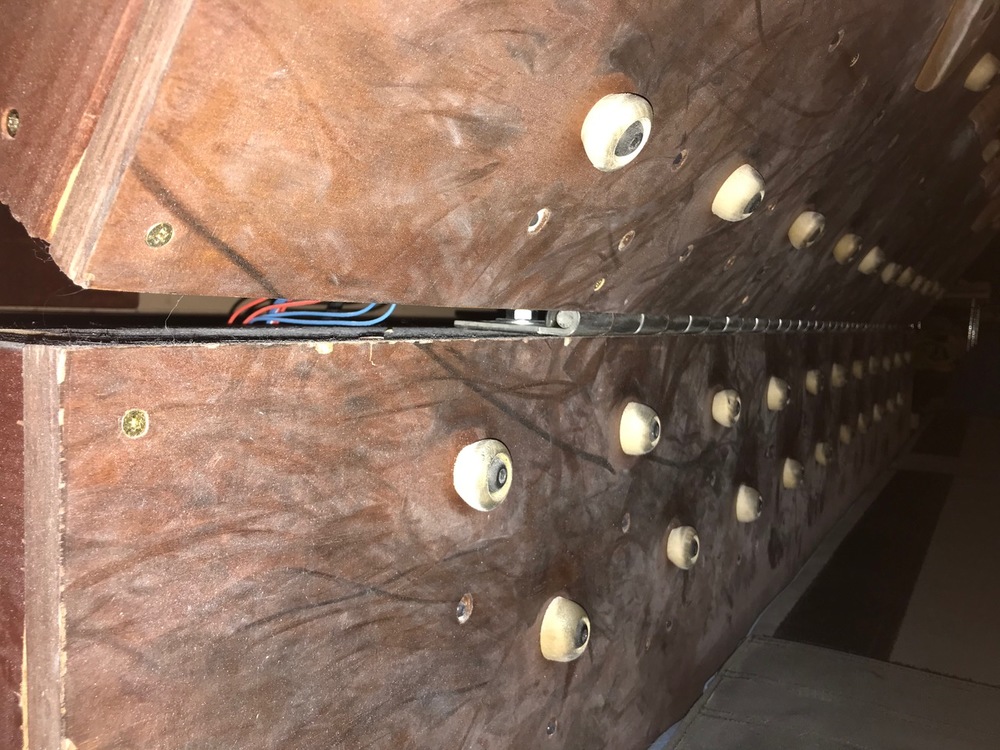 |
|
|
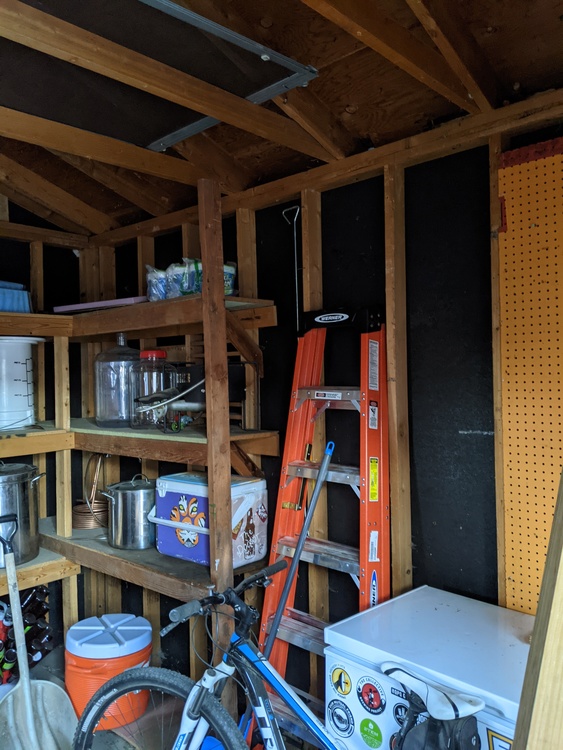
Tal Wanish wrote: I hope you’re not moving the brewing equipment! |
|
|
My buddies place. Our little Covid cave. 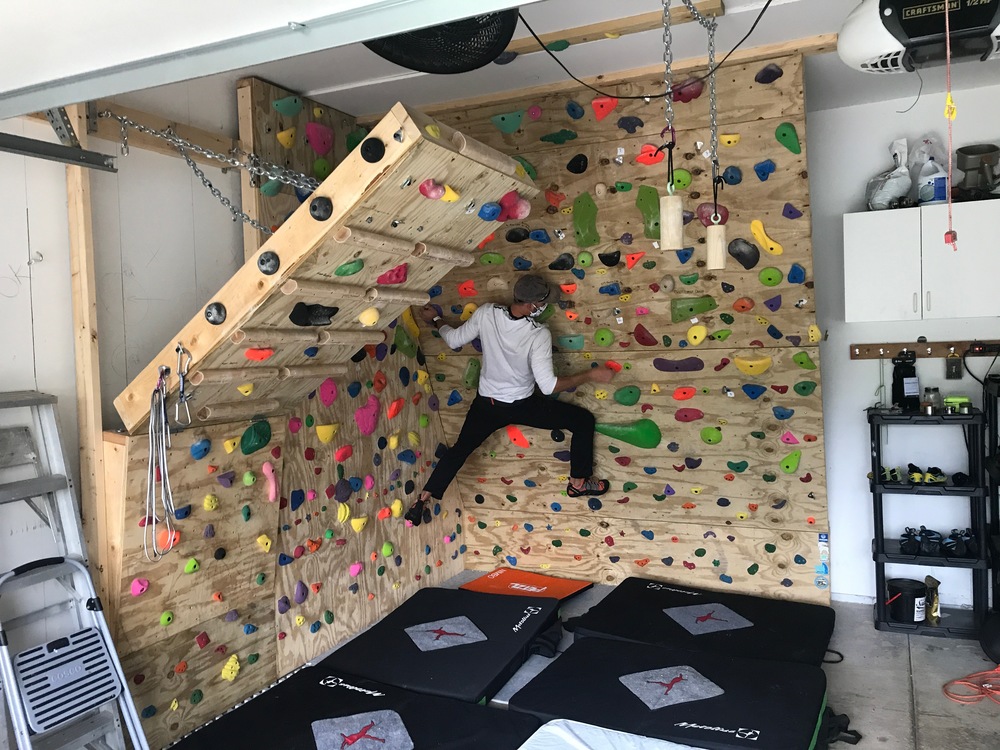 |
|
|
Are you sure those are trusses? Hard to tell from pic. They look like simple joists or ever collar ties. Big difference. I would get an engineer involved if you care about the integrity of the shed. Just my $.02 BWDIK? |
|
|
Tal Wanish wrote: Be careful. I can’t see the enough of the shed to be sure, but those are likely rafter ties, and keep the walls from pushing outward when the roof sees load. They don’t need to be strong enough to hang something from - they only resist a tension load. Looks like you’re in Denver. A good snowstorm could collapse that shed if you take them out. Moving them up to half height kind of solves the outward thrust problem but greatly increases the stresses in your roof rafters when you do. For liability reasons (I’m a structural engineer) I can’t really tell you what to do. But I can tell you that it’s likely more complicated than you think. Before you spend a bunch of money building a nice wall, you may want to talk to someone that understands this stuff. Maybe you have a friend that’s a carpenter? It’s a shed, so probably small enough that it wouldn’t be too hard to reinforce in a way that gets you more headroom. Hope that helps. |
|
|
Tal Wanish wrote: Sounds like you’re on the right track! |