
 Continue with onX Maps
 Sign in with Facebook


Bolts installed without threading exposed above the nut


|
|
Maybe sticky at top of new thread: How to report bad bolts etc |


|
Good idea! I'll start a thread and ask an admin to make it sticky. I'll start with the ASCA link since we can get info to local groups, but if local groups have specific links I can add them to the first post. |
|
|
Sharing photos of the old sleeve bolt that sheared off yesterday when I tried to loosen it. 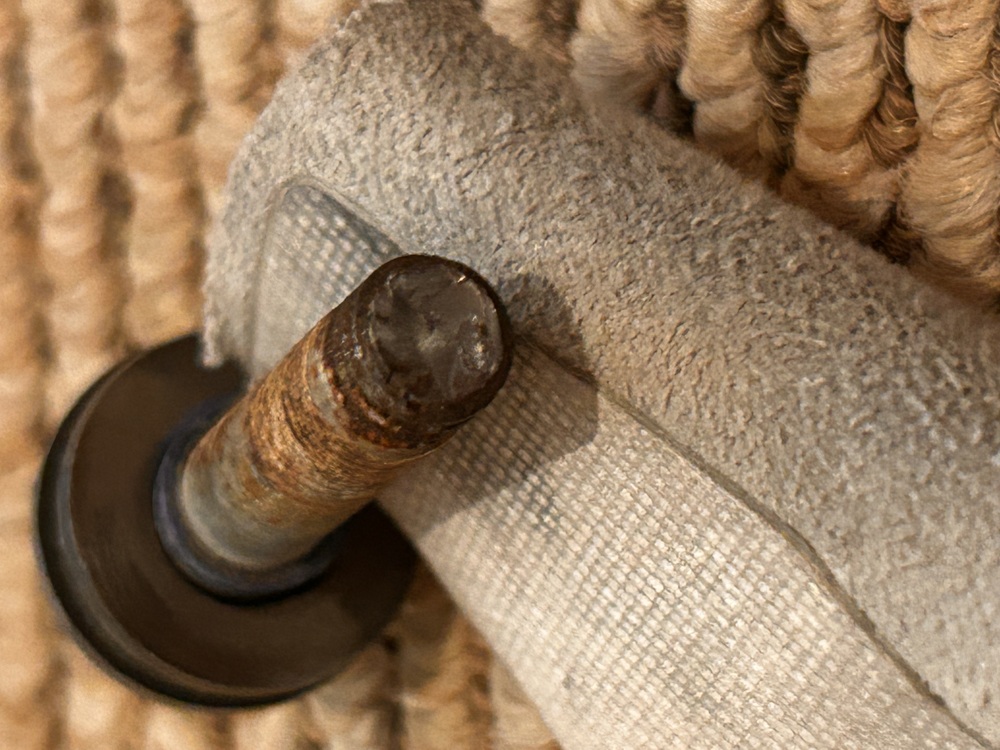 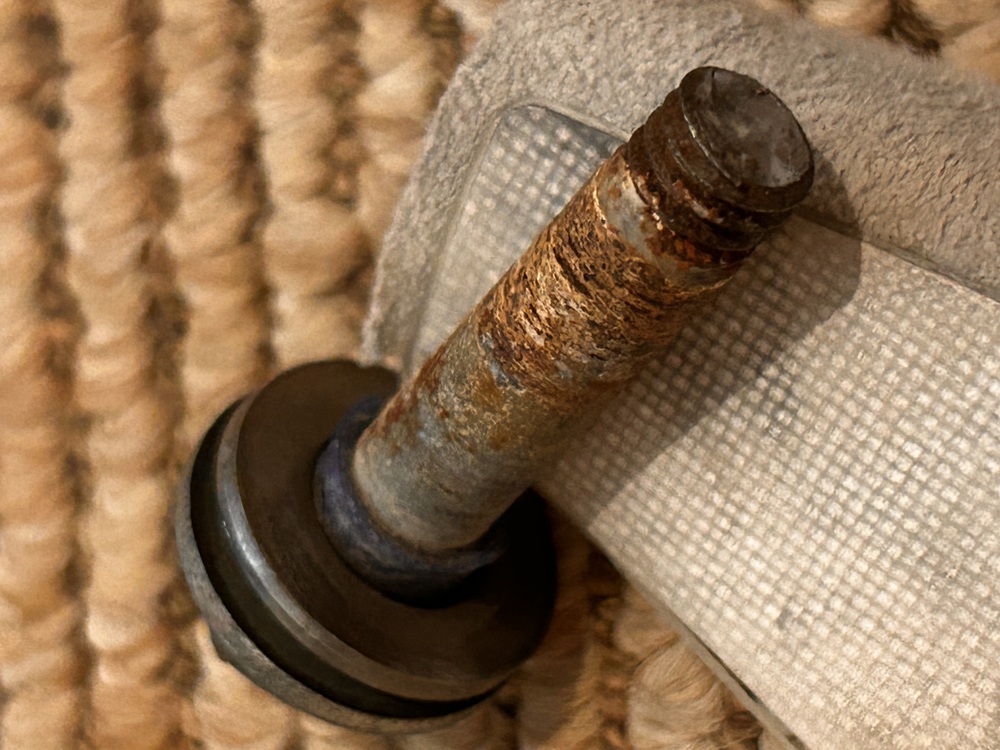 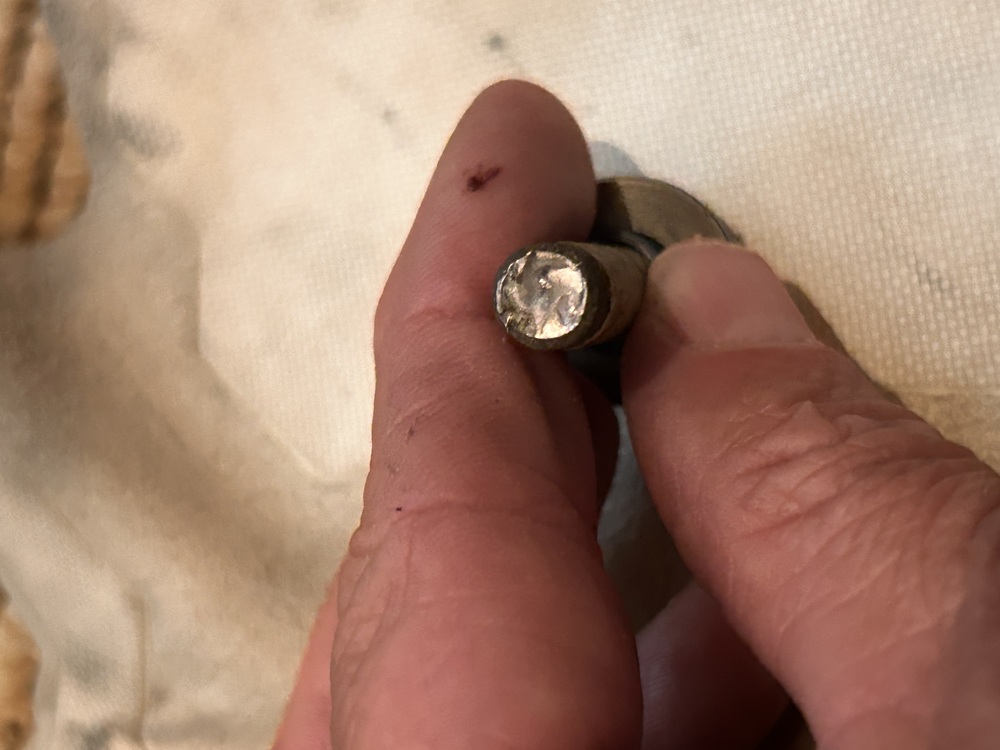 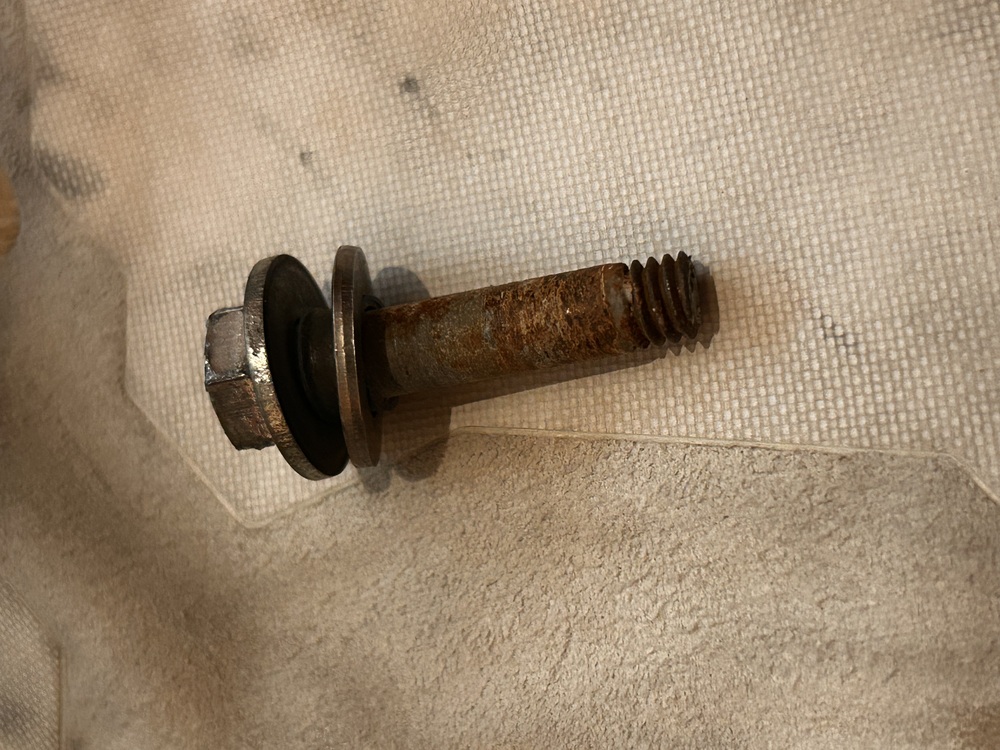
 |
|
|
The best course of action is to contact the original bolter. Let them know there is an issue with this style of installation, explain why it's an issue or point them in the right direction. The installer might be local to this community and it's important that they update their methods going forward. Taking this course is the best method to serve that local community. Now every new route he installs or anyone he teaches bolting will be a little safer. Also the bolter will know every route and bolt he used the specific style on and be much better to correct his mistakes than you or random climbers coming across them with a small chance of having the tools to fix the issue on the spot. |
|
|
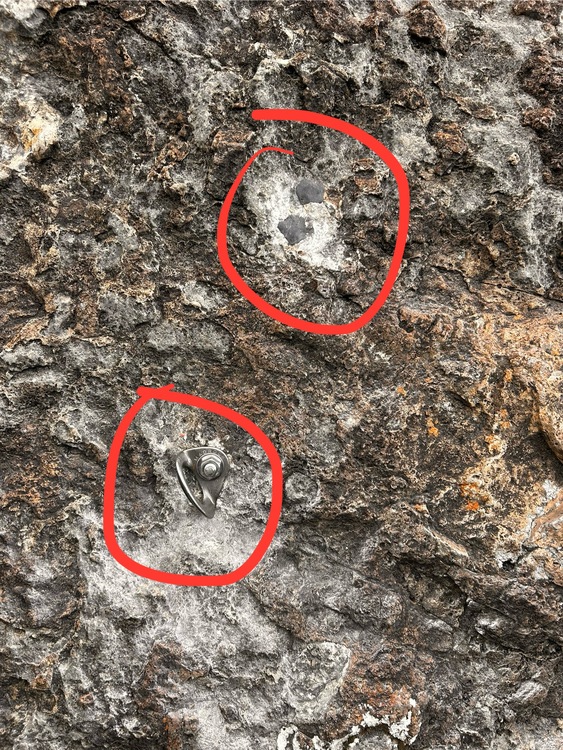
It’s unclear who bolted these problem bolts but I replaced them tonight and all is warm and fuzzy. Some photos to share… My best patch job in granite! 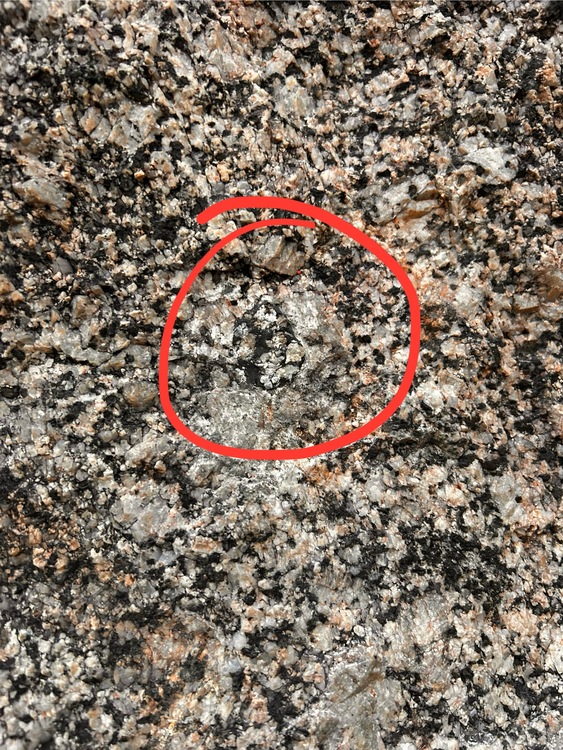
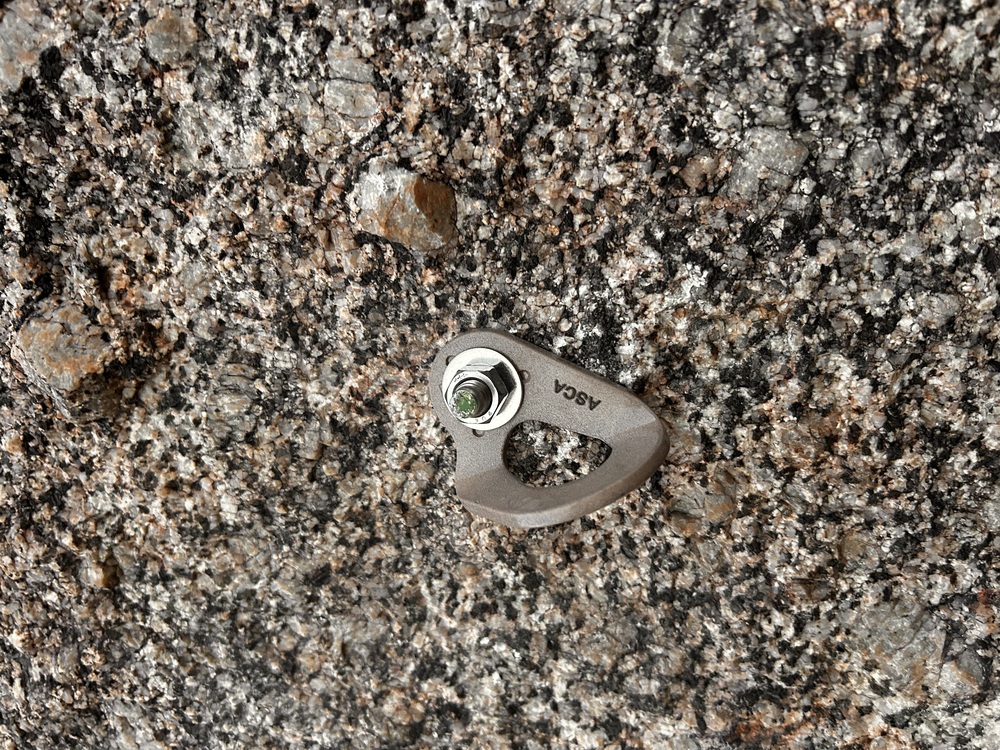 Second new bolt and so-so patch job. I forgot to bring a rock up to texturize the putty 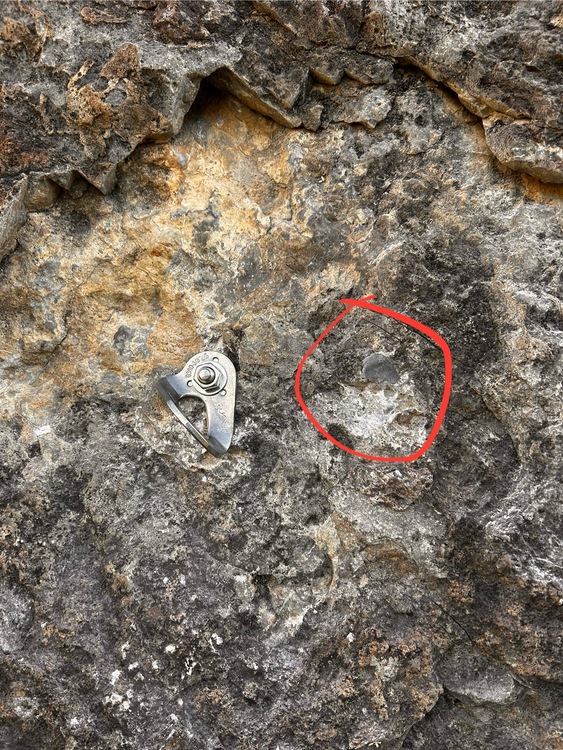
 Thank you to everyone who took a minute to reply. |
|
|
Anna Brown wrote: Excellent work Anna! Kudos to you for going through all this effort to make the route safer! Considering that these placements might be 25 years old, the original bolter might no longer be around. It would still be good put out a notice or a message to the local climbing group just in case any other routes were set like this during that time. |
|
|
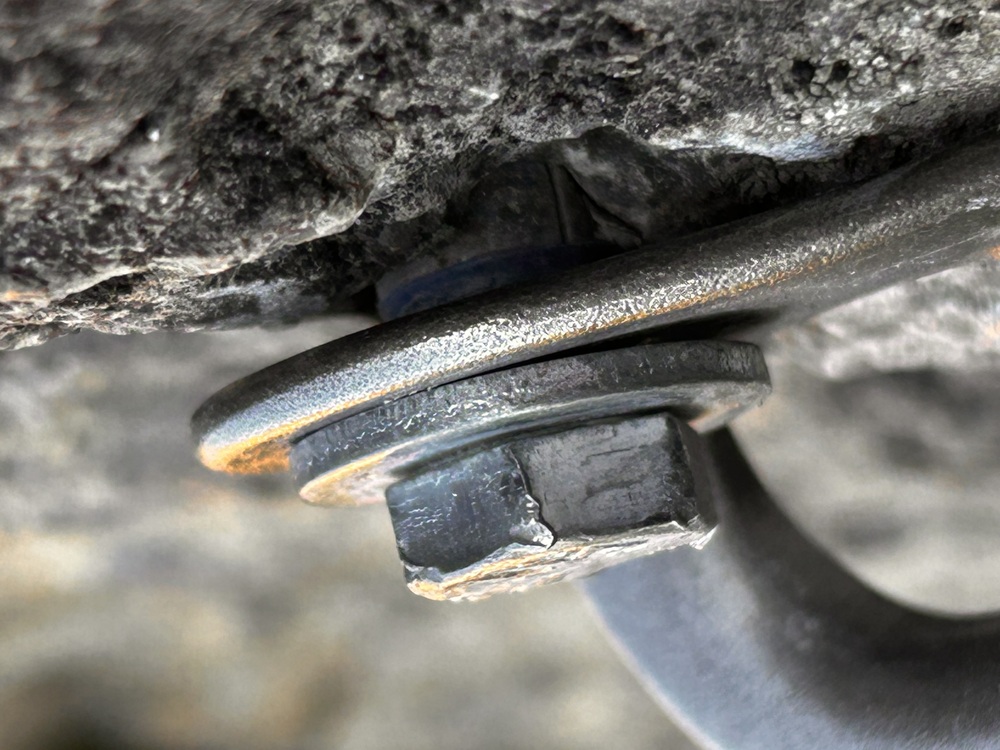
Thank you. It was a fun stormy evening to be out making bolts better. I climb a lot around here and these are the only bolts I’ve seen that look like these couple. I’m confident the issue was damaged threads on both of the wedge bolts. I could feel burs with my fingers when I checked. Has anyone ever repaired damaged threading with a die set? Here’s a closeup of the threading from one of the bolts. I tried a new nut on this bolt and it wouldn’t thread on at all. These are Fixe bolts which my friend Alex says used to come with this rubber washer. 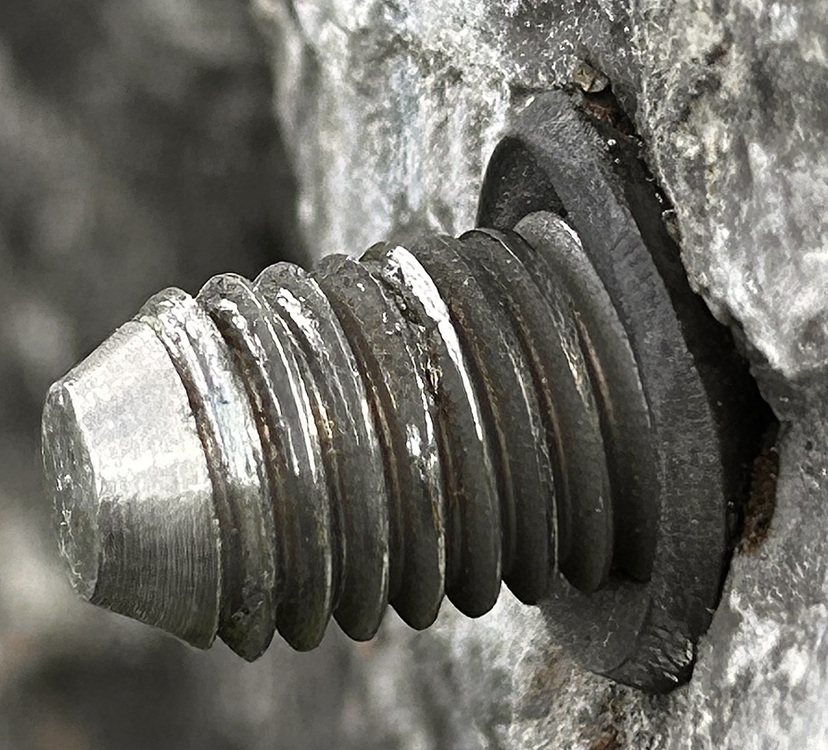 |
|
|
A thread restoring file is the easiest fix for that galled thread. |
|
|
Great job Anna! Nice job on patching the old hole. I had to look carefully to find Waldo in your first photo. Never would have seen it without your red circle! "I forgot to bring a rock up to texturize the putty." When forgetting to bring a piece of rock or sand from the base of the route (been there, done that), simply chip off a small piece of exfoliation flake. Put it over the hole and the epoxy putty or glue, then smash with a hammer. "I tried a new nut on this bolt and it wouldn’t thread on at all. These are Fixe bolts which my friend Alex says used to come with this rubber washer." The nut will not fit because the Fixe wedge anchor is metric. 10mm is slightly larger in diameter than 3/8" and has a metric thread pitch. The rubber seal is non-functional at keeping water out. It may be counterproductive by preventing the hole from dispelling water. I have found a useful purpose for it. When transporting the Fixe wedge anchor, slide the rubber seal down over the collar around the cone. That helps prevent the two-piece collar from falling off and getting lost. Although tape is better for that purpose. Remove rubber or tape prior to installation. "Has anyone ever repaired damaged threading with a die set?" A "die" is not the appropriate tool for repairing threads; it is for cutting new threads. A "thread chaser" is the somewhat similar tool, appropriate for repairing threads. A small file, such as, a "swiss file" will fix a few small burrs. There are thread restoring (aka: thread repairing) files, sized for the specific thread pitch, though I've always "eyeballed it" and used a few strokes with a swiss file. The question is should the threads be repaired? That is a subjective judgment call: How badly are the threads damaged? Simply a tiny burr or two, or is it a gouge along several consecutive threads? How many are damaged, only the outermost two or three, or the entirety of exposed threads which will be engaged by the nut? Are the damaged threads closer to the end of the stud, or closer to the hanger? The outer 2 or 3 threads, closer to the end of the stud, have the weakest holding power. Hence, California construction standards require that a minimum of 3 threads protrude beyond the nut. Those threads should protrude from the nut after torqueing anyway, so no big deal to repair them. The threads closer to the rock, engaged by the nut are the threads that will take the majority of the holding force. I forgot the exact percentage, but about 75% of the clamping force is held by the first 3 threads of the nut! Another issue is, when repairing stainless steel threads, the passivation layer will be disturbed. Contamination by iron particles from the non-stainless ferrous tools will be introduced. That sets the stage for corrosion to develop. Measures could be taken to re-passivate the portion of the stud, such as cleaning with a product, "Bar Keepers Friend". Scrubbing the affected area with the powder, a few drops of water, using an old toothbrush works well. If you want to go further down the rabbit-hole, maybe search for files for repairing SS, stainless swiss files, or perhaps there is a ceramic file. "...I attempted to loosen an old plated sleeve bolt (photo below) to see if I could hammer it in and retighten. The bolt sheared off in the threading with 18ft lbs set on the torque wrench. ..." That's not too surprising, given the age and rust on the bolt. The installation torque spec for a new DeWalt (formerly Rawl, then Powers) 3/8" carbon steel "Power Bolt" (aka: 5-piece) is 20 lb-ft. The 3/8" size has a 3/8" O.D. sleeve. The inner hex bolt is a skinny 5/16" in diameter and only a Grade 5 (hardness). Back in the 1990s, Powers installation specs called for 35 lb-ft. torque. I had more than one encounter with their engineers about the error, providing them with industrial standard lesser torque values (15 to 18 lb-ft) for similar 5/16" bolts. I discussed several anecdotal reports from climbers, about those bolts snapping at 35 lb-ft during installation by torque wrench. Still, it took many months before they got around to changing their dangerous error. There is something worse than a bolt snapping off during installation - that is when the bolt has stretched and failure has begun, though just short of snapping off. |
|
|
Ooof, no good but looks nice like that I guess. Fubar'd the threads no doubt. |
|
|
Thank you all for taking time to post such detailed and thoughtful replies. I really appreciate the information. Message received on a die not being the correct tool for a thread repair job. I don’t think I want to be repairing threads. Cleaner to start from scratch with a good install and new hardware. |
|
|
Two more patch jobs from another bolt replacement project I did today. We removed 5 old split shaft bolts in the Sandia Mountains. Each patch is a little different quality but I’m getting more consistent. 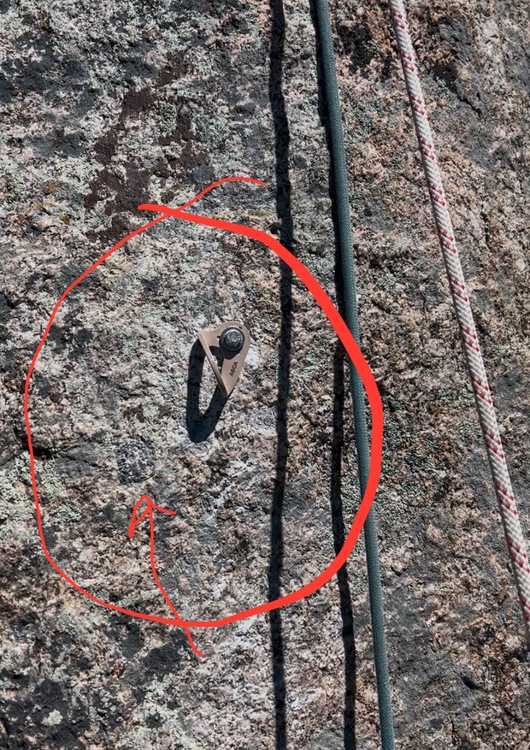 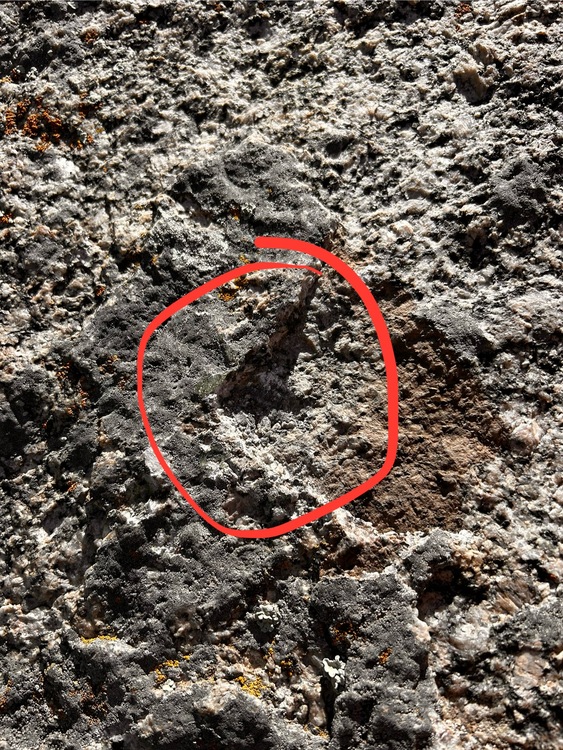 |
|
|
These are the bolts we removed. I have a solid process for removing buttonheads/splitshafts if anyone needs advice/directions on tools and process. Reach out! 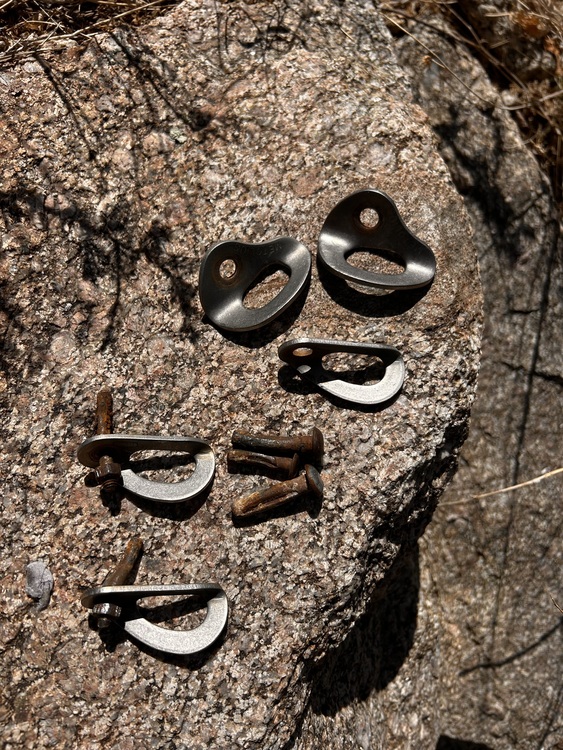 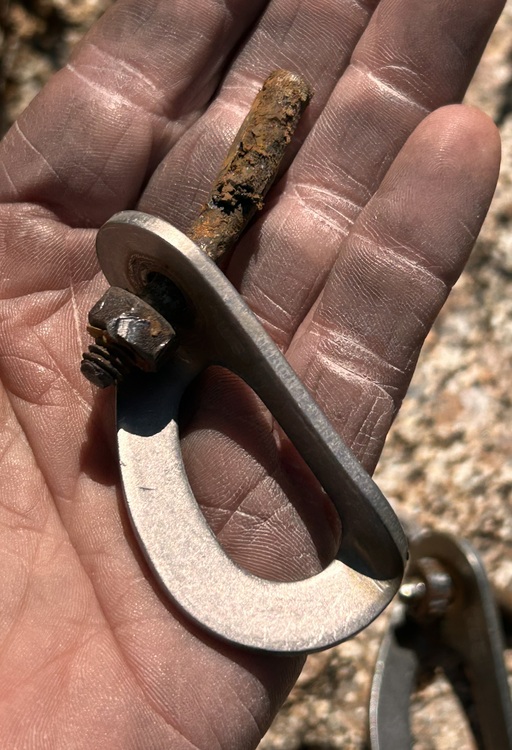 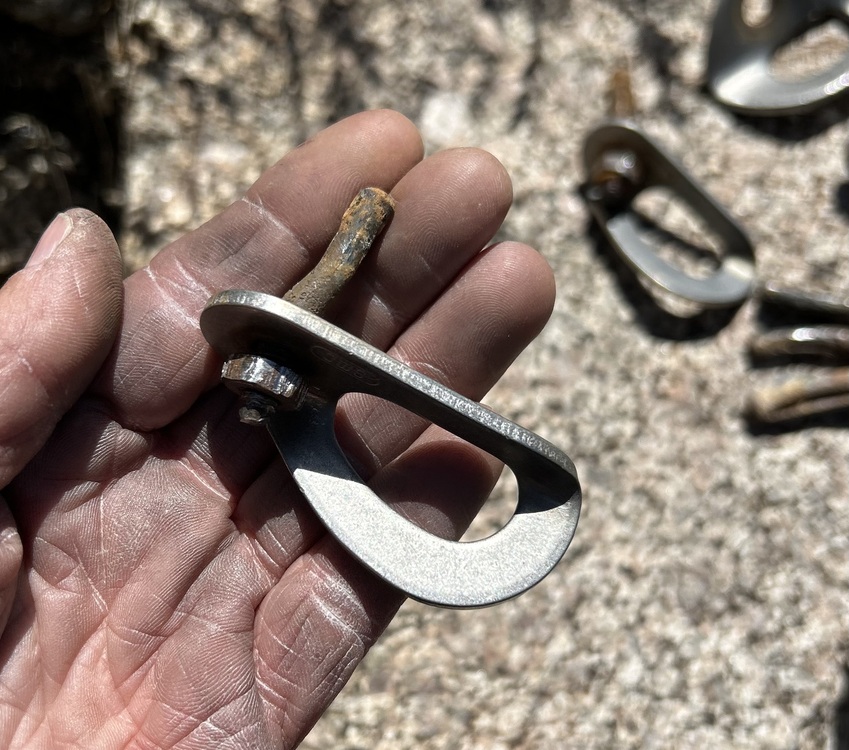 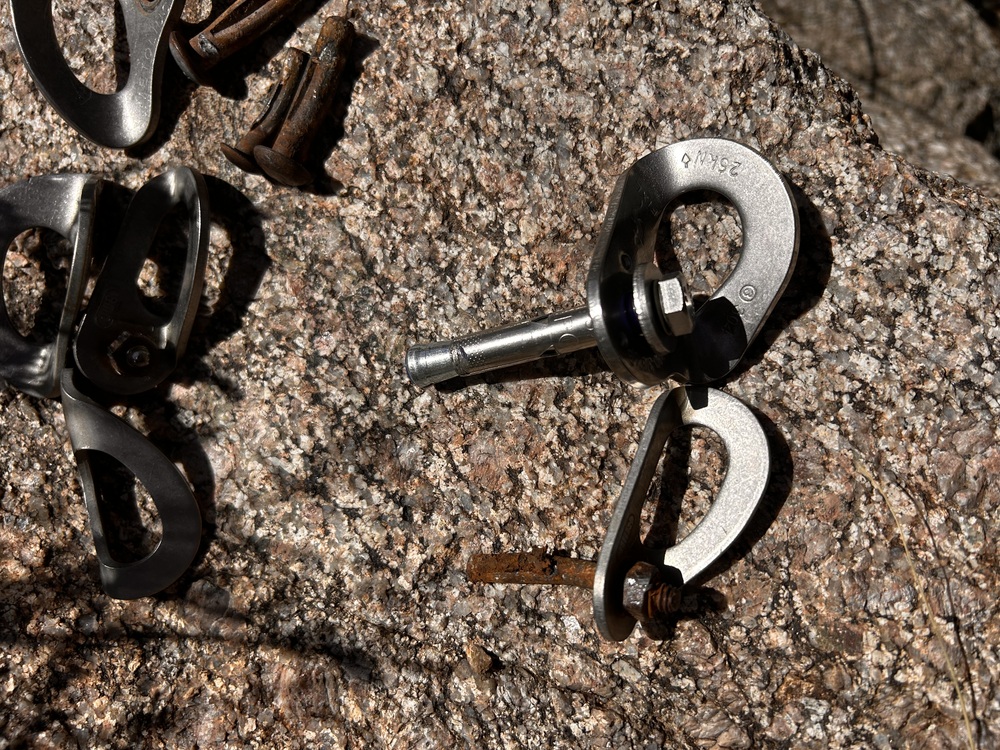 |
|
|
Do you use a "tuning fork" Anna? |
|
|
I started a new thread with details on the buttonhead removal process that is consistently working for me in New Mexico. https://www.mountainproject.com/forum/topic/201002305/fast-process-for-buttonhead-removal |


