Continue with onX Maps
 Sign in with Facebook


Photos of BEAUTIFUL HARDWARE pt2


|
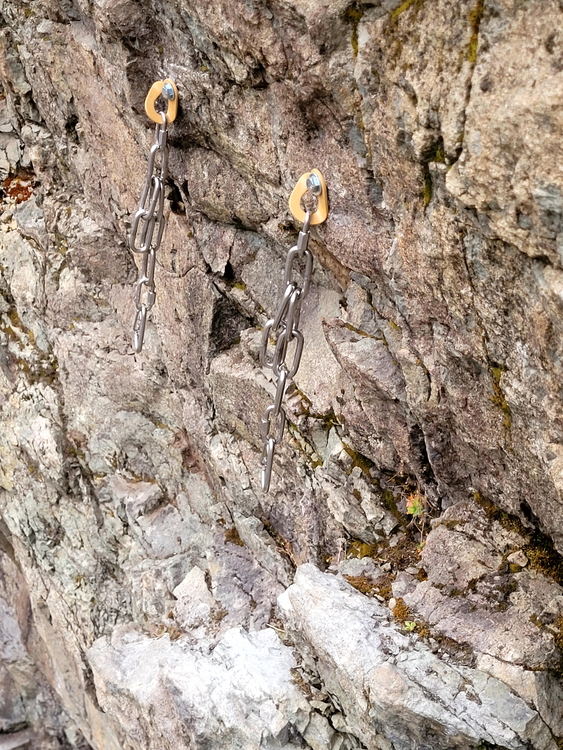
Paul Lwrote: I'm a big fan of at least one extra top link for single-pitch lines that also can be multipitch. Provide lower-offs for the single pitchers, and the top links allow for better belay anchor building if climbers are continuing on. Its not as important with long-link chain but still can be convenient if your chain has tight links. |
|
|
Are those 1/4” QLs on the painted hangers? Not common place in climbing anchors. I know the working load is high, but the way hangers carve slots in QLs could create an issue over time. |
|
|
Paul Lwrote: I'm not understanding what material you are using. Your original post said everything is stainless but the KB2 is carbon steel. |
|
|
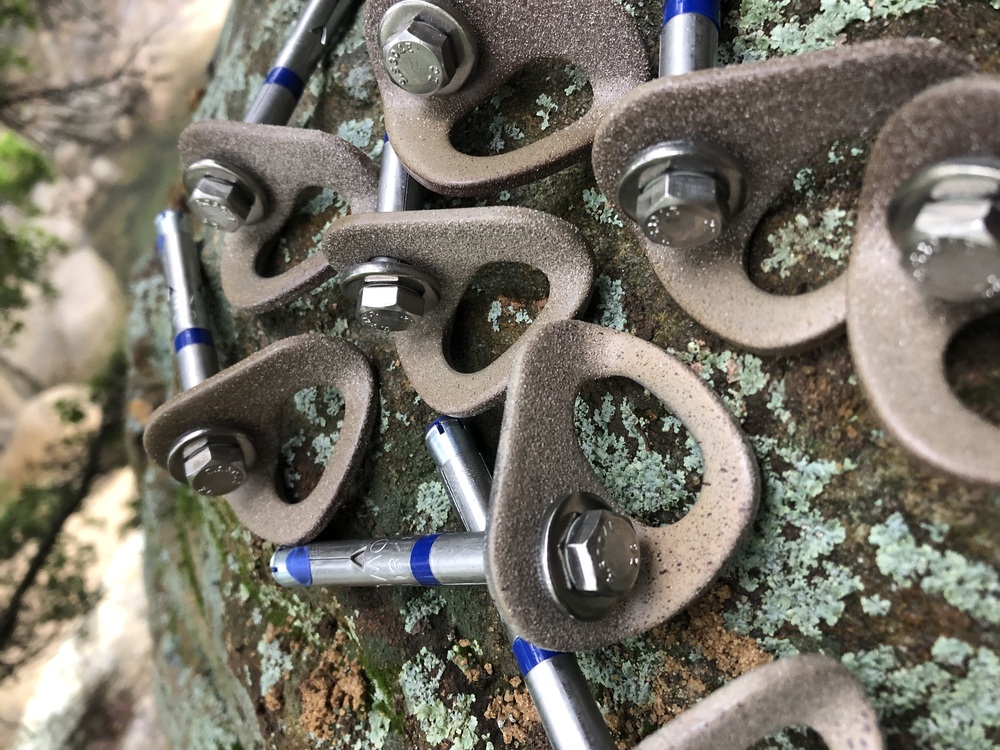 Krylon Satin Khaki, with a dusting of Krylon Satin Espresso, with a sandy-colored texture coat on top. Surprisingly durable if you use the right hangers. Nearly invisible if you color match well. |
|
|
Sam Fearerwrote: I’ve been seeing this method for painting more and more lately - is there a reason you’re not also painting the bolt head and washer? |
|
|
 |
|
|
Sam Fearerwrote: I see no hangers in this image! |
|
|
Tal Mwrote: More work / Feels kind of pointless when I’m just going to hammer it off anyways. Plus I find that hammering dulls whatever minimal glint the bolt head might cause. Full camo is obviously a notch above, but I don’t bother. |
|
|
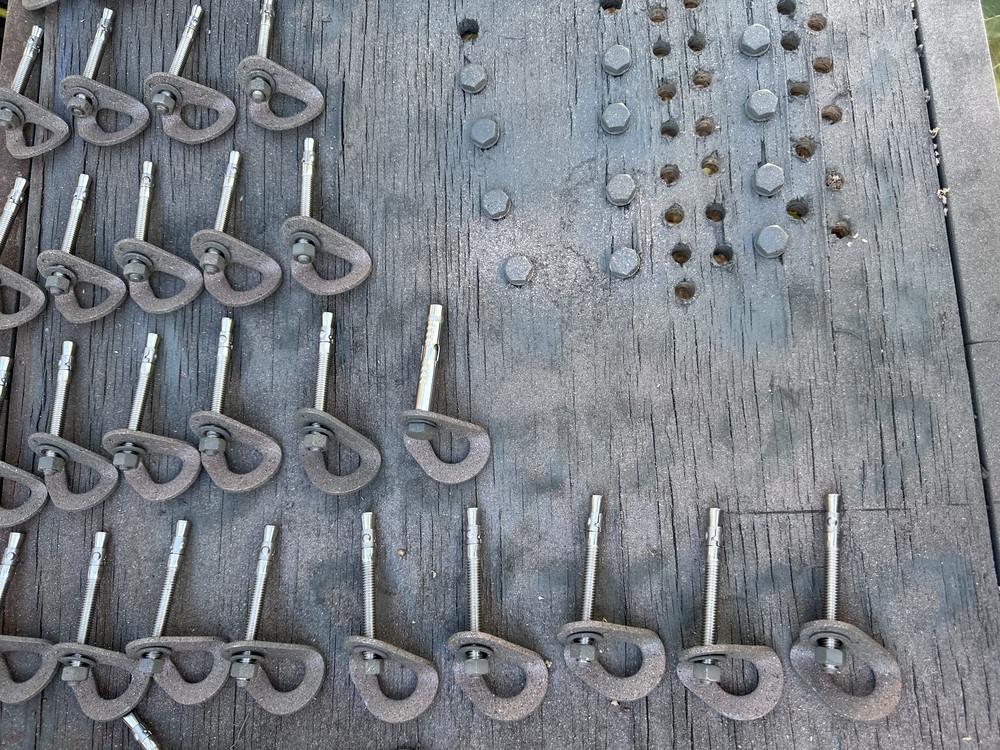
The last time I put up a new route, I camo matched the hanger and washer but left the bolt head unpainted because (as mentioned above) a lot of it gets chipped off while installing anyway, and also because I wonder if it will make condition assessment easier decades from now.  |
|
|
Sam Fearerwrote: Those hangers look great, Sam. I also haven’t been bothering to try to paint the bolt heads, but maybe I should. I have a different question, through. Those appear to be Powers/DeWalt 3/8” sleeve bolts. Have you placed those much? I used them exclusively in the beginning, and though they are technically strong enough, Peter and I and others ended up replacing all of them at a high use crag last year because they were more prone to loosening over time than the 1/2” ones, or 3/8” wedge bolts. I think it’s the lower torque— the torque spec for the 3/8” 5-piece is only 18 ft/lb (as opposed to 25 for almost everything else), and in stainless steel they just seem to want to loosen if they get a lot of repeated outward or sideways pulls. Anyway, I was doing it in the beginning for cost and to save drill bit wear and battery life, but I think I overestimated those differences; in hindsight I wish I had just placed 1/2” sleeve bolts to begin with. Keep in mind, this was in relatively solid gneiss, so perhaps your rock type is different. I see that yours are all the longer length, so maybe you are contending with some variability in hardness? Just though I’d share my experience vis-a-vis that bolt type. Happy drilling. |
|
|
Joshwrote: I wonder when Dewalt updated the 3/8" SS torque spec from 12 to 18 ft lbs. I recall when they updated the 1/2" version form 25 to 30 ft lbs a few years ago. Anyhow, I agree that if the rock is hard enough to use 3/8" bolts you're probably better off using wedge anchors from a price and maintenance stand point. If the rock is in the gray zone (too soft for wedges, but still hard enough for 3/8" sleeves, you're better off using 1/2" if it's going to see significant traffic, since the 3/8" Stainless 5 piece are prone to becoming spinners. |
|
|
DrRockso RRGwrote:
Here's what's online as the current spec sheet: 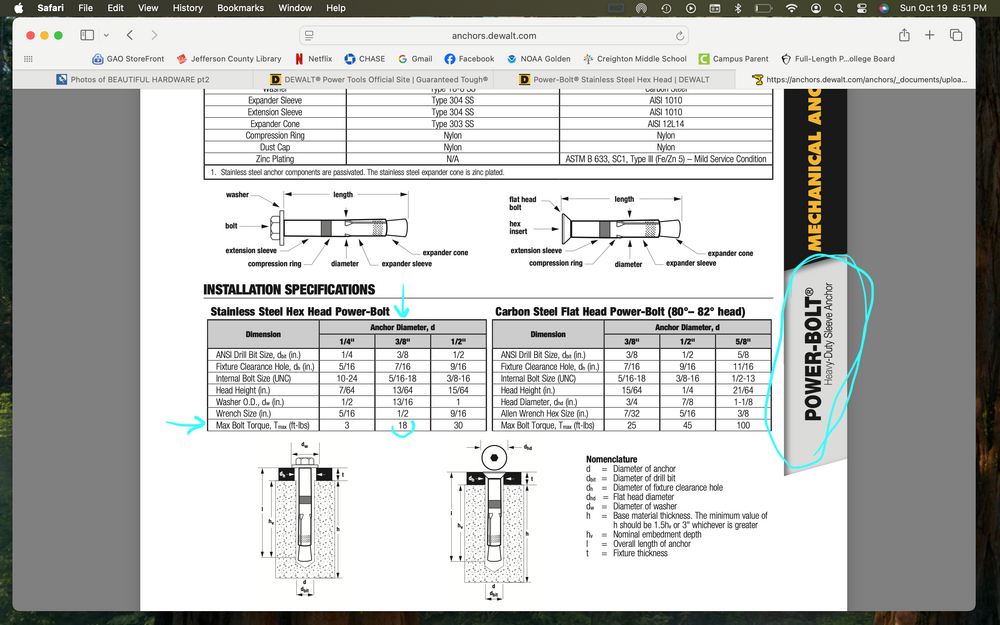 |
|
|
Joshwrote: That’s interesting to hear. I personally haven’t ever had an issue with them loosening over time but maybe that’s because no one climbs my routes :) I have placed longer wedge bolts in bullet sandstone and never had an issue. These, however, are my go to in medium-density sandstone (ie CA coast-adjacent rock). They hold up, hold tight, and - obviously - hold falls. They’re the area standard and I haven’t seen bolts on other routes in town loosening either, which is nice. *10mm CT bolts are also being used here and there where I am and they seem to be a decent replacement, and much much more affordable. |
|
|
To be fair, only a few loosened over time; the rest were just fine. And the rock type is variable density, to be sure. And these were among my first routes installed, so perhaps the issue speaks more to my wobbly early-days drilling or something. |
|
|
 |
|
|
Josh Janeswrote: I used to use SS 1/2" Rawls and those hangers. The sharp edges of the Fixes really tear apart aluminum carabiners though, another reason I went to almost exclusively glue-ins. The camo matches well. |
|
|
Josh Janeswrote: This is nice. How’d you paint the bolt like that? |
|
|
M Spraguewrote: True. Fortunately the newest iteration of the classic Fixe hanger has rounded edges (other changes include slightly reduced weight/thickness and wider positioning of the anti-spin dimples). I also really like the newest version of the PETZL hanger which is similar. These two hangers are well designed. The most poorly designed, commonly used hanger, IMO, is the Mad Rock Sentinel, though it does have a nicely rounded eye to reduce the scoring of aluminum carabiners. |
|
|
Thanks for the update on the Fixe Hangers. That is a long needed improvement. |
|
|
Jake Rwrote: My methods have changed over the years but nowadays it involves these rough principles:
|