
 Continue with onX Maps
 Sign in with Facebook






Photos of BEAUTIFUL HARDWARE


|
Scoot Bank wrote: Fair question - I was upgrading the hardware on the entire route to stainless. It was all plated hardware, and some of it was rusty enough that I had a hard time getting the sleeves out on a few of the 5-piece bolts. The wedge bolts at the anchor were obviously newer, but still unknown age. They probably would've been okay for a few more years, but when you're there doing the rest of the route it just makes sense to finish the job. |
|
|
Rich Farnham wrote: Way to go the extra mile and not cut corners. |
|
|
This is the best patch job I have ever seen, even with the side by side and knowing exactly where the bolts were, the patches are borderline invisible. |
|
|
PatMas wrote: This is the best patch job I have ever seen, even with the side by side and knowing exactly where the bolts were, the patches are borderline invisible. Haha! Thanks! Yeah, it came out really well. I think this coarse granite takes the patch really well. I used Instacrete and I have a small baggie with some crushed granite granules that I press into the surface. When I was rapping down I actually had a hard time locating two of the holes on the route that I had JUST patched. |

|
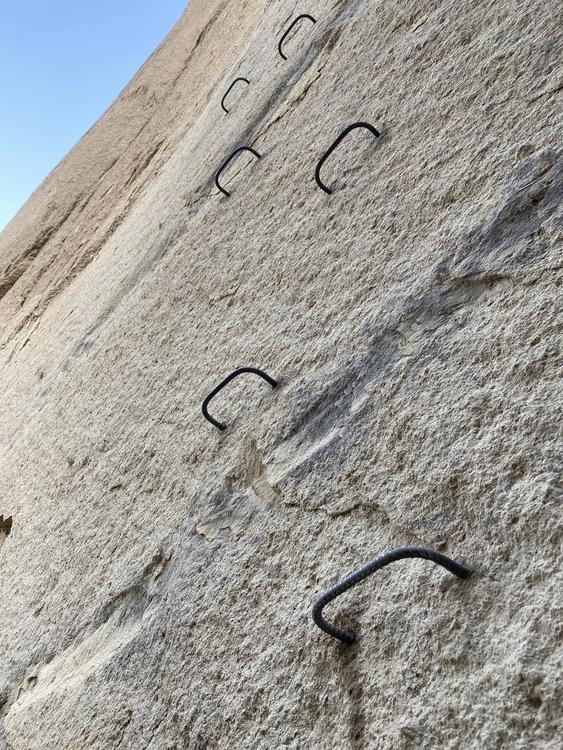 Vertically staggered is the way to go folks. The euros had it right |
|
|
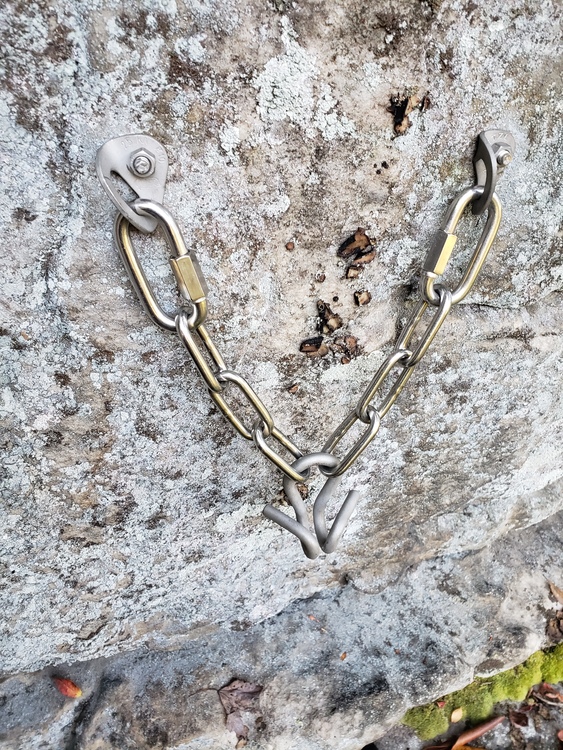 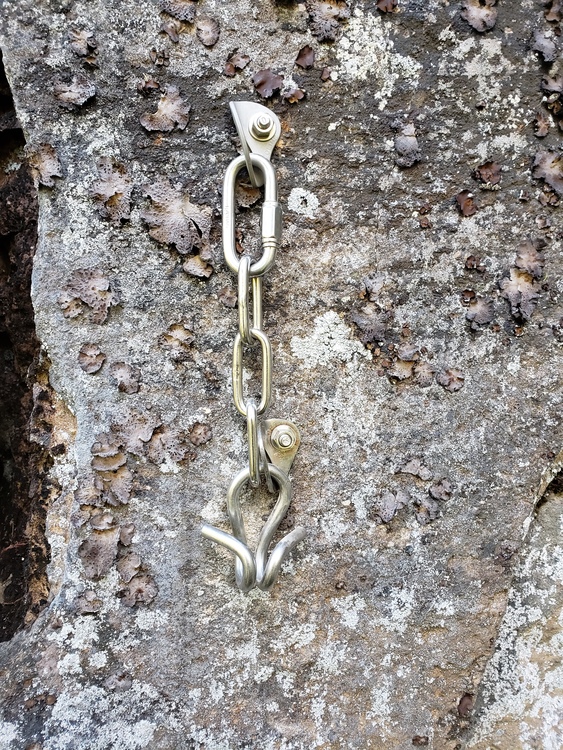 top one replaced my own rusty wedges with KB3. Bolt-Products long link 8mm chain and 10mm pigtail bottom relocated anchor. my current favorite style. These on my own mixed routes off the map somewhere in WV. |
|
|
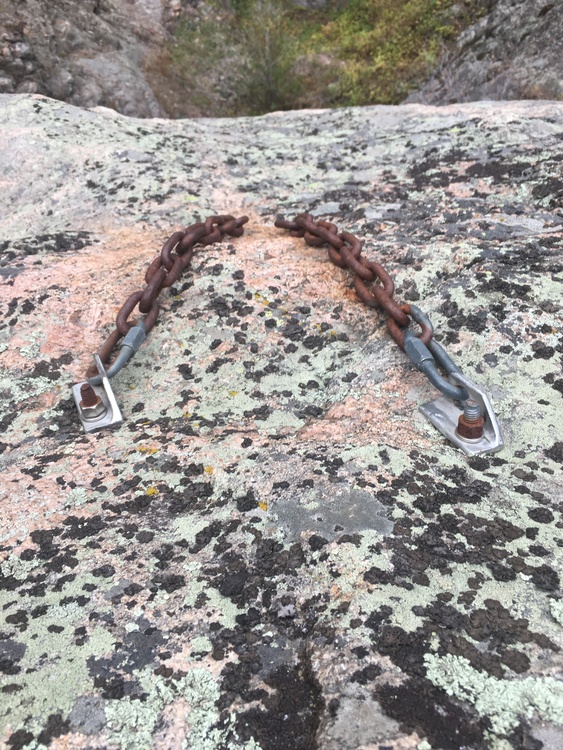 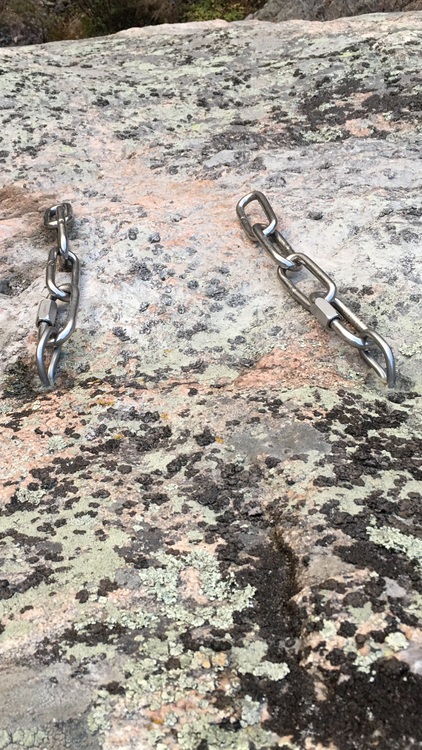 Interesting corrosion on the old bolts. Washers on both were stainless, left nut was stainless right plated. Both bolts plated, both hangers aluminum. Left bolt was trash, right was good, but the nut was pretty corroded. Replaced with Bolt Products 6mm twist bolt, and their long link chain. 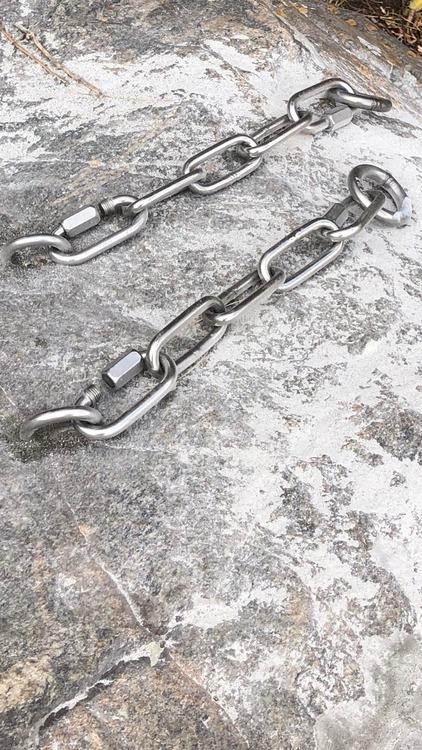 BP 8mm twist bolt. Slightly countersunk. Direction of pull is directly right in this photo. (Closed the links before I left) |
|
|
Not in-rock hardware per se but thought the group would like this. I gave a short talk at a small AF event this weekend and made this board to quickly walk through a lot of info on Fixed Hardware. It doesn't have everything but allowed me to cover common setups and their plus/minuses etc. 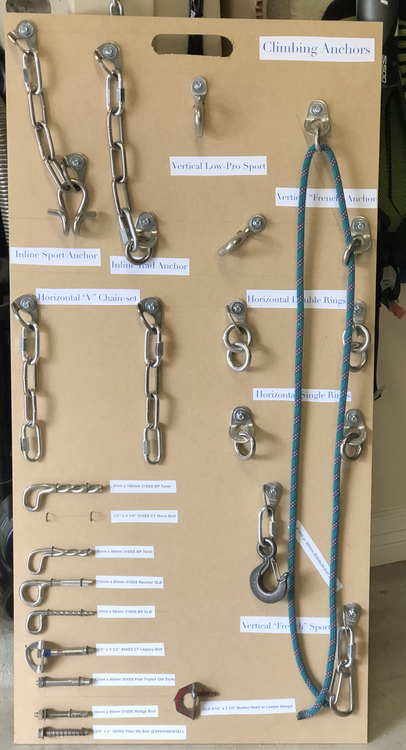 |
|
|
mattm, Nice looking display board. The bolt hanger shown at bottom center is an HME. Assuming that there is a little surface rust (can't discern from the photo) it is heat-treated chromoly, circa mid-1980s. If stainless steel, then it is from a single batch of less than 1,000, circa 1989. Leeper hangers folded the opposite direction and had a hole for a single carabiner. |
|
|
ClimbBaja wrote: Awesome. I'll update that part. I rushed it and didn't really look too hard (thin and non stainless made me think leeper but now that you describe it it makes total sense). That one was from a replacement up in Darrington, WA. |
|
|
Love the board Matt. I might have to make one as well. I have a bag of bolts and hardware that is a mix of old relics and new stuff that I teach with to show a variety of fixed anchors that people might come across, including pins, old bolts, new stuff and links and rings and what not. I like the way you've got your stuff on the board and can also use it to demo how different anchors get set up. |
|
|
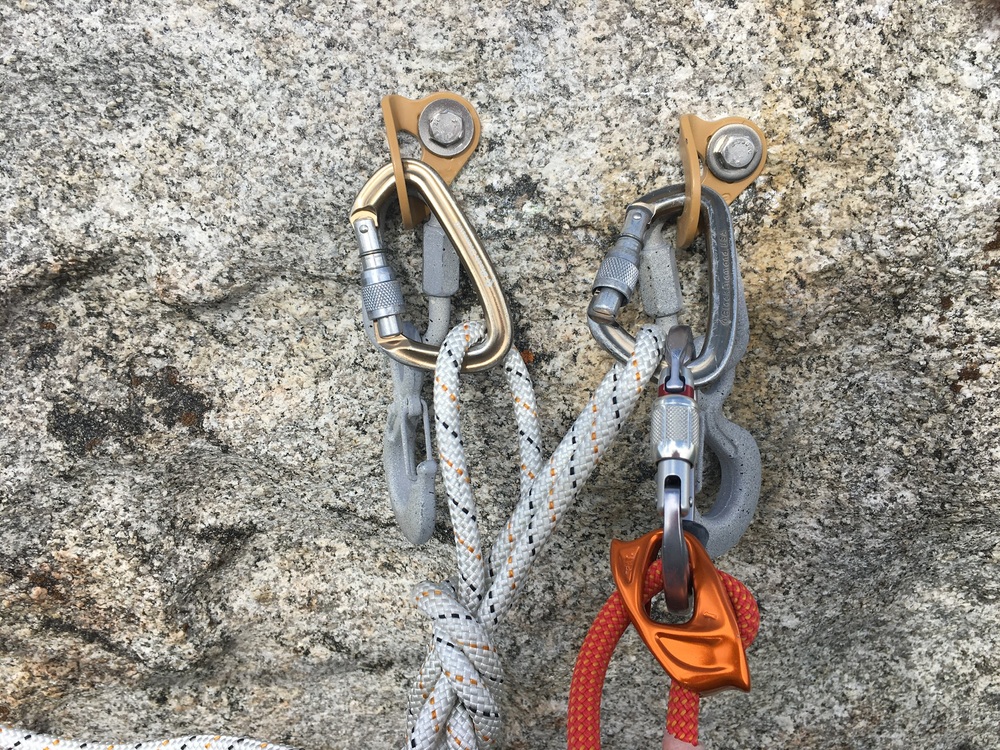
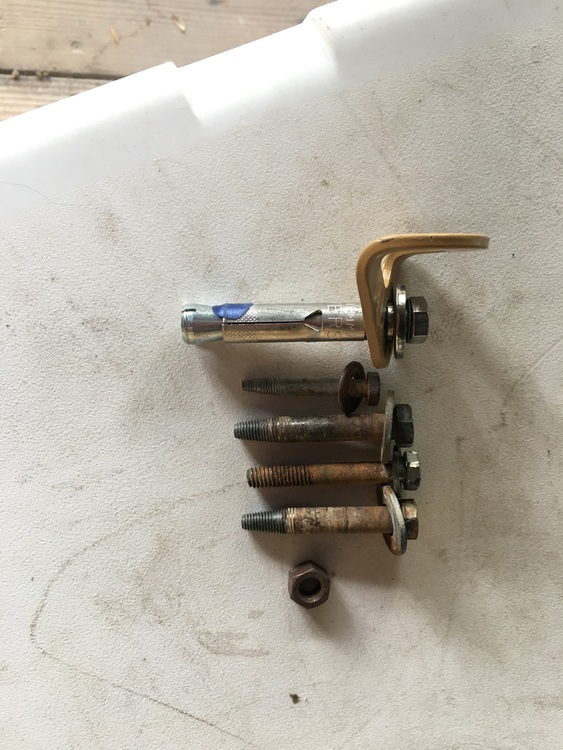
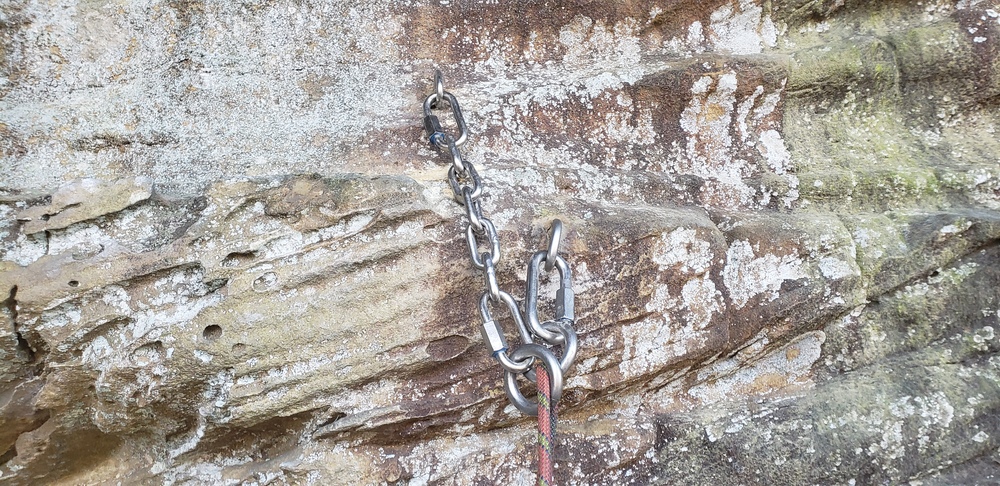 A rebolt job reusing all the holes except for 1 where I offset the anchor bolts. Notice all the weight is taken by the ring and 3/8th ql on the beefy 8mm BP twister, while the lower ring on the other bolt acts as a backup. This should allow for only 1 ring to need replacement in the future. Unfortunately single point anchors aren't popular here, and gumbies will add garbage to the anchor on single ring setups. E-rigging.com is a good resource for reasonably priced stainless chain and ql's if you're trying to go for an all SS setup. This setup ran about $25 + bolts. 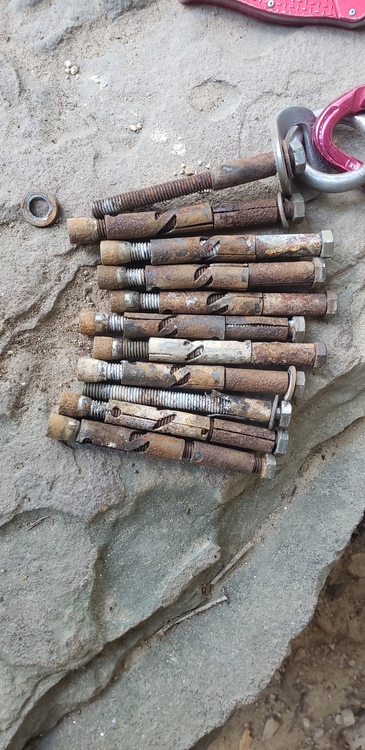 Dynabolt golds like these are easily pulled with a bit of finesse and minimal tools. Unscrew the bolt all the way, rescrew a few thread lengths and tap with a hammer to disengage the cone from the sleeve, unscrew, use a hook tool to pull out the sleeve, rescrew and pull the cone. 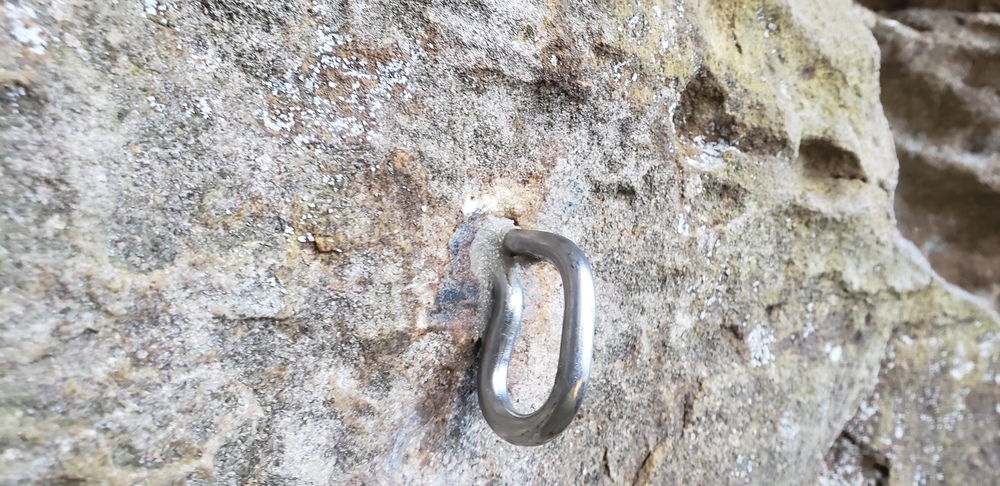 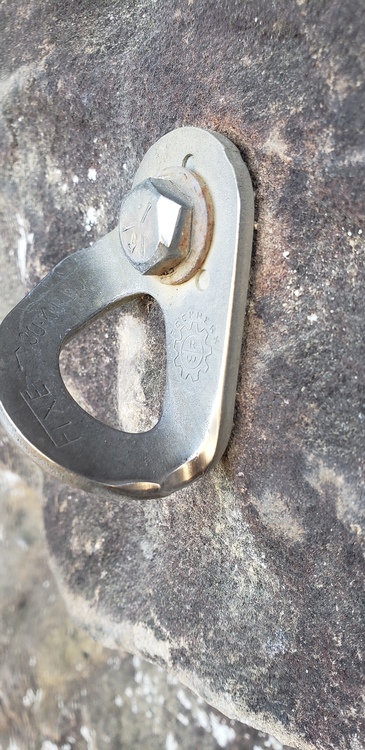 Some rope wear had ground one of the hangers sharp and was starting to wear the bolt head as well. |
|
|
Love those 8mm BP twist bolts! I pretty much use them exclusively now. I wish we had them when we were originally bolting the earlier routes at Rumney. |
|
|
  |
|
|
Zach was that out at the City? |
|
|
Yep, sure was! |
|
|
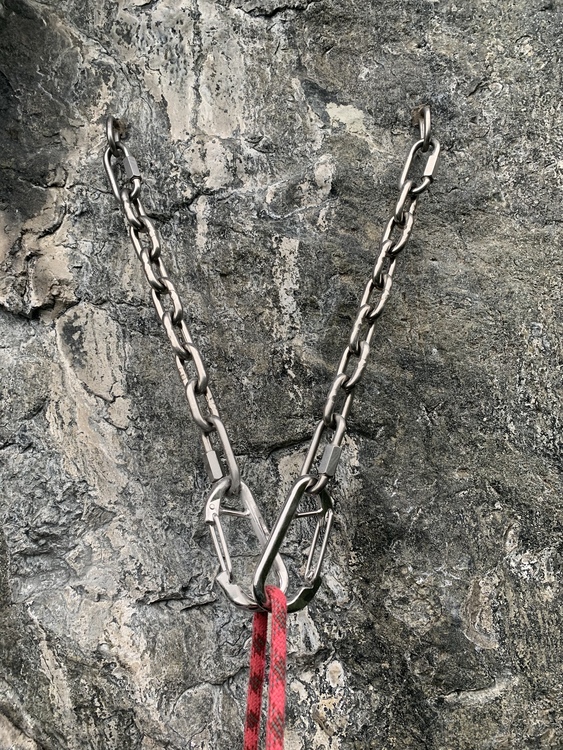 Pulled old 5 piece bolts with cold shuts, upsized the holes and placed these 100mm twist bolts. Used 316 chain, QLs and carabiners from US Stainless. Gate tension is a bit stiff, but overall really pleased with how this turned out. At Little Si in Washington. Hopefully I’ll come check these in 50 years and they will look exactly the same as they do now... |
|
|
Matt Carroll wrote: Great work! What route was this on? |
|
|
Chris Stocking wrote: It’s the Dr Evil anchor! |
|
|
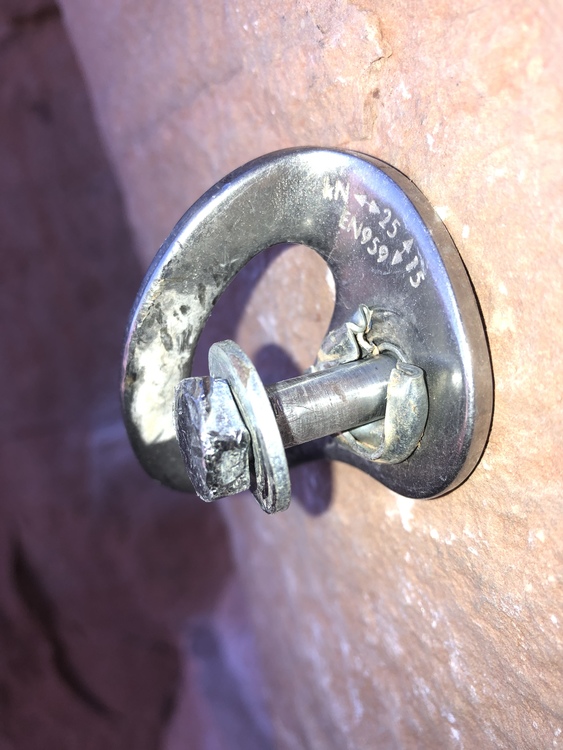 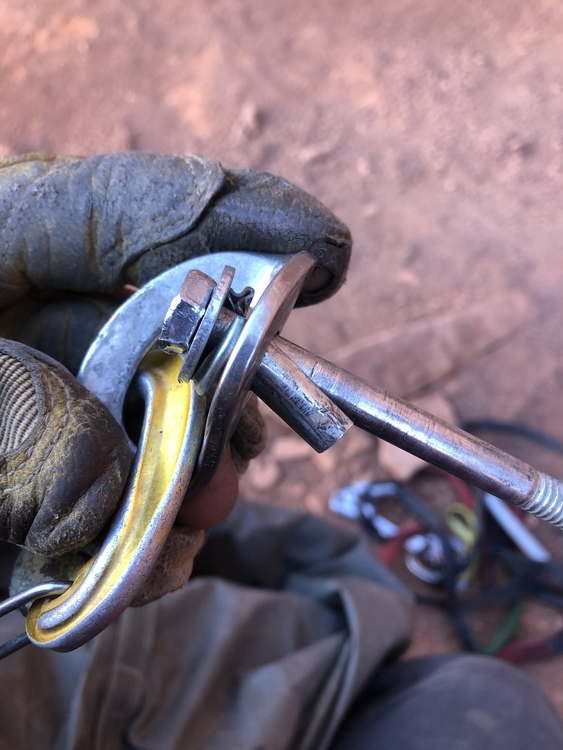 I don’t have any photos of the replacement I installed but I had never encountered anything like this so I wanted to share. It was a ⅜” 5-piece. It looked fairly normal from the outside. I thought someone had left a lockwasher between the washer and hanger. Weird but not the craziest thing. I was doing some anchor maintenance on the route and went to tighten this bolt on my way down. It wouldn’t tighten at all. I funked it out with a few light pulls and quickly discovered that what I thought was a lockwasher was actually the sleeve mushrooming through the hanger hole. The bolt wasn’t engaged in the hole at all. Any ideas on what would cause the sleeve to do that? Repeated over-torquing? Replaced with a ½” x 4.75” SS 5-piece from the ASCA. |


