
 Continue with onX Maps
 Sign in with Facebook






Michigan Barn Wall Project/ climbers in the area?


|
|
Hey all... I just wanted to share my home bouldering wall construction project. Last year I moved out of the city to find a place with some room for a big home climbing wall. A friend has one that really inspired me to build one myself. I found a place with a pole barn that would do, and the posts below will show my progress sofar on getting the walls going. I wanted to share this for a few reasons... First, if anyone is in the area, im looking for some new bouldering friends. Its always more fun to climb with people. Second, while I was planning my wall I enjoyed searching online and seeing what other people had done. It was nice to get some ideas, and see what designs people had come up with. However, there werent too many walls build with the scale I had in mind. I figured by posting I could share some of the things I learned along the way. Third, building a large wall is hard work, so I think its something to be proud of right? Thanks to all the friends and family who've helped on this project. Keep in mind, this wall is still a work in progress... there will be changes, revisions, and some temporary wall decisions while im waiting until other sections are in place. So lets begin. The blank canvas... 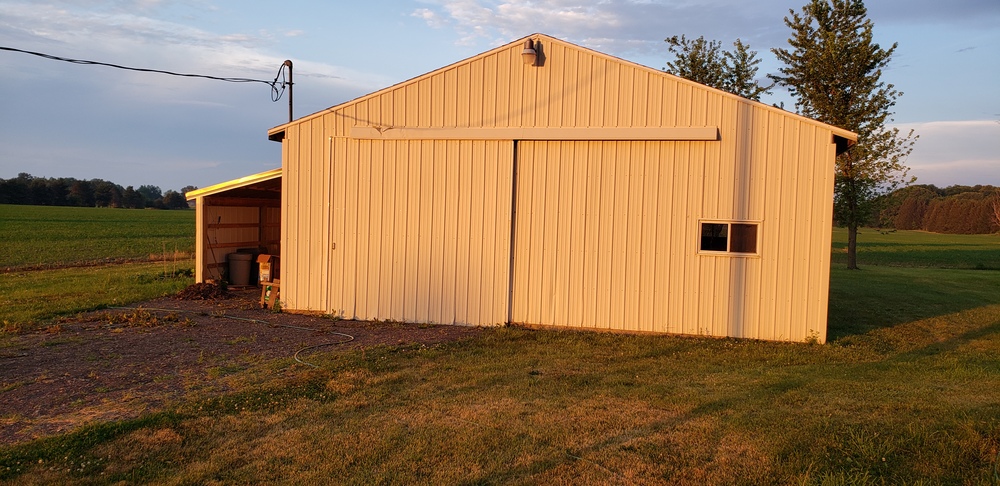 Sadly I didnt take a picture of the barn completely empty before any wall was started. |
|
|
My vision for the barn was to have a little bit of everything in terms of wall variety. I wanted some technical slab, minor overhang, steep overhang, roof, and some big features. Most of my previous walls, and my friends walls, are mostly overhung. I decided I would start with a more mellow angle that would allow me to use some of my smaller holds. My barn only has 11ft ceilings so my more vertical walls needed to be wide to allow for longer climbs. Although it sounds short, it actually works pretty well. By setting problems with a little sideways traverse ive found they are still long enough to be fun. This is less of an issue with the more overhung sections. 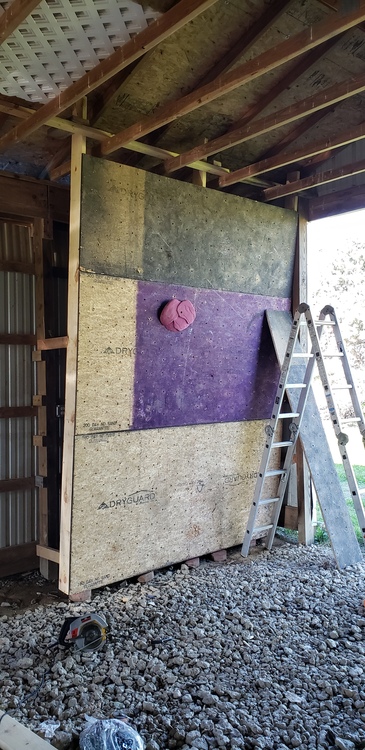 This is the first section we put up... just a slight overhang. For materials I used some leftover subfloor on this section (not everywhere as youll see) This came from a previous wall. There is 2x6 behind the wall for support, and its all tied in to the barns main poles and trusses. 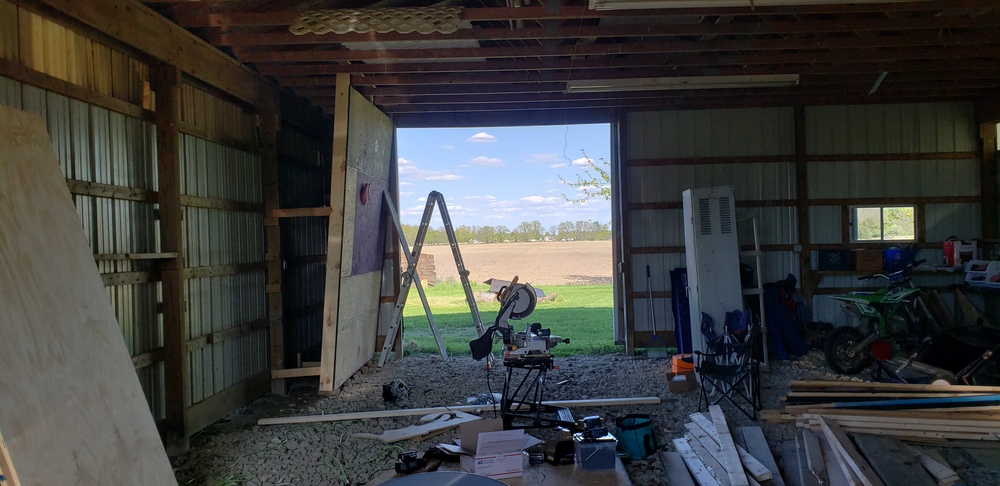 Just another view, and out the rear barn door. |
|
|
The next section is pretty much identical, but with new 5/8 plywood. I wanted to make the section wide enough to allow for traverses. I also learned that when joining wall sections with different angles theres a seam that people use as a hold. I didnt want this, as I knew it would break beta on many of the problems I wanted to set. This is pretty obvious now, but drilling multiple sheets of plywood for the T-nuts is way easier than drilling each sheet individually. Im just using standard 4 prong T-nuts due to cost. Also, since its a home gym I didnt think there would be the same type of wear on them that would require the screw in type. 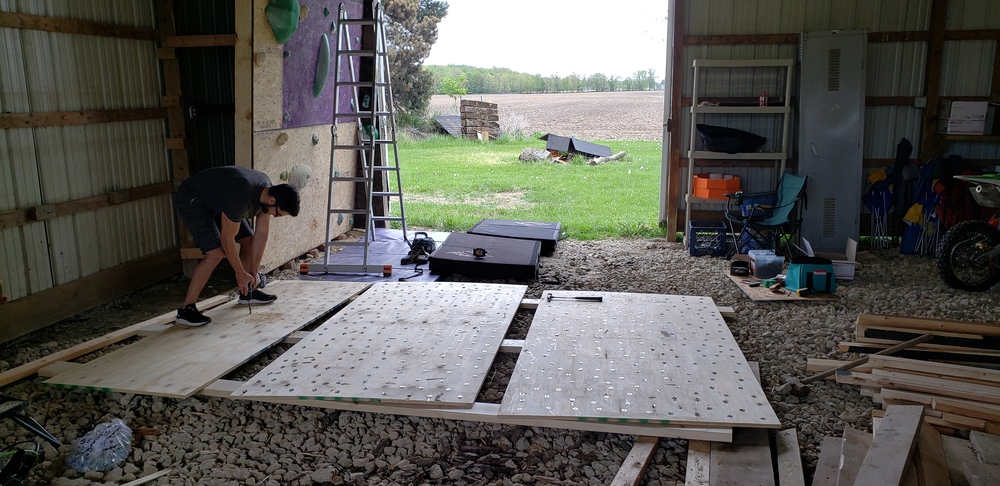 Above, my friend helping drill t-nut holes. 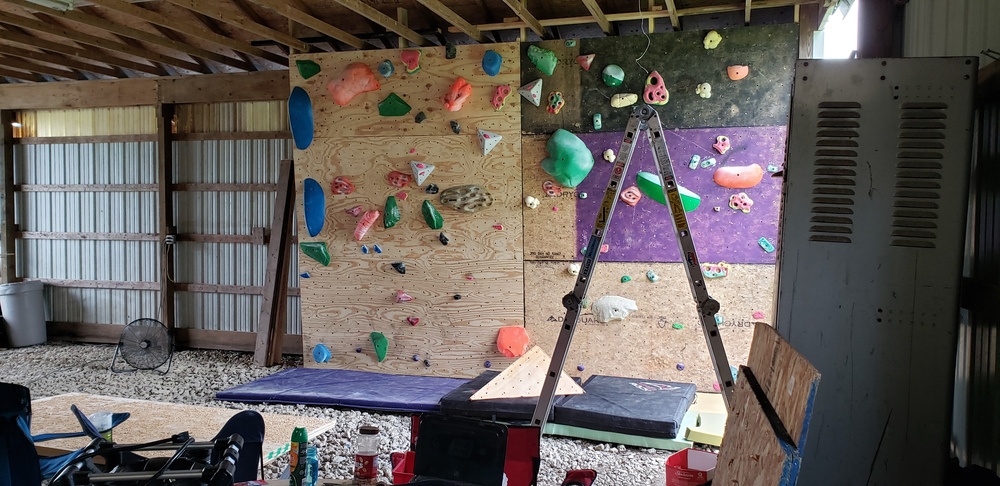 One of the first real sets on the new sections of wall. One big drawback of my barn is the floor situation (this will be fixed in upcoming posts) The floor is crushed rock, and there were some areas that were low and would have standing water after heavy rains. At this point in the build it had not been addressed. The padding situation was pretty sparse still, so I could just move the few pads away from water. It would always dry up after a day or 2, but obviously that wasnt acceptable. |
|
|
The next big step was dealing with the water... and getting it slightly more organized. I wanted a place to store my holds, and somewhere for people to sit/ watch/ relax when not climbing. First, my dad and I moved a pile of extra crushed rock/ gravel from outside, and spread it over many of the low spots in the floor. This pretty much eliminated the standing water in those areas. We still have a couple spots left to do, but since theres no walls in that area yet, I will get to it this summer. After smoothing the ground out I decided to make a seating area. I had a ton of leftover brick from the previous owners unfinished patio, so I decided to make a temporary indoor patio. I built some shelves for the holds, and started moving the brick in. 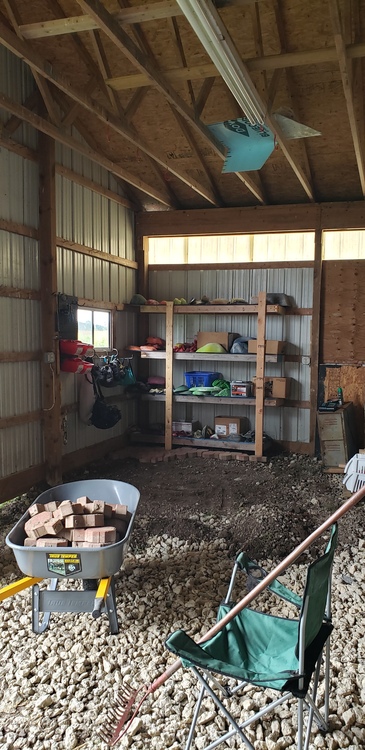 I didnt bother packing everything down, or making it perfectly level since I just planned on it being temporary. Its unique, but works well. 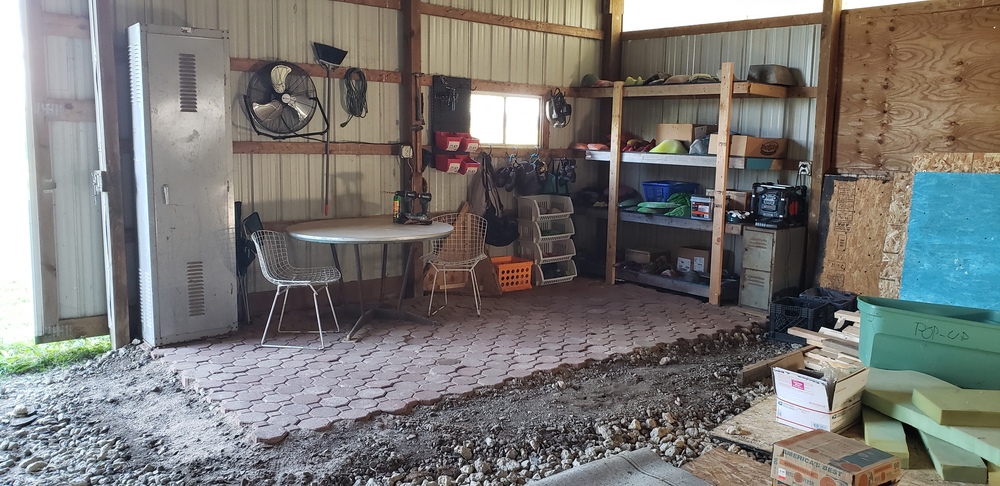 This next section of wall was a bit different than the others. We built it in three sections and then tied it all together. 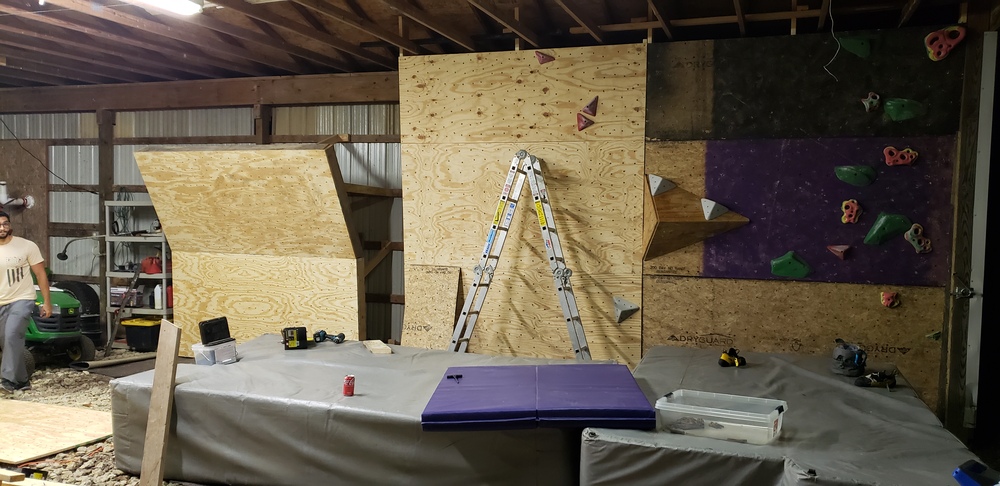 One thing that I think was critical was leaving a gap between the overhang section, and the previous two. I didnt want the overhang to butt up against the flat wall. If it did there would be a nice big arete making for easy cheating on problems. With the gap I was able to make a transition for the sections, and now it makes for some nice options when setting. 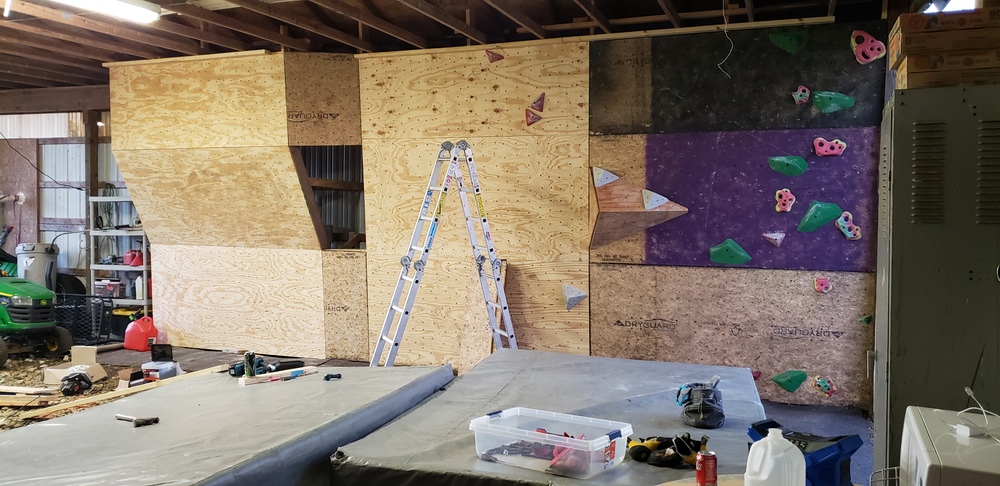 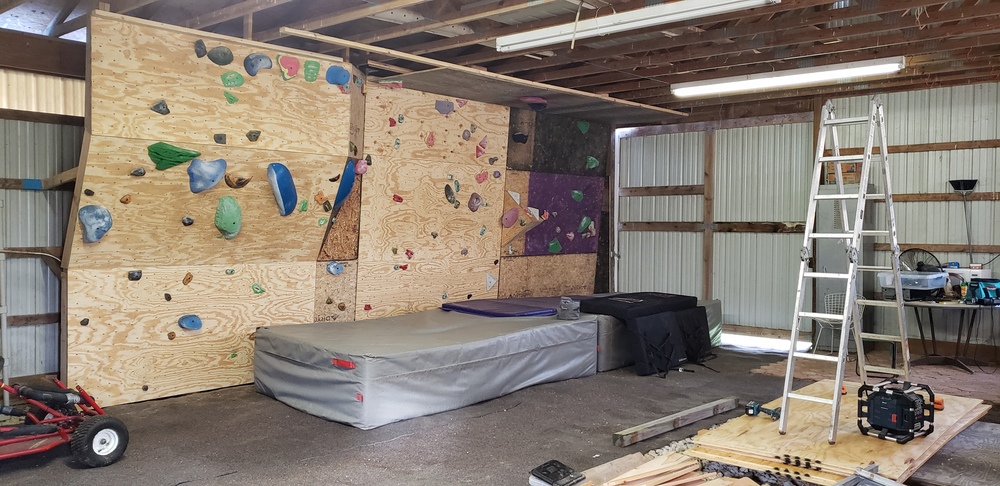 |
|
|
The next big step in the build was putting up the 40 degree wall (approx). Like the other sections we mostly built it on the ground, then lifted it into place. Just a tip for anyone trying to lift sections like this... nail a leg on each side that you can rest it on while you lift. Helps alot with keeping it in place while you finalize the position and secure it. Like the other walls the 40 is tied into the main barn supports and trusses. 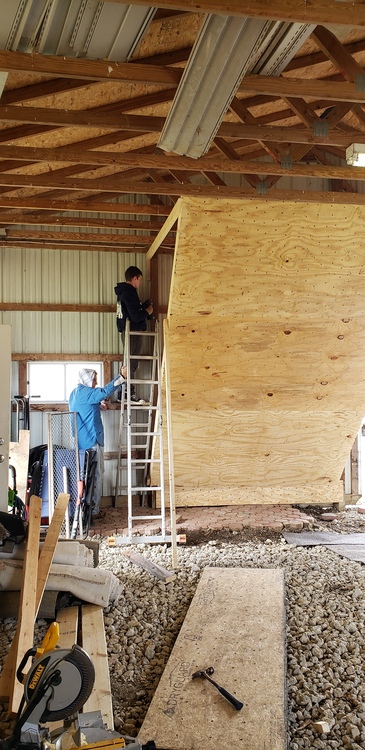 I filled in the right side with just vertial wall. Makes for a nice arete. 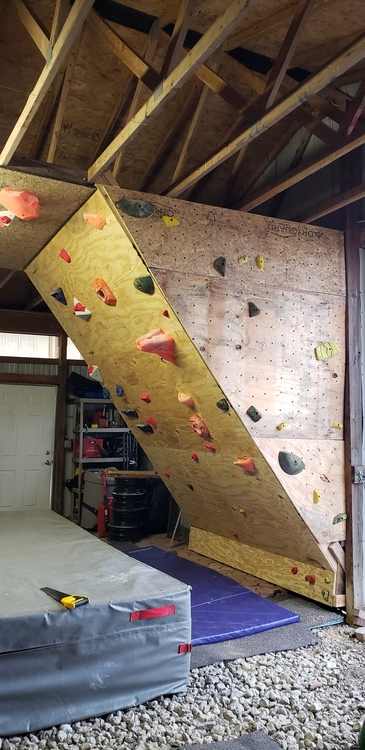 The next project is the slab wall. I got it all framed up, just need to pound in all the Tnuts, and lift it into place. Its going to be to the left of the small overhang wall. Ill leave a gap between the two as to avoid any sharp corners. 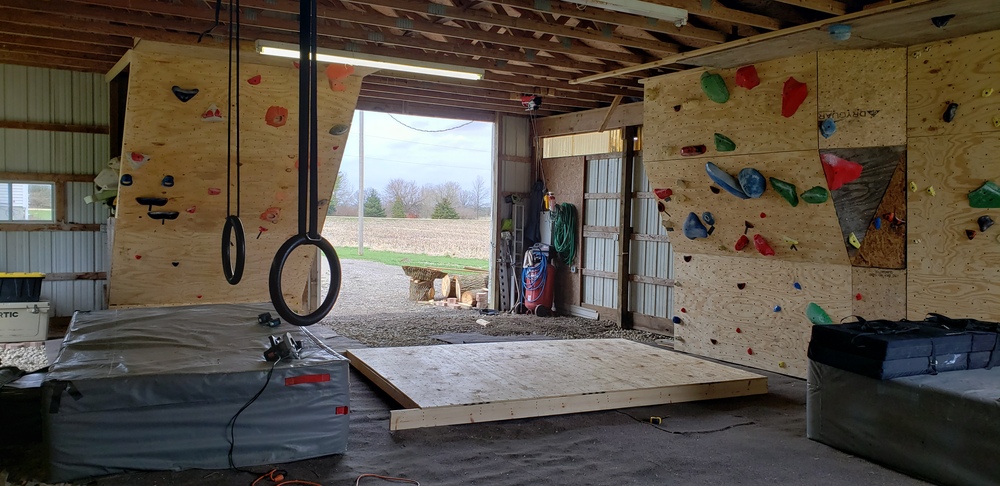 |


|
Nick that looks so awesome! Do you visit the gyms in GR? I climb at inside moves. I got hurt bouldering a few years ago so I try to stay clear sadly. |
|
|
Looks sweet Nick! Looks like you are taking your time to do it right, nice work. I'm down in Lansing, maybe swing up sometime and check it out? You should come down to Grand Ledge some time for some reel rock, Ill show ya around. Steve |
|
|
Chelsea Lybargerwrote: Ive only been to Terra Firma in GR. Ill prob check out some more places there this summer. My next new gym will most likely be Dyno in Detroit. |
|
|
glclimber 21wrote: Yeah for sure... im hoping to make Fridays a weekly bouldering day. Ive been to Grand Ledge quite a few times actually... I have a boulder there I need to finish. A good friend of mine loves to rub in the fact that he sent it, and I havent. |
|
|
So I made lots of progress this weekend in the barn. Slab wall is complete! It was alot of work to get it all tied in, but im loving the new angles. 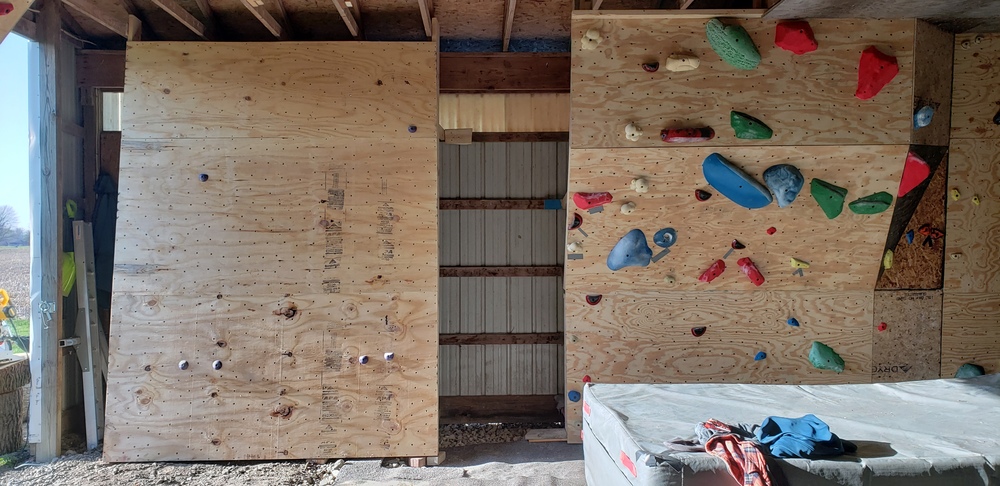 So, like the other wall transition, I kept the slab a few feet from the other angled wall. Did my best to avoid and sharp aretes that would make holds unnecessary. 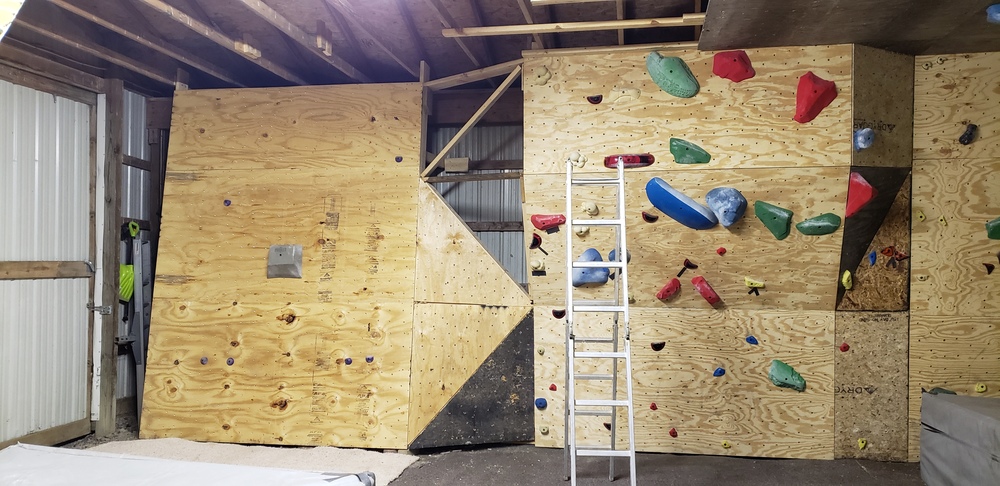 Connecting the two walls took quite a while. In order to make the different angles meet without bending the plywood I needed to cut multiple triangles. Two triangles for each section worked well. I added additional bracing beyond the diagonals shown in this picture, the wall is very solid. 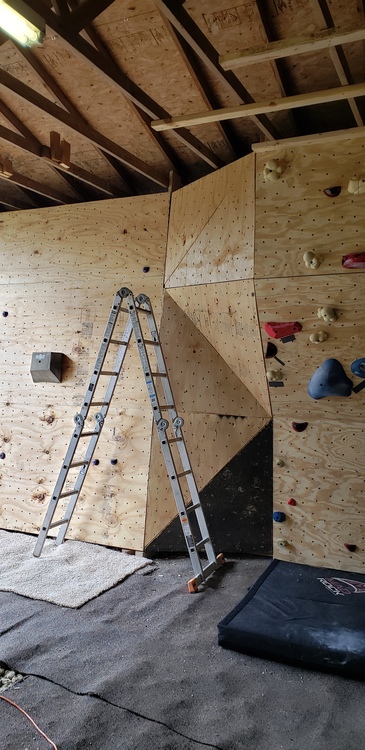 Finished transition. I had a couple small gaps... getting all the triangles to line up perfectly was pretty time consuming. For the gaps that did show up I had two solutions. First, I got an angle grinder with a heavy grit sandpaper disc. I sanded any protruding edges down... This will prevent anyone from crimping on them. It also brings down the risk of scratching ones arms on the seams, and reduces potential slivers. Second, Im trying out some wood putty in the seams as well. As long as it doesnt shrink, It filled the cracks pretty easily. 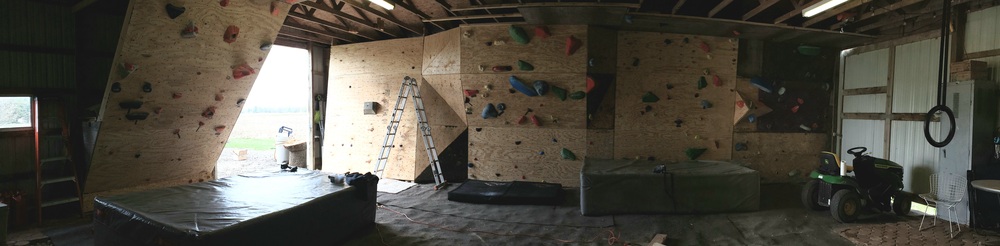 View of all the progress so far. I have some plywood left to put up for the roof, but otherwise this whole side is pretty much finished. I would like to add some volumes, so ill use the leftover scraps to make a variety of shapes. Also, I finally got new resin, so ill be pouring some new holds (: |
|
|
New progress! We started building the kink 60 section of wall. Its not 100% complete, still more bracing to add when the sides get filled in, and shelving to build behind the wall. Its solid though and weve got some climbing in on it. The new section makes nice long boulders, and adds a level of difficulty the other sections didnt offer. This weekend I will be filling in the right side with a variety of angles. They will all meet up and connect with the 30 degree wall on the roof. See pics below, and more to come! Again, if anyone is interested in joining some climbing sessions, just reach out! 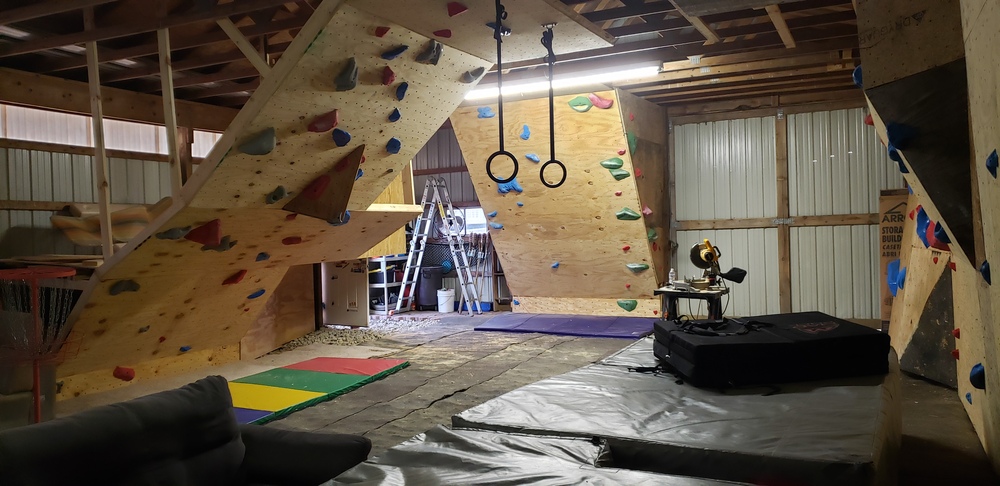 |
|
|
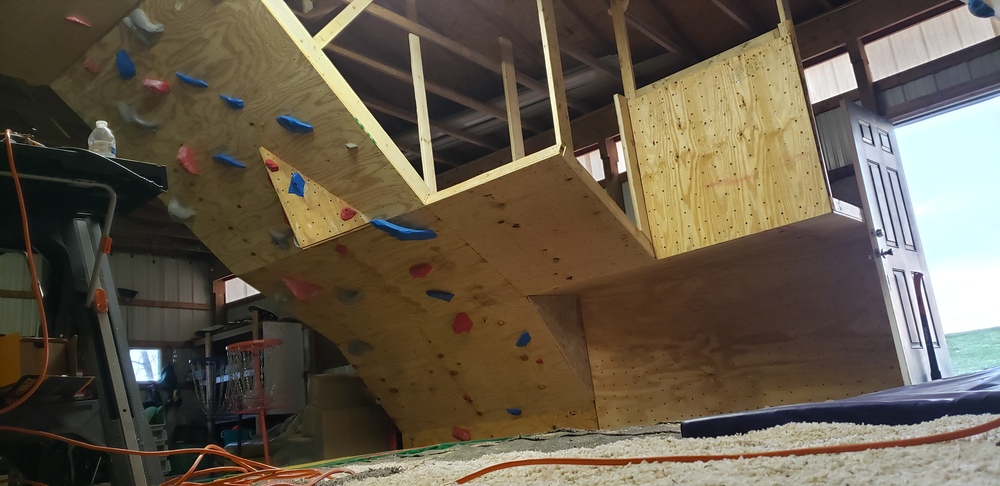 |
|
|
This is amazing. Enviable walls in the flats of MI |
|
|
This weekend we made a big push to finish the corner. Id guess we spent close to 15 hours working on the wall. I must say im very happy with the results though. 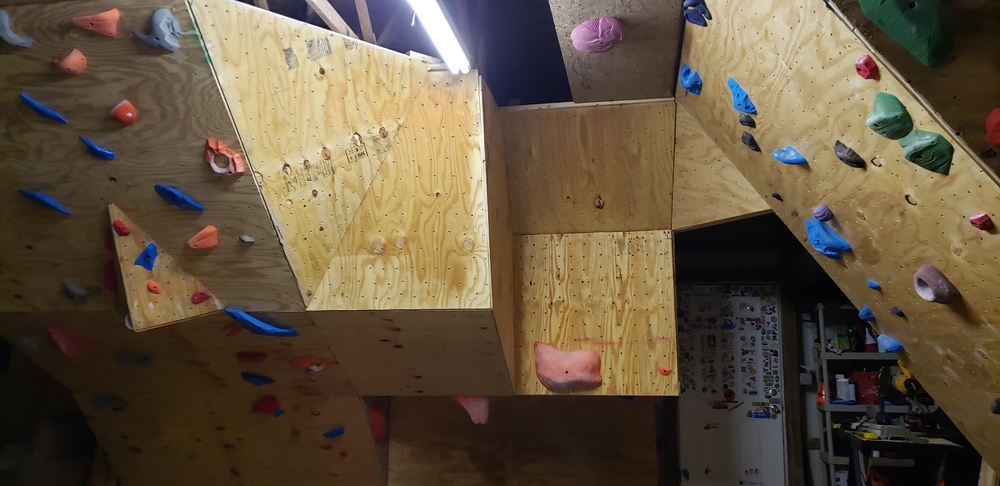 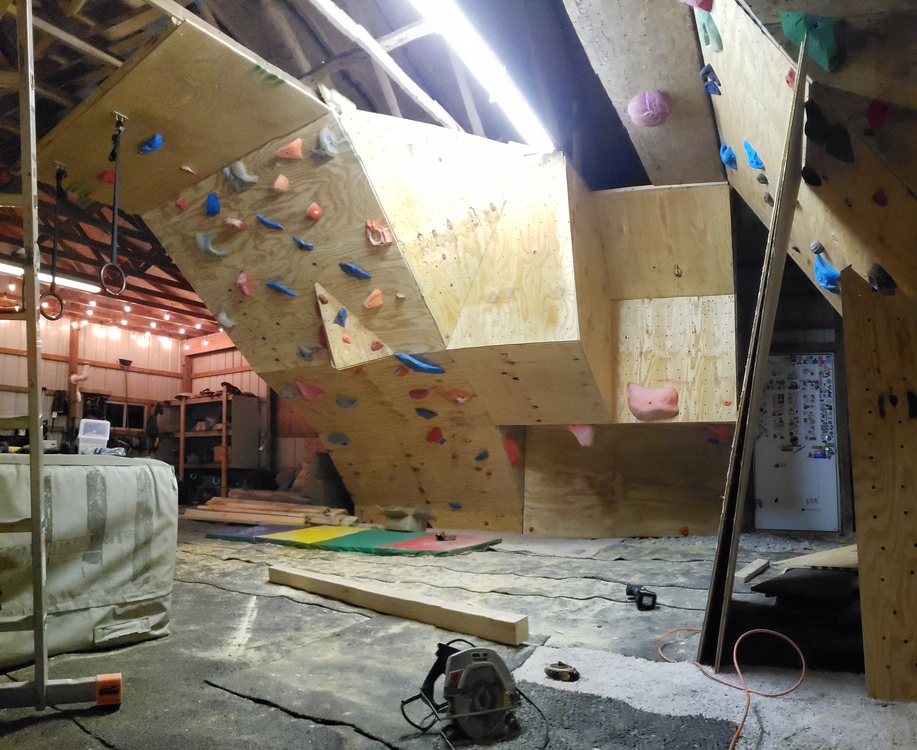 This section has a nice dihedral, allowing for setting that I just cant do on any other sections of my walls. I will take some more pictures, but the first thing I set there was a cool dihedral mantle problem where you push up into it, rest, them come around the left face to the finish. Its super fun. I had considered making the left face a dihedral as well, but figured one was enough. I also didnt want problems on the 60 kink section getting cheated constantly by people using the arete. I think the angle blending the two sections together was a much better design. We also tied the 30 degree wall section in with the small triangle. That itself opened up some cool possibilities. I set a problem starting on the 30, then transitioning and ending the on the dihedral face. Ohh, also... and I highly recommend this... I used an angle grinder with a sandpaper wheel to round off and smooth all the corners. Now when your reaching around the edges you dont scrape up your wrists/ forearms. Its actually really quick and easy to do. I will fill in the few gaps with some wood putty once its a bit warmer. The barn was below freezing most of the weekend while we were working. |
|
|
The other HUGE development this weekend was the addition of a significant amount of padding. Im super lucky to have a cousin who works as a track coach at a local high school. They are in the process of replacing their pole vault pads, so I was able to get the old ones. My dad helped a bunch and brought 2 full trailers worth of pads. Now almost the whole floor of the barn is covered by padding 1ft to 3ft thick. Falls from the roof, and constantly moving pads is no longer a worry. The only downside of so many pads is that it makes setting alot harder. I think ill pull them outside, or stack them in the center when doing full barn strip/ sets. I will post better pics soon, but here is a preview. 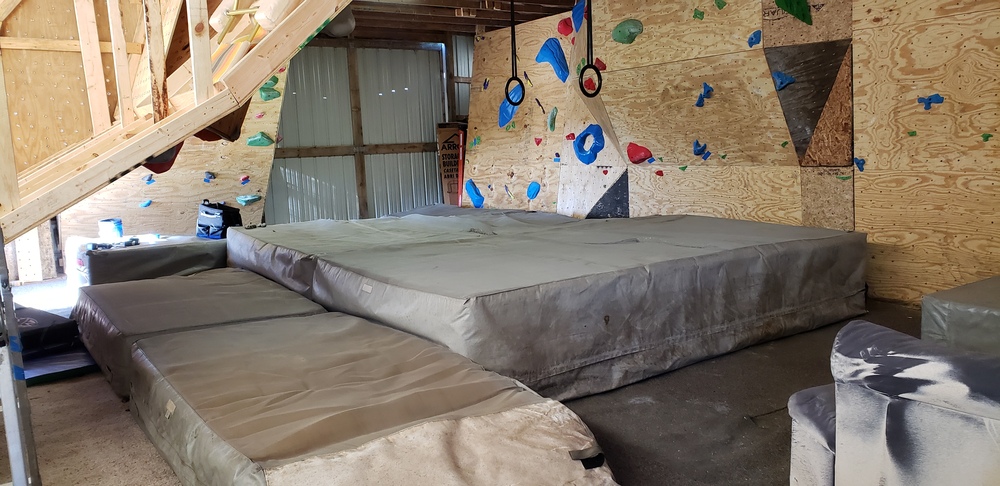 |
|
|
Next projects in the barn...
|
|
|
New updates coming for the barn Woodie soon! Tonight im going to start insulating the barn with some rolls I got off amazon. Should help warm the barn up on the cold days. Also got some additional lighting so its a bit brighter on the gloomy winter days. I came up with a rough plan for the next wall section. It will blend the kink 60 wall into a small slabby section on the left side. The two sections will connect with some slightly overhung angled wall. From there I will build an overhung column more in the middle of the barn. It will have angled wall going up on 3 sides, then transitioning into an arch that connects to the top of the kink 60. This idea was inspired by the old Planet Rock bouldering area in Pontiac. (I loved that gym) This will both help hold up all the additional weight placed on the trusses from roof plywood, and the back side will be filled with shelving/ storage. We will see how well the vision lines up with what I actually build in future posts. It always seems to change a little bit when the actual process begins. Also, weve been starting to do consistent weekly sessions. Still looking to add a few cool people to the weekly crew. If youre in the area, and want to do some bouldering send me a message. Been setting V0-V7 lately, but hoping to get stronger. Our current group has a mix of beginners, intermediate, guys, and girls. I always find it much more motivating to climb with people. |
|
|
This isnt the prettiest, or most glorious step in the build, but its a big improvement over the previous solution. Yesterday i moved and improved the hold storage area in the barn. In the past, I had shelving over in the corner of the sitting area. It was easy to get to, but took up valuable space. I decided to disassemble and rebuild the shelves behind the kink 60 section of wall. In total i added 32ft of shelving, and an additional 8ft of floor storage for the larger hold bins. I havent got to it yet, but once the remaining wall section is built, ill add at least another 12ft of shelving behind the wall. Im also going to build a set of fold down stairs, and a flush hidden door in the wall for access. The floor of this area looks half hazard but Intentionally left it with just a couple screws for ease of removal. I wanted to be able to slide/ move the floorboards easily for when I have to access the back of the wall. Ease of Tnut replacement was my main consideration. I also added 3 LED shop lights to a few areas in the barn. I need to get their positioning finalized, but for now, they are adding some much needed light! I started putting up the insulation on the trusses as well. Im about 1/3 of the way done with the barn. Its a pain, especially doing it solo, but necessary for winter climbing. Below is the progress sofar. This week i have some holiday break and will start the next wall section.  |
|
|
Looks super sick!! Im in east Lansing and would certainly come check it out. |
|
|
Jeremy Bultmanwrote: For sure! We will be doing some climbing after Christmas and New year! |
|
|
Another quick update... again, not the most glamorous as a new section of wall, but this is a huge improvement to the barn. I reorganized the seating patio. The corner was getting pretty cramped with not enough seats for people, couches facing away from each other, and cords/ propane tanks in the way. I moved the furniture around to a much more usable configuration, got the propane organized, and made room for all the tools/ chargers etc. In fixing up the corner situation, I also got the floor prepped for the next sections of wall. Everything is cleared out and im ready to start building over the holiday break. This last big section of wall is going to be one of the most complicated sofar, but im super excited to see how it climbs.  |


