Jesus Built My Hotrod
5.7 A4,
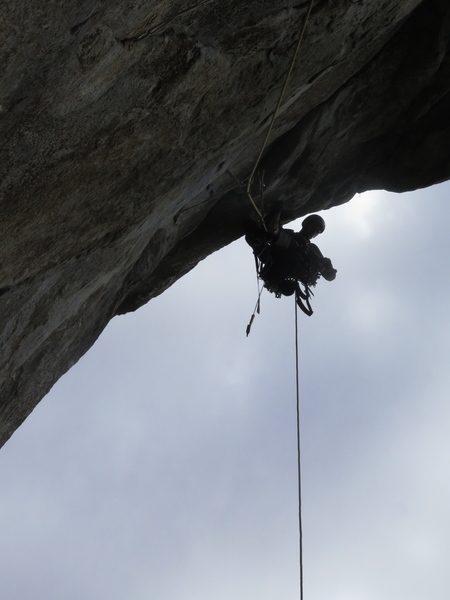
Trad, Aid, 1000 ft (303 m), 9 pitches, Grade V,
 Avg: 3 from 2
votes
Avg: 3 from 2
votes
FA: Eric Kohl, Eric Rasmussen - September 1992
California
> Yosemite NP
> Yosemite Valley
> Valley S Side
> Q. Leaning Towe…
> Leaning Tower
 Access Issue:
 Latest updates on closures, permits, and regulations.
Details
Please visit
climbingyosemite.com/ and
nps.gov/yose/planyourvisit/… for the latest information on visiting Yosemite, including permits, regulations, and closure information.
Yosemite National Park has yearly closures for Peregrine Falcon Protection March 1- July 15. Always check the NPS website at
nps.gov/yose/planyourvisit/… for the most current details and park alerts, and to learn more about the peregrine falcon, and how closures help it survive. This page also shares closures and warnings due to current fires, smoke, etc.
Description
This route is a spicy outing, sure to give you what you want if you're after a shorter climb with some thought provoking hooking and thin nailing on it. The pitches are fairly sustained, do not underestimate how much time they will take! Most parties complete the route in three days, this should be an indication. The rock is delicate in places, sometimes the edges of cracks will crumble and major hooking features have fallen off in the past - but fear not, it still goes (and with more traffic, will improve!) The rock quality tends to improve the higher you get.
P1: C3F 100’ – STEEP! Begin on fixed heads and hooks to a machine head (not shown in topo), which will bring you into a nice crack. When the crack ends, clip three machine heads and a lots of #2-3 aluminum heads (one fat copper with worn cable) up discontinuous features before a C1 crack takes you to the belay.
P1 anchor: single compression bolt with homemade hanger (bomber) backed up with fixed pink tricam – takes 0.3”, 1”, or 2”
P2: C3F or A3 145’ – STEEP! Head up and right towards the shiny bolt (KB above) and pass through the right side of the roof (big roof in topo not visible from belay). A flake is missing above the first roof; get creative. Several bat hook moves lead to a rivet below the second roof (fixed KBs underneath). Machine head and aluminum heads above second roof.
P2 anchor: two 3/8” expansion bolts - takes 2” or 3”
P3: A3 140’ – Clip a good cam and then head up and left using beaks, nuts, and hooks. Get ready to commit to some back-to-back(to back?) bat hooks – a good cam placement mellows things out just when you really want it. Finally, somewhere to stand (!!!) followed by 12 more feet of thin crack. Free climb 5.5 to Ahwahnee Ledge. (spoiler alert: the bolt/rivet shown in the topo does not exist).
P3 anchor (Ahwahnee Ledge): three 3/8” expansion bolts; giant ledge.
P4: C2 90’ – Traverse left off the far end of Ahwahnee, passing a good bolt and the free variation anchors (two bolts) where you’ll reach a beauty of a crack. Small cams, nuts and camhooks, nothing bigger than 0.5”.
P4 anchor: 4 bolt belay (two 3/8” expansion, one good compression, one bad/smashed over compression)
P5 (Go for the Old E): A3+/A4 130' – Fixed KBs and thin beak placements to a good nut, followed by more beaks to a good offset cam. Traverse left on a variety of small gear, some fixed angles and LAs. Climb a short section of expanding flakes with secure moves. Rock gets better towards anchor.
P5 anchor: bomber, 2 beefy compression bolts and a 3/8” expansion bolt (not a bad place to set up a portaledge).
P6 (Mini Thin Headwall): A2+ 140' – aesthetic pitch, first half follows a good cam crack, thin moves or a little pendulum get you to the next crack system.
P6 anchor: Single 3/8” expansion bolt, takes a good medium cam.
P7: A3 150' – A good consolation prize if you do not get to lead the previous pitch, revenge is sweet but try not to fall on your belayer’s face at the very start. A two bolt free variation anchor is 1/3 of the way up. Pendulum into the big V slot gully to the right. Gentle camhooking gets you atop the loose pedestal, very loose is an exaggeration but run it out just to be safe.
P7 anchor: good cams under roof. I don’t remember if there was a bolt or not.
P8: 5.8 (A2) 140' – Pitch traverses right. Good bolt 20’ right of belay. Pendulum into 5.8 free climbing or thin aid under the roof (harder). Stay left at the top; bring shoes if free climbing.
P8 anchor: 2 bolts, offset cam
P9: 5.5 100' – An obvious finish, climb the easy ramp to the summit, build gear anchor under giant block above Wet Denim anchor.
Enjoy the views of El Cap and don’t forget to post a photo to Instagram or whatever your preferred mode of spray is!
Location
Approach: Head across the catwalk and rack up before catching a short belay to get from the dead tree to the start of the route (leave haul bags at the base of the tree and haul them from there).
Start: past the bolt ladders is a single bolt which can be backed up with a 0.5 or a 3" behind a giant loose block, this is the first belay anchor and sets the tone accordingly (2 bolt anchor with rap rings further right is too far). head up and right on heads and devious hooks and you will soon be rewarded with a bomber C1 crack.
Enjoy great views of Bridalveil Falls and Gold Wall across the valley. Unlike the West Face junk show you're pretty much guaranteed to not be stuck behind another party on this route, so get after it!
The first three pitches are very steep, bailing from them might involve a bit of down aiding or swinging into one of the bolt lines climbers right.
Descent: From the top make a long series of double rope rappels down the gully to get back to the base (this is an involved process, read other descriptions to be sure you can route find this part)
Protection
Standard Big Wall Aid Rack (2017):
Cams: 2-3 ea micro
(gray C3 equiv) to 0.5”
(incl. offsets and/or Totems) 2 ea 0.75 to 2”
1 ea 3”
Nuts: 1 ea to mid-size
Offset Nuts: 1-2 ea of smaller sizes, 1 ea big sizes
Micro Nuts: 1 ea of three biggest sizes
Beaks: 6-8 large, 6 medium, 4 small
(can’t have too many beaks) Lost Arrows: 1 ea #2, #3
Angles: 1 ea ½”, 5/8”
Cam Hooks: 2 ea narrow
(1 wide, if you have it already) Heads: 1 ea #2-4
in case fixed ones blow Hooks: 2-3 ea
(2x+ pointed hooks essential - Moses Logan hooks) Rivet Hanger: 3 ea large cinch type
Old E: 2 ea (large size)
cleaning cord – this route has a fair bit of traversing, instead of leaving tat on the fixed pieces bring a 10 m length of 5 mm cord that you can thread through fixed gear and lower out with.
Other Notes: - There is a free variation with a bunch of shiny bolts that at times are within arm's reach of the route. In my opinion they detract from the aid line, but only you (or your partner) will judge if you clip them or not.
- Many pitches go mostly clean, but a hammer is pretty nice to have for some of the beak placements and would be necessary for replacing heads.
- May 2017 - all tat removed, all heads in good/reasonably good condition.
Special Request: For God's sake, bring a knife and some spare cord so you can remove all of the American death triangles and junk on the descent and replace the rappel anchors with a single good piece of cord (some bolts are 18" apart so plan accordingly).


 Continue with onX Maps
 Continue with Facebook