To save paper & ink, use the [Hide] controls next to photos and comments
so you only print what you need.
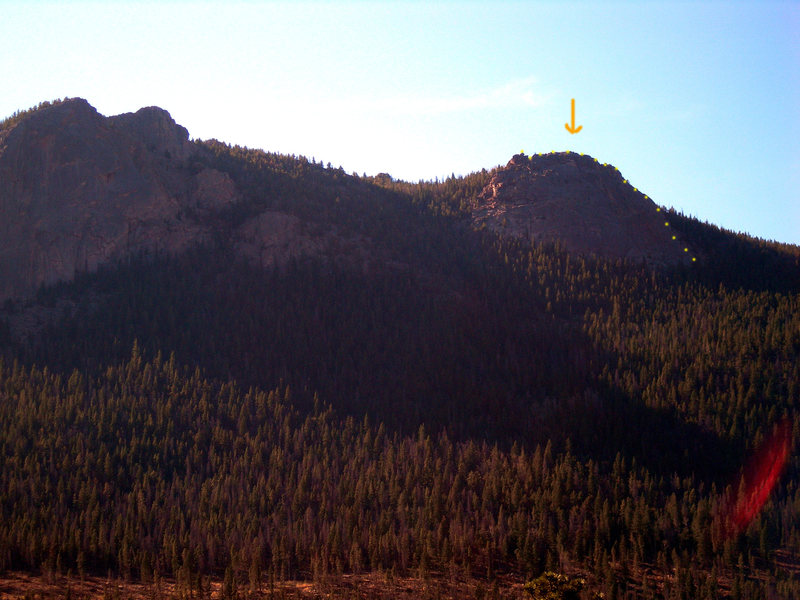
Rainbow Ridge
5.5 PG13,
Trad, 700 ft (212 m), 3 pitches,

 Avg: 2.3 from 4
votes
Avg: 2.3 from 4
votes
FA: Chip Salaun and Doug Allcock, 1980
Colorado
> Estes Park Valley
> Fall River Rd (…
> Rainbow Rock
Description
This is a quick route for end-of-the-roader types. It probably gets very little traffic and starts in the shade. The description from guidebooks may be a bit hard to follow, but the route essentially travels the right side of this modest crag in 2-3 pitches. The description here may be a variation of the actual line, but it works.
P1. Ascend a slab with light protection opportunities. Perhaps 50-60 feet up, you have to choose to go up lichened slab or traverse right to the edge of the crag. We went right. One could stop here ~110' up or continue leftward gaining a nicely featured face with knobs somewhat reminiscent of the golden knob pitch on the Grand Teton's Upper Exum Ridge. ~230' up is a good flake below a stump.
P2. Angle right to the edge and into the sun. Continue up the edge on slightly gritty rock to a ledge ~220' up.
P3. Continue up the edge, pass an ET-reminiscent horn. The terrain soon flattens out passing a couple 4th Class descent options. However, you may continue upward to tag the top of the crag ~260' up. If you go this way, the descent is a walkoff.
Location
This starts on the right side of the crag just right of a pine needle filled groove on a slab.
Protection
A light rack to a #3.5 Camalot, wires, and a few hexes work. We used a 70m rope, but that is not essential.
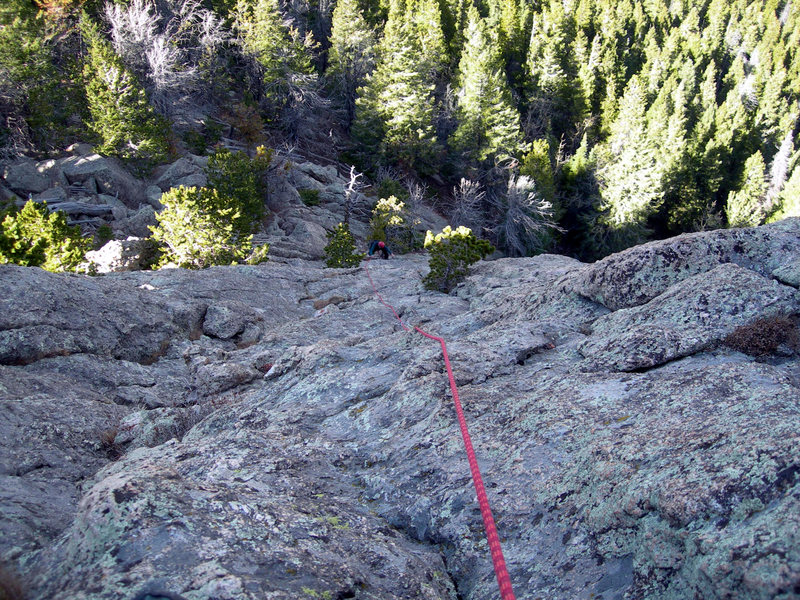
![Deb pauses on her scramble of P3's ridge.]()
[Hide Photo] Deb pauses on her scramble of P3's ridge.
![This shows some of the terrain from ~60' up on the start we used.]()
[Hide Photo] This shows some of the terrain from ~60' up on the start we used.


 Continue with onX Maps
 Continue with Facebook


Longmont, CO
Start at the nadir of the ridge. Follow this more or less straight up. Protection is adequate and belay stances are mostly comfortable.
P1: 5.6 150' Follow the ridge to a semi-hanging stance left of the ridge on #2 & #3 Camalot.
P2: 5.5 150' Follow the ridge up to a featured face. When in doubt, stay on the ridge, and aim for the trees.
P3: 5.4 150' Follow the ridge. There's a section of rock that is a bit deteriorating but still climbs well. Stay on the ridge.
P4: 5th ~100' Follow the ridge. Low angle but huge exposure.
All in all this is a great route and is well featured. If you've climbed a Flatiron before you'll be well prepared for this route and the nature of the climbing and protection (or lack thereof). Have fun, enjoy. Walk off right to the trail back to the TH. Jun 17, 2020