The Red Queen (unfinished)
5.7 PG13,
Trad, Alpine, 500 ft (152 m), 5 pitches, Grade III,
 Avg: 3 from 1
vote
Avg: 3 from 1
vote
FA: Takuya Yoshida and Bradley White, June 2010
New Hampshire
> WM: Zealand Valley
> Zealand Notch Itself:…
Description
Do a boulder problem Start 15+ ft to reach protection and enter box notch. Exit notch and belay at garden ledge above (5.5 and 60ft). Move right and ascend white outcrop. When it ends move left onto slabs to wall, climb wall at it's least resistance move right and up to belay [I belayed off of a talus rock horn (5.6 and 120ft)]. Ascend talus 100+ ft to the base of the highest walls. This talus field became the scene of an epic rock slide. Takuya got hit by it but his fast agility got him away with only having a sprained walkable ankle. I sat and watched the rock come down and go on down the other side of this narrow talus field a little below me, it came to a stop. Most rock slides should stop up here.
We got to beneath the highest wall. I went on forty ft. up the pillar (5.7) along side the Red Queen's wall (of what I believed would be the easiest way up it). Above the pillar are extreme parallel (far from each other) hand cracks. They are about 10 ft. long and are one big, possibly blasted off separated from the cliff broken up block, sticking out hanging out up there slightly inclining and a short distance up from the pillar's top. I knew I could reach one. Maybe it's very loose? Fear. Why the fear?
I looked at the traverse right to where there are other cracks created from stable blocks. Far way I would have to bring him up and move us to the other side of this ledge. It was going to take too long to do all of this. The secure crack is there. Up it and then back left above those cracks blasted difficult cracks. Standing on top of them I know what up with them. If it's quarried rock, it'll come off by it's own unique loose rock properties (I taught myself to climb solo on many road cut rocks). Climbing naturally exfoliating rock is dangerous enough. I'm going to need to know more about what's here first. Takuya won't get his climbing shoe back on. This is nuts and the rest of the climbs probably goes back to moderate moves above those cracks. Takuya injured, a crack I would have to aid climb or die trying to do it, dark swirling clouds overhead, fatigued, I retreated before the Red Queen said, "off with my head".
Now I have to go back. When I get back I'm going to go up right of the pillar near the big hole in the wall where that lay back crack is before the actual hole. I would like to do the stone filled crack to the left of the pillar also someday and much more. The crack ends where the Queen's got big body size horns. How safe are those horns? I'll have to check it out on my way up. Probably everywhere the rock is supportive, solid as alpine rock gets. The rock here has fascinating features and has been a lot of fun to climb.
A dike chimney is formed inside the Queen's giant inside corner dike facing north. Its got a few orange brown flaking stones beneath it falling out from somewhere.
The giant left facing corner of this dike is solid, definitely old rock with wide vertical shadows from off width and hand cracks on it higher up, probably hard to do. There lots of choices here but always there is. I've got to reach the base of the climb first, then I can climb.
Location
Left center. In the talus field there is a large white birch before the upper woods. Go up left and then directly to base of the cliff. Go to the right of the wet slab until there is an opening below the steep white granite wall.
Protection
Regular rack, but multiple #3 and 3.5 (at least four total) and a #4 cam are importantly convenient on the highest wall. We escaped along the base of the highest walls heading south and did two short rappels.
![Top half of the pillar. The way I went up was the outside edge (5.7) that is not in the photo.]()
[Hide Photo] Top half of the pillar. The way I went up was the outside edge (5.7) that is not in the photo.
![Left of the pillar on the highest wall is this 80+' crack.]()
[Hide Photo] Left of the pillar on the highest wall is this 80+' crack.
![The V groove start to the pillar next to the highest wall.]()
[Hide Photo] The V groove start to the pillar next to the highest wall.
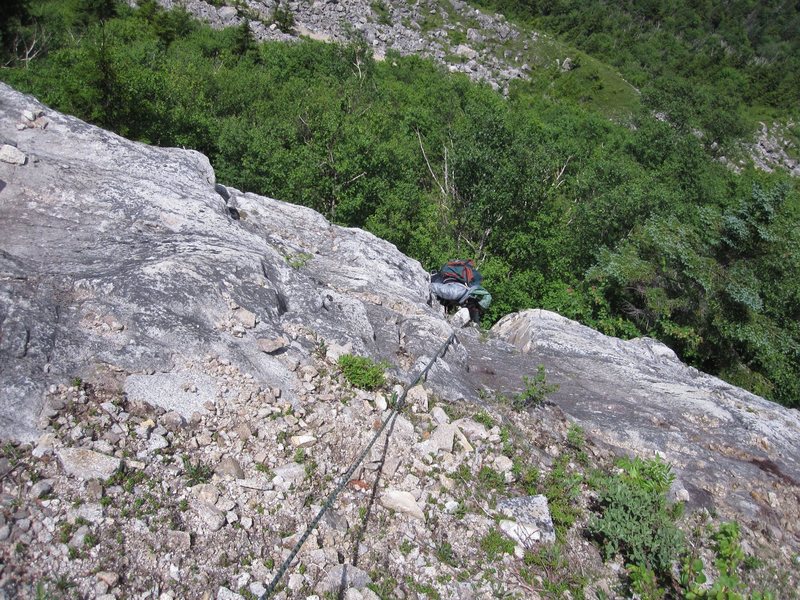
![The rest of the second pitch went onto the slabs and later up the first steep wall with the central crack, right of the tree center right side on the gray rock left of the large white rock. Moved up right above large white rock in the talus and trees to belay on a rock horn (5.6). <br>
The large ceiling on the upper right side, we have named 'King Henry' and the white left facing wall is the 'Red Queen's' undone finish.]()
[Hide Photo] The rest of the second pitch went onto the slabs and later up the first steep wall with the central crack, right of the tree center right side on the gray rock left of the large white rock. Moved u…


 Continue with onX Maps
 Continue with Facebook