To save paper & ink, use the [Hide] controls next to photos and comments
so you only print what you need.
Arch Enemy
5.11+,
Trad, 400 ft (121 m), 6 pitches, Grade III,
Avg: 3.5 from 39
votes
FA: J. Burcham/K. Powell
Arizona
> Northern Arizona
> Sedona Area
> Sedona
> Mitten Ridge
> Flying Buttress
Description
P1: 5.9 fingers to ow crack. P2: 5.11- climb diagonally left past thin crack to bolted, exposed face over arch. P3: 5.10 hands thru a roof, clip directional bolt then traverse left oonto face (do not climb 10+ bulge/ow.)P4: Climb past many bolts (mostly 5.10) then 5.11+ crux to sustained difficult terraine to bombay squeeze. P5: 5.8ish bolted traverse. P6: Climb 5.10 corner and ow to 4th class and summit!
Location
approach from "cowpies" trail head off schnebly. Climb is just right of the huge arch visible from the parking area.
Protection
double set to #3, single #3.5,#4. 10-12draws, 4-6slings.
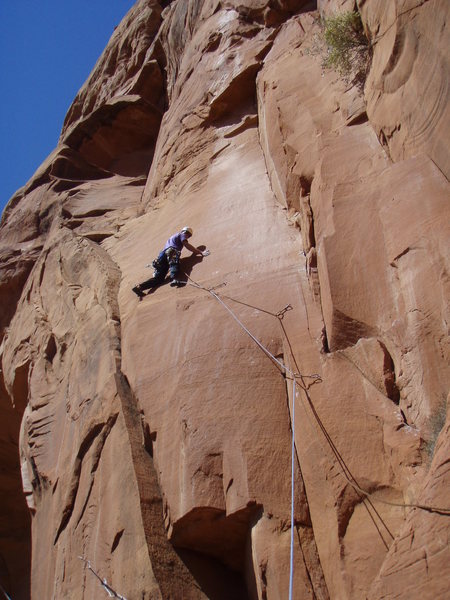
[Hide Photo] Finishing the crux of the second pitch of Arch Enemy, while Chris belays & soaks up the scenery on his first visit to Sedona. An exciting and very exposed pitch. Photo by Manny R.
[Hide Comment] I think the pro could be whittled down to a single rack of cams up to #4 camalot (2 #3s) and med- lg nuts, 10 Quickdraws, 5 long runners. Lot of bolts on route. Do not fail to bring the 3,4 for the last pitch. Summit is worth the trip, as is the rap!
May 2, 2008
[Hide Comment] I think if you're careful with your rope the second and third pitch could go as one, if you're in a hurry. Only need a single rack to 4 on this climb. XO
Apr 3, 2009
[Hide Comment] What an amazing route! Second pitch was amazing! Actually the whole thing was amazing. We felt that while a single set would work we were glad to have doubles in just a few spots. Don't forget the 3.5 and 4. Crux on the crux pitch was wicked! Overall well protected and well thought out route. Go Do It!!! The rap alone will take your breath away and the last rap station just makes you laugh!
Jan 11, 2010
[Hide Comment] Additional Beta for finding the trailhead as this description leaves some to be desired. Trailhead Directions: From the "Y" (the intersection of Highway 179 and Highway 89A) go south on Highway 179 about 0.3 mile to Schnebly Hill Road. Turn left on Schnebly Hill and proceed 3.5 miles. The trailhead parking is on your right. Use the far entrance to the parking area as the near entrance is very steep and you have a good chance of hitting the bottom of your vehicle. Schnebly Hill is paved for the first mile and the last 2.5 miles can be a very rough unpaved road. more about the trail here: greatsedonahikes.com/cowpie…Feb 5, 2011
[Hide Comment] What an amazing climb! As far as rack i would bring singles from small to #4 C4 with 2 .5 C4s. No Nuts if you have a green c3. Linking pitches 2&3 was awesome and helped split crux's between leaders. BTW i would not call the last pitch an OW! There is one pod for a #4 higher up and a tricky slopy sandy move protected by bolts to start. Get on this thing! IT'S RAD
Feb 27, 2013
[Hide Comment] Right at the crux on P4 there was a pretty sizable plate/flake(25" x 15"?) that was almost completely detached from the wall. Was this something new?
My partner led up to it, knew it was coming off if he bumped it, so he aided through the crux ensuring he wouldn't send it off flying directly at the belay(and me!).
I followed up and cleaned maybe 25 lbs off by simply tapping it with my food a handful of times. It all went straight down at the P3 belay(yikes!).
I'm just curious if this was new since it hasn't been mentioned before? It seemed like it was natural to use it through the crux for hands and feet. Not sure if the crux is harder or easier now..!
Also- Super rad route! All pitches were fun, with 2 & 4 being money! Those raps were more than likely the most fun I've ever done.
Jun 8, 2015
[Hide Comment] A few notes on the route. The crux pitch apparently had a hold break so could be a 12- ? Pitch 1 is a fun layback and ow. 2 and 3 could be linked probably for a classic Sedona face + crack pitch. Pitch 4 is interesting and involves some powerful moves to the crack above. Pitch 5 felt a bit like .8+/.9 and a lil PG Pitch 6 was the sleeper crux. 10+ move and then slab to the summit.
[Hide Comment] Felt difficult with some flexible holds at crux. Could see some fairly fresh breakage out right but still manageable with a few funky french-free moves. Cool route from top to bottom.
Feb 13, 2021


 Avg: 3.5 from 39
votes
Avg: 3.5 from 39
votes

 Continue with onX Maps
 Continue with Facebook


PAYSON
Phoenix
I second Manny's rack suggestions. May 16, 2008
Lyttelton, New Zealand
Only need a single rack to 4 on this climb.
XO Apr 3, 2009
Ouray, CO
Trailhead Directions: From the "Y" (the intersection of Highway 179 and Highway 89A) go south on Highway 179 about 0.3 mile to Schnebly Hill Road. Turn left on Schnebly Hill and proceed 3.5 miles. The trailhead parking is on your right. Use the far entrance to the parking area as the near entrance is very steep and you have a good chance of hitting the bottom of your vehicle. Schnebly Hill is paved for the first mile and the last 2.5 miles can be a very rough unpaved road. more about the trail here: greatsedonahikes.com/cowpie… Feb 5, 2011
Flagstaff
the road
AZ
My partner led up to it, knew it was coming off if he bumped it, so he aided through the crux ensuring he wouldn't send it off flying directly at the belay(and me!).
I followed up and cleaned maybe 25 lbs off by simply tapping it with my food a handful of times. It all went straight down at the P3 belay(yikes!).
I'm just curious if this was new since it hasn't been mentioned before? It seemed like it was natural to use it through the crux for hands and feet. Not sure if the crux is harder or easier now..!
Also- Super rad route! All pitches were fun, with 2 & 4 being money! Those raps were more than likely the most fun I've ever done. Jun 8, 2015
Mexico City , Tucson, AZ
Pitch 1 is a fun layback and ow.
2 and 3 could be linked probably for a classic Sedona face + crack pitch.
Pitch 4 is interesting and involves some powerful moves to the crack above.
Pitch 5 felt a bit like .8+/.9 and a lil PG
Pitch 6 was the sleeper crux. 10+ move and then slab to the summit.
Great climb Dec 23, 2018