To save paper & ink, use the [Hide] controls next to photos and comments
so you only print what you need.
Mercury
5.8+ R,
Trad, 1450 ft (439 m), 5 pitches, Grade III,


 Avg: 2.7 from 3
votes
FA: Paul Ross, Layne Potter May 19th 2006
Utah
> S Central Utah
> San Rafael Swell
> San Rafael Swel…
> Eastern Reef Ar…
> K Crags
Description
Takes a line between Tsunami and Seduction of Stone . Starts just above and left of the lowest part of the slab between the two waves,small cairn....
P1 Straight up to a bolt at 70',continue to double anchors.100' 5.7R
P2)Trend slightly left to a bolt at 40'. Do not go to the the groove on the left but follow slim dark dyke's up to the right, good cam placement in the crack at the small overlap. Then straight up to double anchors. 200'5.8+R
P3)Go under the white spot to the large open groove system. Up this then easy scramble to anchors below a clean open slab.250'5.3.
P4)straight up from the belay and head up through pot holes to double anchors.,no pro. 200' 5.6R
P5)Continue straight up the open slab to double anchors ,no pro. 200' 5.6R.
P6)4th class left to the ridge to a fine summit.
Descent :- Return to top of P5 and rap the route.
Location
The climb is best approached from the Three Fingers Canyon Road. Park about 1/4 mile from entrance to canyon and walk north for about 20 mins easy walk.See crag photo.
Protection
Cams.5" to 2.5" Four 4mm to 5mm cord slings for placement over spikes. Two 60 meter ropes

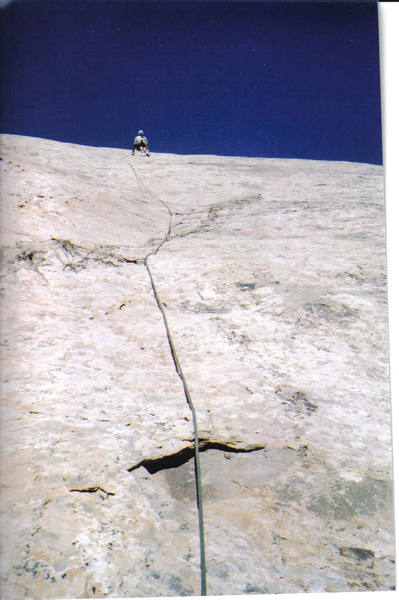
[Hide Photo] Mercury. You can see the "White Spot" about 1/3 of the way up. (Which you traverse under on the way to the self named Gates of Mordor.) 4-20-08.

[Hide Photo] Traverse below the "white spot" which you can see for miles, just below the self named Gates of Mordor.

[Hide Photo] South end of the Surfing the Swell formation. A)Seduction of Stone 5.7R B)Mercury 5.8+R.C) Tsunami 5.9R


 Avg: 2.7 from 3
votes


Nederland, CO
P1 Climb 100 feet to the double bolts. P2 Up left to the bolt and then follow those thin friable black dikes up right to the overlap and place a big nut or small cam, it's the only good piece on the pitch. I got a small so-so nut higher up as well. End at the double anchors. P3 Traverse below the "white spot" to the crack. There is a single bolt at the top of the crack; which you should clip with a long runner if this is your first piece. Continue up through the Gates of Mordor (you'll know it when you see it). I got a questionable tie-off on the right gate, but then head left and belay in the crack or up to a big block. (It should work well if you didn't build in too much rope drag. We set up a belay at that only bolt and wasted a pitch.)[I suspect the original party 4th classed in here.] P4 Climb to the top of the pyramid to the double bolt anchor. P5 Climb straight up through the potholes. I got a questionable #.3 camalot cantilevered vertically in a hole, but it is the only piece on the pitch. (This pitch needs a couple of bolts.) P6? We bailed rather than risk another solo pitch. (Yes, the angle is starting to drop, but shit happens and my partner just didn't want to risk it.)
The double anchor raps work with a 60m rope and rope stretch, but from the top of the pyramid you will only reach that single bolt below the Gates of Mordor. You have a short rap or downclimb from there to get back over to the bolts at the top of P2.
The climb covers some beautiful rock, the climbing is fun, but has an "unfinished" quality about it, like someone was in a hurry. Though not desperate, it's not for the faint-of-heart. I would welcome some specific suggestions for some minimal number of additional bolts, otherwise let's not be lazy and call it "trad," you are soloing and risking the aunt of all fall factor 2 falls. Pity. Apr 28, 2008
Keswick, Cumbria
Nederland, CO