
 Avg: 3.9 from 72
votes
Avg: 3.9 from 72
votes
 Access Issue: Closures
Details
Access Issue: Closures
Details
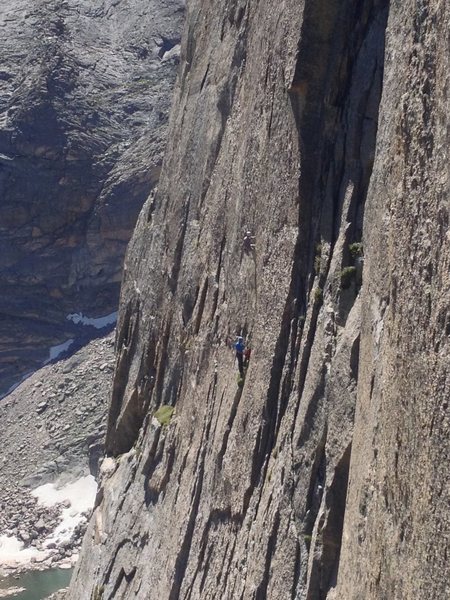
This is a magical mystery tour. It has lots of variety including steep face climbing similar to the domes of Tuolumne Meadows. There may be no better face climbing in the Park.
The route starts on Middle Earth, which can be accessed by various means.
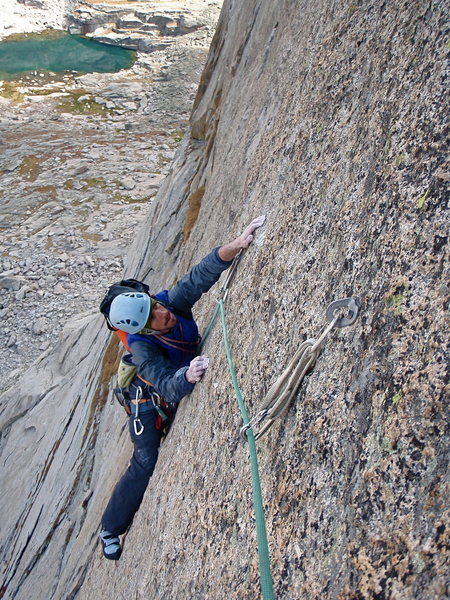
P1. The first pitch of the route proper begins to the right of the Eye of Mordor, a huge, seriously sinister, vertical gouge left of center on Spearhead's east face.
The first pitch is easy, taking you to a big ledge. The next pitch climbs straight up into an obvious dihedral, which grows wide at its top (5.9). Not much gear toward the end, unless you brought a 12" piece. I did not but found that focused liebacking brought me to its top and the next big ledge.
P3. The third pitch heads left, through a hole, and onto a ramp. Before heading too far along the ramp, climb up and through an overhang/flake, onto the next ledge which curves into a right-facing dihedral (5.10a).
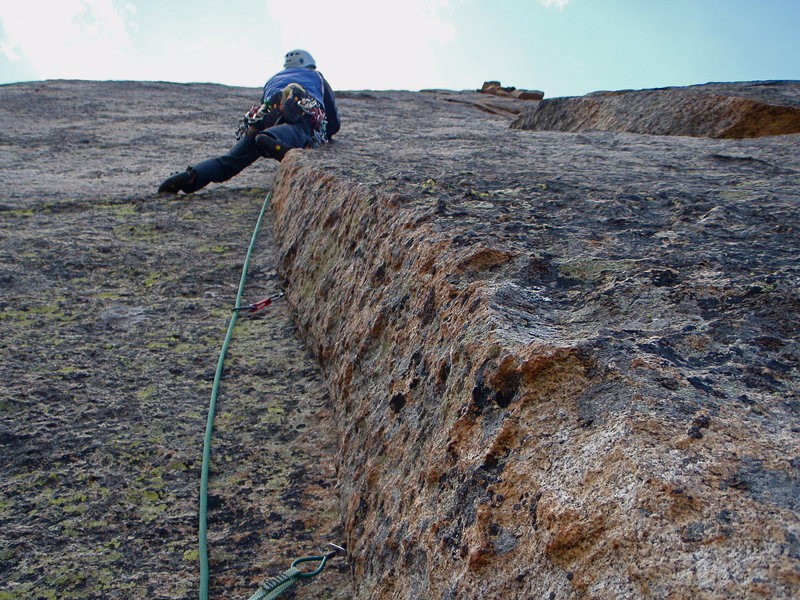
P4. The fourth pitch heads up the dihedral, over a small roof and hand traverses left into another short dihedral. Belay from slings towards its top (5.10c). This is a cool pitch.
P5. Next, a thin hand crack in a short dihedral quickly turns into a short, somewhat horizontal, finger crack. The crack dies into the sweeping wall above. Figure out how to put your feet where your hands are and stand up onto a golden wall of knobs (crux). Climb toward and ultimately onto a memorable flake and then up right toward a shallow, short dihedral (more cruxey climbing here as well).
Rossiter's guide suggests belaying at the base of the dihedral. I kept going and joined two pitches together into 165 feet of incredible climbing. You will need lots of runners if you do this. The next section heads up the dihedral, breaks out right into more wonderful face climbing and then into another shallow short dihedral, belaying at its top (5.11a/b). Take a breather.
P6. The next pitch heads up a series of dihedrals. Belay on top of the second one (5.8).
P7. You are now below the exit pitch. The rock changes dramatically in character at this point but remains solid. Clip a bolt, mince left toward a thin crack and get some smallish stoppers in it. Then head straight up the crack to the summit (5.10b).
Lots of quick draws, shoulder runners and a small standard rack with TCUs.

 Continue with onX Maps
 Sign in with Facebook


On the last pitch, it's easy to avoid the final 5.10 crack if weather is moving in. Just keep going left on ever-easier ground. If you don't place any pro past the crack (reasonable), you can walk back on the summit rocks and flip the rope around for a good TR for the second.
Great route. Aug 21, 2002
Estes Park, CO
Boulder, CO
The "10d mantel" noted on Gillet's topo is 5.9+ if you move 1' to the right of the bolt.
Regarding the topo, there may be some pin/bolt count discrepancies, but the accuracy of the features and climbing line is excellent. 7 bolts? 8 bolts? Ahh, spear me the details. Jul 28, 2003
Colorado
Las Vegas
My Dad and I both felt that the moves to the first bolt on the crux pitch were NOT the most difficult. We thought the crux came later in the pitch. Combining the 5.11s is wicked, and should not be missed. No single move on this mega pitch is 11d, but there is a lot of 5.11 rock climbing on it, and only moderate rests. The final 5.10 pitch is actually very fun as well.
Many of the pins mentioned above and in the guide are now gone, but aside from the sweeping slabs (1/4 inch bolts), this climb takes great gear everywhere. Get after it! Jul 18, 2009
Ciales, PR
I replaced the fat arrow piton at the crux of the crack, (which seemed about llc?) and there are some more thin moves (harder for me and I like thin face) before reaching the last dihedral to the belay atop the second 5.11 pitch. The other two crucial fixed pitons on the 5.11 pitches pulled out easily and so I re-placed them but freeze/thaw could loosen them soon enough. For sure this is some of the hardest stone I've ever hand-drilled in and it completely 'mushroomed' one of my drill bits.
I've done the route in 5 pitches with a 60m by linking pitches one and two to near the top of the ramp above middle earth. Pitch two climbs up to and includes the 5.8R left-facing corner pitch. Pitch three joins the first two 5.10/9 pitches (use long runners on the zig-zags of the start of that pitch to avoid rope drag). Pitch 4 joins the two 5.11 pitches (52m) and pitch 5 takes you to the top. Or you can easily break this stellar route into 9 depending on your preferences.
There are still a few old SMC hangers on newer bolts (that were already replaced) and I'll eventually get up there with the correct wrench to replace those old aluminum hangers with real steel. Aug 23, 2009
This route can easily be done in five 60m pitches. We had a 70m rope and probably, had we not forgotten most of our slings and left them at home, could have done it in four pitches. AN AWESOME ROUTE!!!
The walk off down the East Ledges descent route was very quick.... Sep 11, 2009
Bend
I submitted the beta photo above to show the line we took for Spear Me The Details. Attempting to follow the description above and our memories of the topo, from the top of the pitch 2 (proper - beginning on Middle Earth) lieback, we traversed to the ledge about 40 feet right. We then followed a chossy ramp back left. This seemed like a waste. If there is a better way from the top of the pitch 2 flake to establish on the crux pitches above, please comment accordingly.
Also, if anybody has a good idea of what route the red line is, please let me know.
A writeup and photos of our experience on Spear Me The Details and in Glacier Gorge can be found here: climbinghouse.com/2010/07/s…. Jul 29, 2010
Colorado
Golden, CO
Luckily you can get a good #4 stopper before commiting to the crux moves. Aug 22, 2010
Boulder, CO
Grand Junction, CO
Ft Collins, CO
Combining the two 5.11 pitches certainly makes for one of the best pitches in RMNP. I think a Loweball would fit the pin scar at the crux beautifully, unfortunately I didn't have one. Aug 21, 2015
Boulder, CO
- 60m ropes work great, although we had to simul short bits of P1/2 and 3/4 (from the ground). It's fast to get to the base of the crux if you link all the lower pitches. If you bring a 70m, it would only marginally help but only on the easier approach pitches.
- Definitely "pre-rack" a #4 BD stopper and a #3 RP to quickdraws (set in that order) for exiting out of the crux roof/horizontal crack. Both of these can be set from good stances before committing to the move to get on the face and to the 1st bolt.
- Plenty of cruxes along the 2 crux pitches, and depending on your style/strength, it could either be exiting the crack, or getting to the flake, or getting to the dihedral at the base of the 2nd crux pitch. Either way, the trick seemed to be keeping it together and staying calm on the long calf-burning voyage along the bolts (hard to do!).
- On the 2nd crux pitch, take caution above the crappy knifeblade. That thing would not hold a fall (it wiggles and isn't fully driven in), and there's no gear to be had for a ways before pulling a 9+/10- off-balance move to get to the 1st bolt.
- And needless to say, AMAZING route! Sep 2, 2015
Boulder, CO
If you don't wear stiff shoes, you're gonna have a bad time.... Aug 14, 2016
Boulder, CO
Lakewood, CO
Boulder, CO
Boulder, CO
Boulder, CO
Albuquerque, NM
The last pitch "belay" on top of the dihedral is a rusty 1/4" spinner. You could climb around to the other side of the dihedral and downclimb a bit to get some gear in, but the belay would be awkward. The bolt is probably hard to reach if you're under 6ft. Aug 12, 2023