To save paper & ink, use the [Hide] controls next to photos and comments
so you only print what you need.
Wild Wind
5.9,
Trad, 60 ft (18 m),

 Avg: 2.6 from 349
votes
Avg: 2.6 from 349
votes
FA: John Lakey, Chick Holtkamp and Randy Russell, February 1978
California
> Joshua Tree NP
> Hidden Valley Area
> Real Hidden Valley
> Hidden Tower
 Access Issue:
 Climbing Regulations/Seasonal Raptor Closures
Details
The Joshua Tree National Park Superintendent's Compendium states that:
1. Vegetation is not allowed to be used as an anchor.
2. Only neutral or rock colored bolt hangers are allowed.
For a complete list of climbing rules and closures visit:
nps.gov/jotr/planyourvisit/…
Description
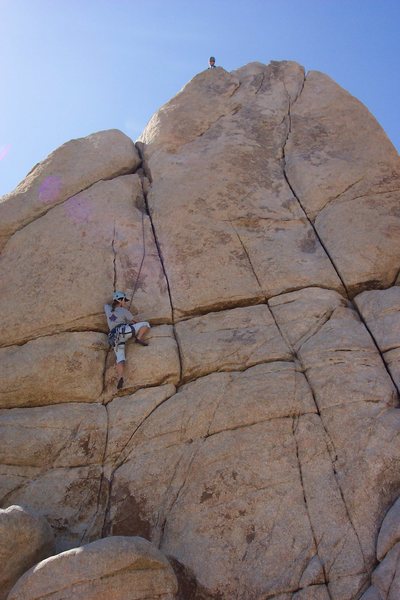
This is the prominent crack just left of Sail Away. Climb the vertical crack for roughly 40 feet (Variation 1), then follow a thin, right-leaning crack (crux, PG13) to the top.
Variation 1: You can avoid the 5.9 crux (the thin, right-leaning crack) by continuing straight up the vertical crack to a saddle on the left side of Hidden Tower. From the saddle, climb the unprotected face to the top of the tower.
Belay from the communal anchor atop the tower and rappel with a single 50m or longer rope as for Sail Away.
Protection
Standard rack to 2" with TCUs to protect thin, right-leaning section near the top.
![Leading up Wild Wind with the brightest rope ever known. To the left is Stormy Seas (red line).]()
[Hide Photo] Leading up Wild Wind with the brightest rope ever known. To the left is Stormy Seas (red line).
![Aaron Collins fun times in JTree!]()
[Hide Photo] Aaron Collins fun times in JTree!
![Dave up to the horizontal and then off into the thin crack...]()
[Hide Photo] Dave up to the horizontal and then off into the thin crack...
![Mike Morley negotiates the 5.9 crux traverse of Wild Wind. Photo: Irvin Fernandez]()
[Hide Photo] Mike Morley negotiates the 5.9 crux traverse of Wild Wind. Photo: Irvin Fernandez
![me headed up!]()
[Hide Photo] me headed up!
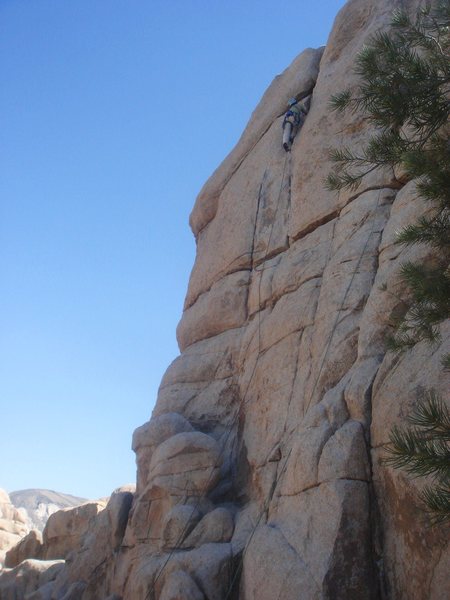
![Getting established on Wild Wind. The leader in this photo avoided the crux and continued up the vertical crack.]()
[Hide Photo] Getting established on Wild Wind. The leader in this photo avoided the crux and continued up the vertical crack.


 Continue with onX Maps
 Continue with Facebook


Redwood City
Olympia, WA
Alameda
Joshua Tree
Reno, NV
Hamilton, ON
Bomber #2 camalot goes high and left of the traverse, then into the business: small hands with beautiful dishes with lots of friction for your feet. A blue alien will go in about midway but it’s mediocre at best. The end of the traverse is less generous for foot placements, but as soon as you get a finger in that flake above you, you’re solid.
Enjoyed the bottom section of the climb also. A fun straddle-the-rock move is followed by an interesting sequence below the two parallel vertical cracks midway up. Enjoyable stems lead up the cracks, until the left peters out, and you reach the start of the aforementioned traverse.
Single rack from blue alien to gold camalot is sufficient with a supplemental nut set. Great route! Nov 14, 2019
San Diego, CA