Continue with onX Maps
 Continue with Facebook


Home Wall - Worth it? Doable?


|
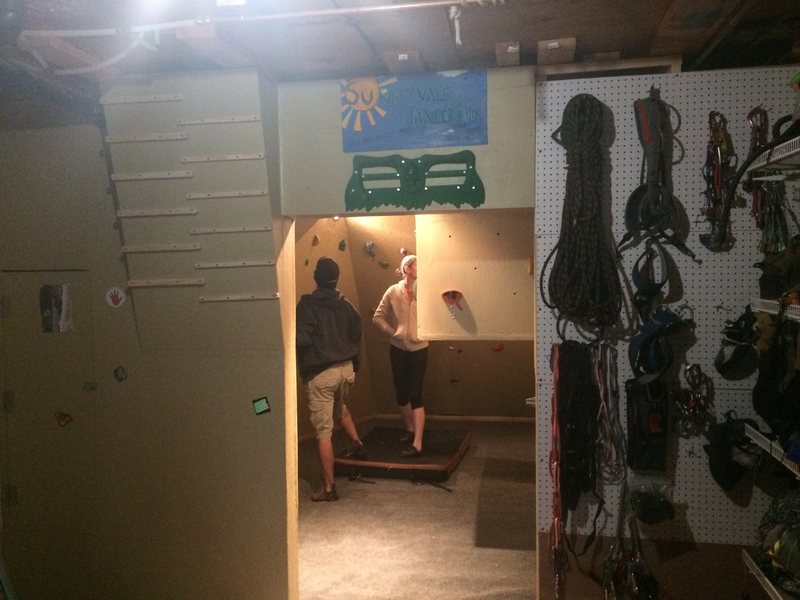
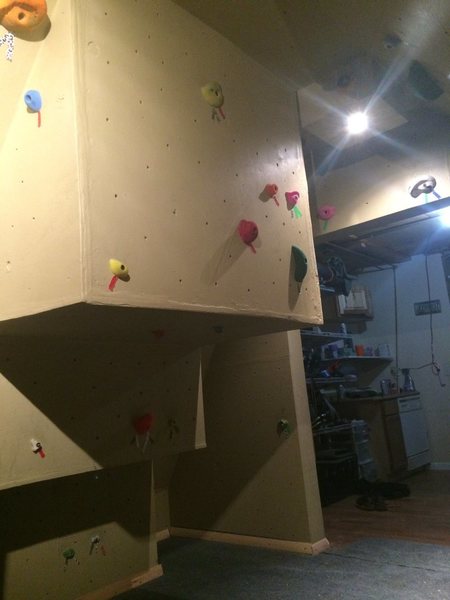
So after having my first kid and watching what little strength I had evaporating, I've been thinking of building a small wall in our basement. After looking through the awesome photos of others home walls here in the forum, I wanted to ask of those who've already done this... |
|
|
I'm gonna say it is worth it, but you are the one who decides to make it so. In other words will you use it long term is the question. What kind of space do you have? Do you have enough ceiling height? My single car Garage has good height so I was able to make mine (freestanding because I'm renting) 8' wide by 11' tall tilted back at about 30deg (not quite 3, 4'x8' plywood sheets stacked). Steep wall for me and allows for enough movement. I personally would say if you cant make it at least that size it might not get the action needed to make it worth it. And make sure you get enough holds so you dont have to move them all around all that much. People may slam this idea but I got one of Metolious starter packs and it comes with a pretty good amount of decent holds. You will want to invest in some extra, good, hand holds though if you make the wall steep. |
|
|
I built a 16' modular woody in my backyard about six years ago, and it is totally worth it if you're really into climbing. Definitely a commitment. |
|
|
If I was the only one climbing it, I think I wouldn't use my woody very much. For me, the key was putting it in my garage, where it's easy to open the door and make it the center of a barbeque and climbing session. Having friends come over climb- whether they climb harder than me or have never tried- makes it totally worth it. Having friends that climb harder than you come over is also nice because they can set problems and sequences that challenge you. |
|
|
I built mine this year, and it's been awesome. I was only able to make it 8' tall. So it is 8' by 16' long. And one of the panels is adjustable angle from vertical to 45 degrees, which makes it much better.one of the issues of a home wall is its hard to set problems that are hard for you. But if it's an adjustable wall, a V1 at vertical becomes much harder at 30 degrees! |
|
|
It's totally worth it. I had a membership to the local gym here, but they expanded their kids program and scheduled it at the same time I was off work. Needless to say, not doin it. So I built my own wall at home. I did 100% of the work, and it wasn't as hard as I thought it would be. I haven't worked with wood since middle school shop class, and I've never done carpet or electrical prior to this, but the finished product looks professional. It took about 3 months and $2000 all together to finish. When in doubt, just do it. |
|
|
Hey Brian, |
|
|
I think the key is to use your wall as a training tool rather than a way to "climb routes". Unless you have unlimited space and money, your wall isn't going to be as interesting or challenging as even the smallest commercial wall. So rather than try to keep an interesting array of "routes" (and you know how quickly they can get stale), set problems that you can do reps and/or circuits on for a structured workout. For example, I have a wall in my one-car garage with 14 marked problems, each being 5-10 moves long. I mostly get busy on there in the early spring, and initially I can do maybe half the problems in one session. But I get out there 2-3X/week and by the time summer has truly arrived I can manage all 14 in one session. This seems to correlate with a 2 grade increase in my crimpability and pump resistance outdoors. YMMV. |
|
|
Thanks for the advice. My space is maybe 7' tall by 12' wide. I'm fairly positive I'd use it and the space isn't used for anything else. Thanks again. |
|
|
I built a small 30 degree woody that is two 4x8 sheets in size shortly after my first kid was born. He'll be three this December. I thought it has been totally worth it. I'm climbing stronger and more confidently than before the kid. |
|
|
Building a home wall was the best thing I have ever done to improve my climbing. I climb way harder now than when I used to go to a climbing gym. Also, I can get strong without ditching my family for hours each week. I'm 36 with a wife and three sons, and I'm as strong as I've ever been. |
|
|
Climate control, Climate control, Climate control, worse thing about my wall in my garage. In the summer, in the Midwest, hot and hella humid. In the winter, It took the propane heater 30 minutes to get it to an ok tempture. In the late winter/early spring and late summer/early fall like right now it is perfect! So again Climate control, Climate control, Climate control, But they are useful Build it for training and a few short power problems. Also don't get fancy, just build a 30 to 45 degree wall. And to switch it up make volumes to help change the angles here and there. If you can go with screw in t-nuts. Enjoy and happy climbing. |
|
|
One more thing... Don't paint your wall or use a sand paint mix. I did this and had nothing but problems. My wall was indoors so weather wasn't an issue. If you have yours outside different story. But indoors. First the sand mix was like road rash if you knocked your knuckles on the wall I ended up scraping it all off. Two the paint actually stuck to the holds in the humid conditions of the garage. |
|
|
Capt. Impatient wrote:One more thing... Don't paint your wall or use a sand paint mix. I did this and had nothing but problems. My wall was indoors so weather wasn't an issue. If you have yours outside different story. But indoors. First the sand mix was like road rash if you knocked your knuckles on the wall I ended up scraping it all off. Two the paint actually stuck to the holds in the humid conditions of the garage.Agree with the sand. I did this, and if you have any problems that involve a dyno, or any dynamic move really, you will scrape all the skin off whatever touches the wall. In retrospect I would still do it on vertical walls at the base, just for the occasional smear, and I have a few problems that require a flag for balance, but overhanging sections, not necessary. As far as paint sticking to the holds, that most likely depends on where you live. Here in CO it's not a problem, and as long as you let the paint dry for an adequate time, it won't stick. It looks much more professional painted, and I'm nowhere near being a good carpenter, so there are some gaps between the wood that I had to use quite a bit of caulk to seal up. Without paint, my wall would look terrible. |
|
|
I read after I painted my wall. 'If you can smear on plywood you can smear on anything'. Next wall I build will have no paint. Don't worry about gaps and imperfection. I just called those features on my wall |
|
|
If you haven't seen it already you may want to look at THIS thread for inspiration. |

|
Gunkiemike wrote:I think the key is to use your wall as a training tool rather than a way to "climb routes". Unless you have unlimited space and money, your wall isn't going to be as interesting or challenging as even the smallest commercial wall. So rather than try to keep an interesting array of "routes" (and you know how quickly they can get stale), set problems that you can do reps and/or circuits on for a structured workout. For example, I have a wall in my one-car garage with 14 marked problems, each being 5-10 moves long. I mostly get busy on there in the early spring, and initially I can do maybe half the problems in one session. But I get out there 2-3X/week and by the time summer has truly arrived I can manage all 14 in one session. This seems to correlate with a 2 grade increase in my crimpability and pump resistance outdoors. YMMV.This. A system type wall will of more value for training AND take up less space. With this sort of setup, you can get away with just an 8x8 wall. It can get boring though so just keep that in mind and have a good training plan in place. |
|
|
Thanks again for the advice everybody. Any tips on how to begin designing something other than just an angled wall? |
|
|
Brian C. wrote:Thanks again for the advice everybody. Any tips on how to begin designing something other than just an angled wall?I started with a simple 30 degree wall in the furthest corner of my room, then went from there. It is nice to have some deviation from just plain angles, but depending on space, a simple overhang or two is the most efficient use of space. A double angle section could add a break from monotony and add an extra challenge.  Also consider building volumes to mix it up. I noticed as I was building that small variations in angles (less than a degree) led to significant gaps in my measurements. For me, it was best to visualize what I wanted, then repeatedly measure again and again after each finished section. You can build a cardboard model, or even use CAD software if you are so inclined. If you're not a skilled carpenter or engineer, don't expect all your measurements to work out perfectly. I found out halfway through my build that my house settled slightly, and wasn't truly level, which added to even more complications. Measure, measure , measure, then make a few cuts here and there. You don't have to have a solid plan with everything blueprinted, but at least a general idea of what you want is definitely necessary, unless you want to spend a ton of money on unneeded buildings materials. |
|
|
Hello climbers, Defenetely worth for me! I hesitate a lot, and this is why I shear my experience with you all!! I live in an apartment, so not a lot of room to build a fix wall, but because of lockdown I was really miss the training. I design and build a adjustable (0°,5°,10°,25°) self-standing wall that can be unmounted in less than 10 minutes and be stored behind a door. :) I spend a lot of time to solve many issue related to my specification and needs: - low budget (less than 300$) - few hours of free time (after work and family duty) difficult to find time to work on that project - small place to store it (must also light-weight to be stored) I design and made the structure, the wall, the holds, everything. I am making videos to explain all the process; I hope that can help someone. If you have any question do not hesitate to ask, I will answer as soon as I can. https://www.youtube.com/channel/UCfr9CaFoxS64_-55BeITWaA/ The result is great and I really enjoy climb on it...waiting the spring to co climbing outdoor again! I hope that it can helps! Stay safe and climb hard! :) Luca 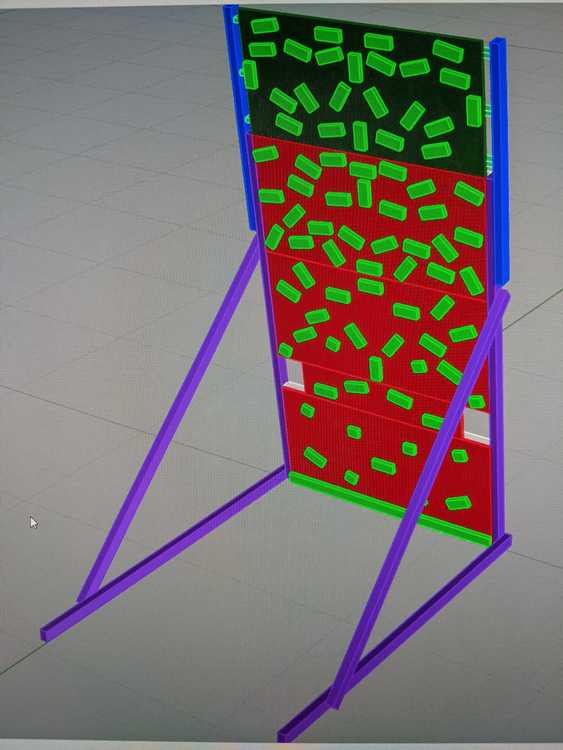 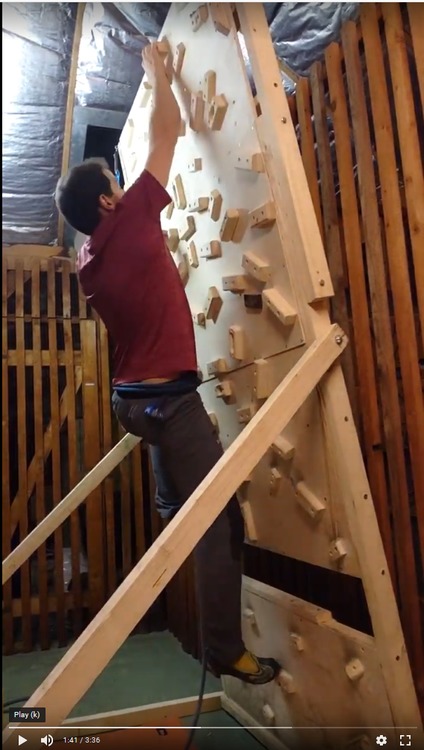 |
|
|
My story is a little different but ill share it in case anyone wants to try the same, more involved route, that I did. I work seasonally, nonstop for about 6 months in the warmer months, so I needed to build something if I wanted to climb at all. I saved up and built a Tension board with sets A,B, footholds and the lights. I attached it the outside of a cabin, with some monster gate hinges and a 6x12 ledger (which serves as the foot board) attached to the foundation. The top is held to the building with unistrut, and I keep a 4x4 winch, powered by a small car battery with solar panel, attached to the back. The unistrut is bolted onto the building and it attached with wingnuts and washers to the wall. This way I can get an adjustable angle on the wall. Its not quite as simple as a commercial gym, but I can change the angle myself in less than 5 minutes. I also opted for the lights setup to use with the app. Like has been said here many times, the key is setting problems that you do not get bored with. That is one major but taken for granted thing with a gym, you are paying for someone to set. I gawked at the price of the lights initially, and spent a season without them. It is difficult to keep yourself mentally focused enough to set routes while also staying at your physical limit. They aren't mutually exclusive supplies, and it can be draining. This last season I bit the bullet, bought the lights, and my climbing time at least tripled. Climbing other people's problems was a game changer. I also chose tension bc of the wood holds and I wouldn't choose anything else. I can put in a 3 hour session if I feel like it and my skin is never the limiting factor. I would have put mine inside but I don't have the space (and tension was only set up for 8 x 12 back when I built it.) But outside hasn't been any issue really. I used simple polyurethane to treat the boards, pressure treated Doug Fir 4x4 for the framing. 2x4 probably would have been fine but I had the 4x4s. I usually leave the wall between 20 and 40 degrees, and I stapled visquuen across the back. It rains pretty hard up there but it's also not humid so it hasn't caused any issues I see. Three seasons outside and I see some cracks on some set screw holes, but I'm not positive I that isn't from overtightening. I take all the holds down and wrap it in visqueen for the winter when I leave. The whole place usually gets buried in snow. Takes me like half a day take to set up and take down each year. All told I spent around 3k on it. The vast majority was holds and the lights. I justified the expense bc it is my only climbing for half the year and I realized I go a little crazy working nonstop without climbing. It's a very solid outlet. |