
 Continue with onX Maps
 Continue with Facebook


Powers 3/8" PB+ bolt design, removal tools

|
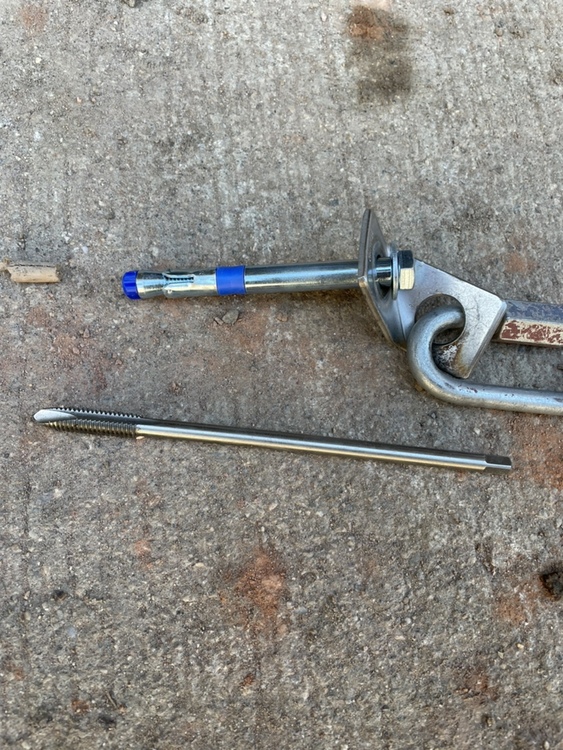 The old methods and tools for 3/8" 5-piece don't work for this redesigned bolt. Instead of a long expansion sleeve that is relatively shallow in the hole, there is a long spacer and a small but thick expansion clip that is deep in the hole, beyond the reach of a typical tap (2.25" deep on the 3.5" version). Instead of a cone with a tight fit against the rock, they made the cone under-sized so that the diameter is 0.369"- it doesn't touch the rock. To compensate they added a threaded plastic end cap that is responsible for holding the cone in place as you start to tighten it. It seems to me that this redesign might be more tolerant of smaller diameter holes from worn out bits. It also makes them easier to extract. To remove:
~$15 tool: 5/16-18 tap x 6.00" OAL https://www.msdiscounttool.com/catalog/product_info.php?cPath=1101&products_id=97357 |

|
Thanks Greg! Also, please don't be deceived by Fixe selling PB+ bolts as "5-piece bolts" - plated 5-piece bolts ("Power-Bolt") have not been made for years, and are not available outside of occasional eBay sales of old bolts. Power-Bolt+ are not 5-piece, and Fixe shouldn't be selling them as such - and should not be selling 3/8" ones at all. The 1/2" PB+ is more similar to the old 5-piece in strength (it has the same size bolt core, not a reduced size core like the 3/8"), and has a dust cap that actually works better in soft sandstone than the old ones, so the 1/2" version can be appropriate for soft desert sandstone where the occasional wetting from rain simply evaporates out through the rock. The PB+ is not made in stainless, and the stainless Power-Bolts are the same design as they used to be, and are appropriate to still call 5-piece. |
|
|
Greg Barnes wrote: Thanks for pointing this out Greg! Ive been saying this ever since the redesign, though unfortunately it’s not the first time a company has been irresponsible with what they sell. Greg’s method for removing the PB+ works flawlessly, until you drop your tap and break it. Here’s a good alternative if you are replacing with 1/2”:
|
|
|
Has anyone tried using a self tapping screw instead of a proper tap for pulling? It seems like it would alleviate the brittleness issue and no one cares that it isn't going to create clean threads. I would guess the tapping threads will wear out fairly quickly, but for the price difference it seems reasonable. I would guess a proper tap is preferred for 5 piece since the thin sleeve gets mangled even then, but if this sleeve is thicker maybe it can take the abuse. |
|
|
Alex R wrote: A quick search doesn't return any 5/16" self-tapping screw that is long enough to reach the expansion sleeve. I imagine the price for a 3.5" self-tapping screw might be more than half the price of the tap since I saw short ones selling for $5/each. Still cheaper, but unlike the T-handle wrench you would have to either use a hanger or pliers to hold the end of the screw. The broken tap issue happens more with the thin sleeves when a careless angle sends it biting into rock and steel with too much torque. This expansion clip looks like easier work for a tap than a real 3/8" 5-piece bolt. |
|
|
Who wants to guess what percentage of these PB+ in the field were sold by Fixe USA? |
|
|
timothy fisher wrote: I'm not going to guess, but I've unfortunately seen them around Utah. |
|
|
timothy fisher wrote: I’d be willing to bet 50% at least, though it wasn’t just Fixe. Climbtech sold them for over a year before cleaning up their act. The 3/8 PB+ is pretty common in Montana limestone. I removed a couple dozen this fall, all with signs of corrosion around the bolt/cone interface. It’s worth noting that these bolts should be replaced before corrosion becomes an issue. I could see clean removal becoming an issue once the bolt seizes up in the cone as it won’t take much force to break the 1/4” machine screw. |


