|
|
M Hanna
·
Nov 9, 2019
·
Seattle, WA
· Joined Apr 2015
· Points: 5
|
|
|
Josh Janes
 ·
Nov 10, 2019
·
Unknown Hometown
· Joined Jun 2001
· Points: 9,999
·
Nov 10, 2019
·
Unknown Hometown
· Joined Jun 2001
· Points: 9,999
Great setup!
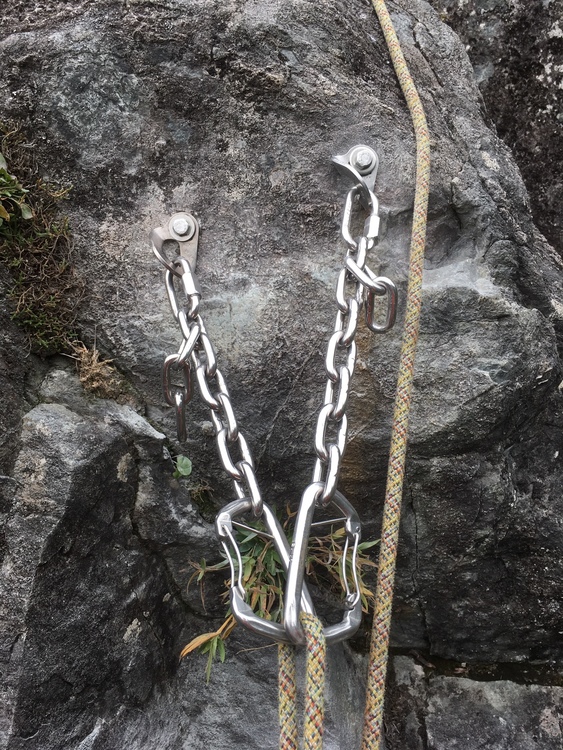
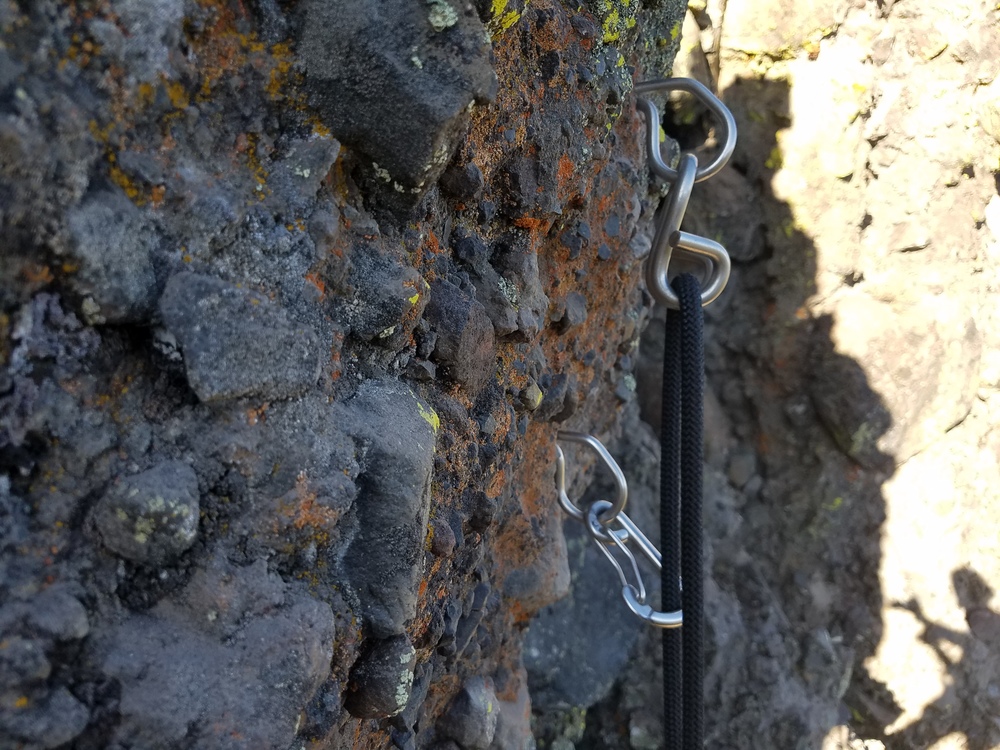
Lower ‘biner will get worn when lazy or clueless climbers ignore the pigtail and lower off only the ‘biner.
I‘d suggest using a captive pin carabiner or standard steel carabiner (if theft is not a concern) from the onset to simplify replacement.
Also staggering the bolts just enough that if the upper bolt did somehow fail, the rope wouldn’t drop across the gate of the lower carabiner and open it - thus defeating the redundancy. But not so much so as to create friction or twists.
|
|
|
Mike Bond
·
Nov 10, 2019
·
Kentucky
· Joined Aug 2009
· Points: 3,191
Josh Janes wrote:
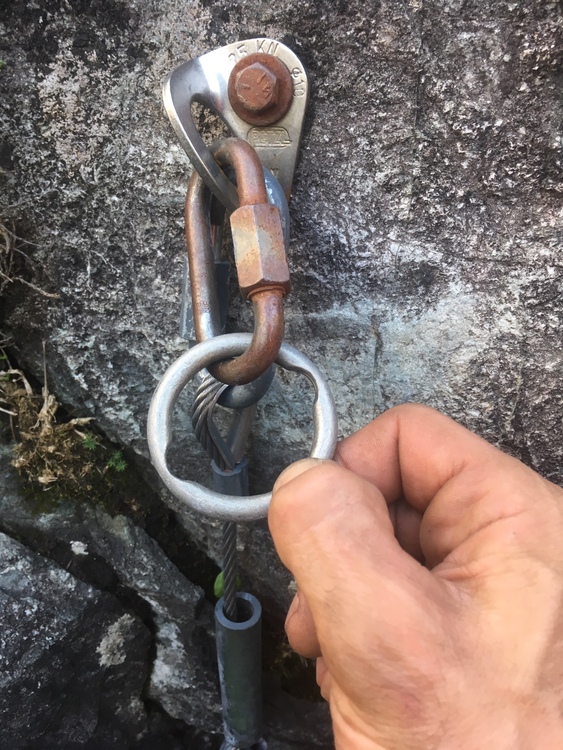
Also staggering the bolts just enough that if the upper bolt did somehow fail, the rope wouldn’t drop across the gate of the lower carabiner and open it - thus defeating the redundancy. But not so much so as to create friction or twists. I found you can't offset them much at all on the horizontal axis or it gets weird, but it seems that facing the gate away from the very slight offset is the right thing to do. To this point made by Josh, it would be a tad better in the setup in the picture above to face the gate the other direction. That is, it should be faced to the right in the unglued bolt picture. In this case, the top bolt is ever so slightly to the left of the bottom bolt, and then the biner should then have it's gate facing right. So, should the top bolt fail, the falling part of the rope is for sure across the spine. Same concept as when clipping draws before a traverse. Also, in the set up as is, there is a chance that the rope coming out of the pigtails left side could also clip into the biner when someone lowers (if they move slightly right). This would leave that biner effectively unclipped; as both sides (aka a loop) of the rope would be in it. Bobby, Both of the anchor pictures you posted higher up have this in the way I describe. It is only this last picture (of the unglued bolts) that has the biner facing the unpreferred way. Also, I think you must use a captive biner. I have seen people take almost anything they can from an anchor. I don't understand it, but if it's easy to remove; it will be taken.
|
|
|
Nick Drake
·
Nov 14, 2019
·
Kent, WA
· Joined Jan 2015
· Points: 651
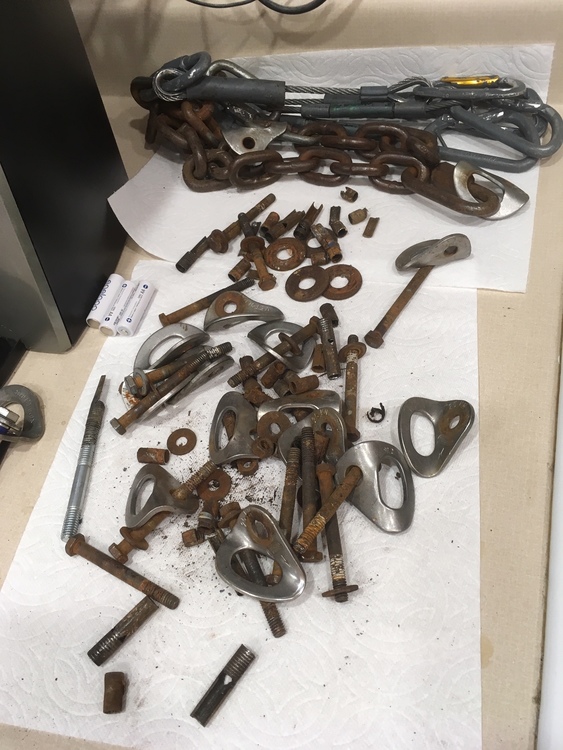
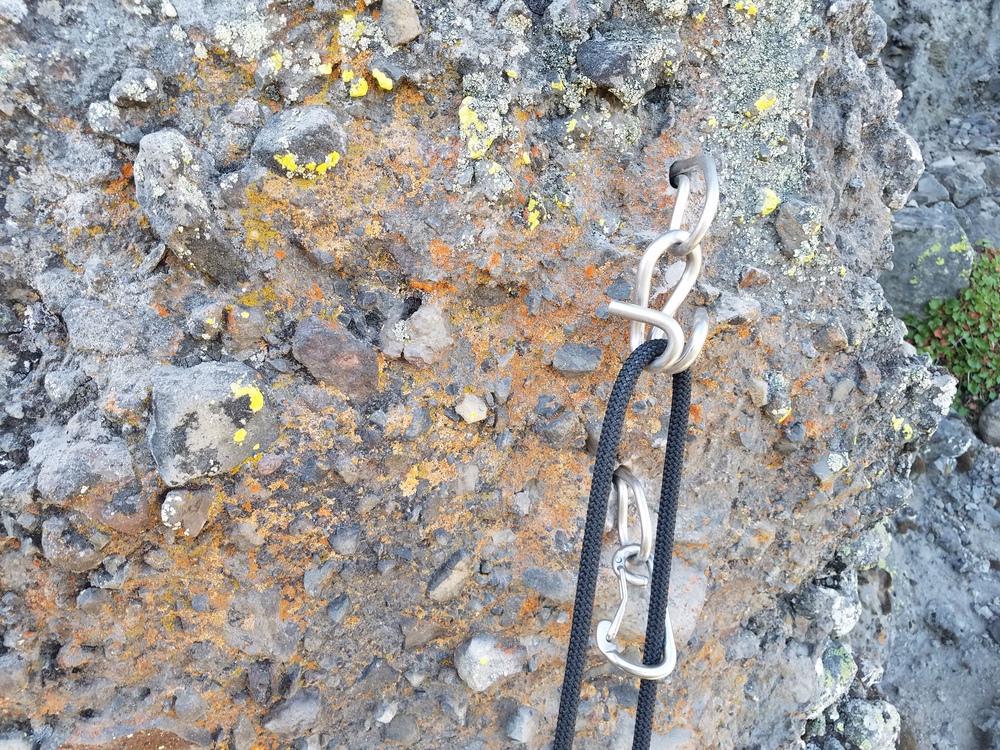
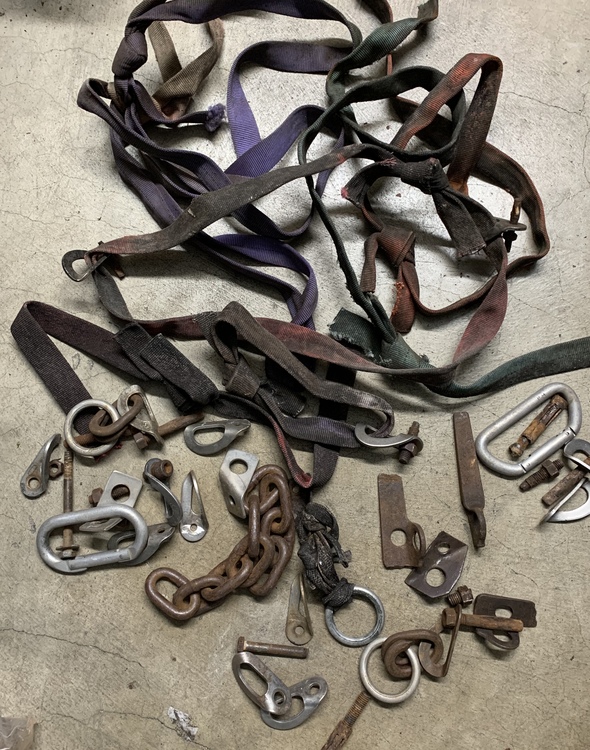
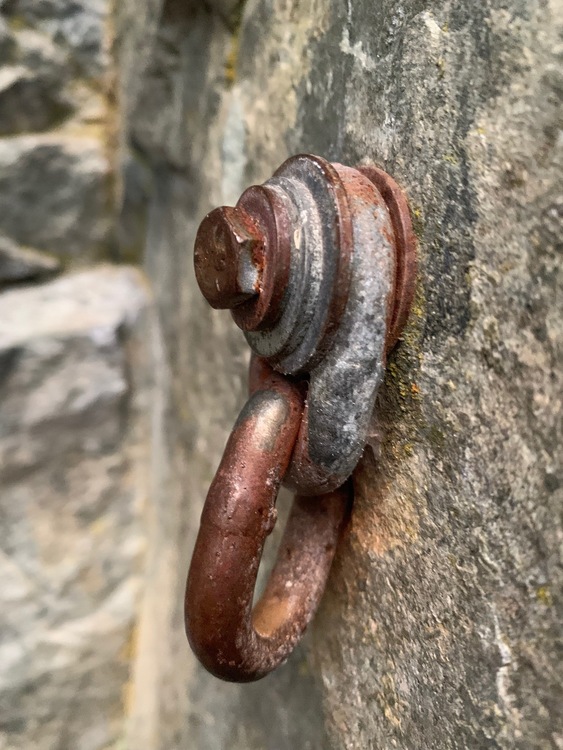
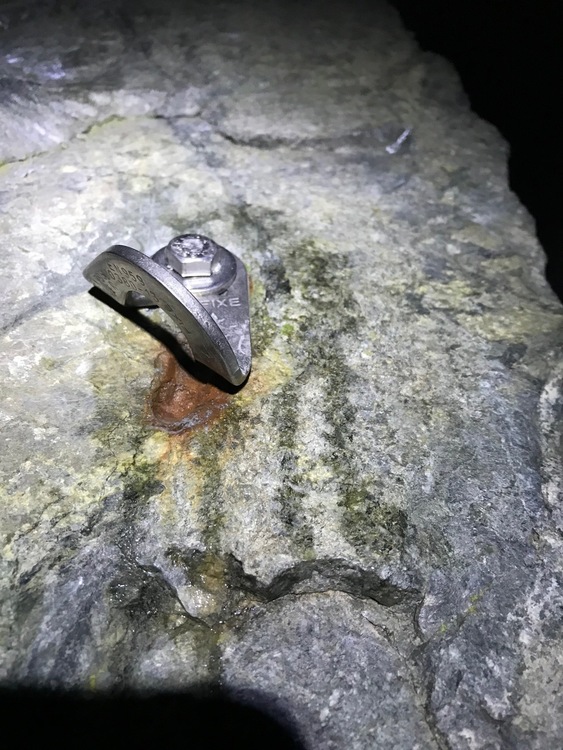
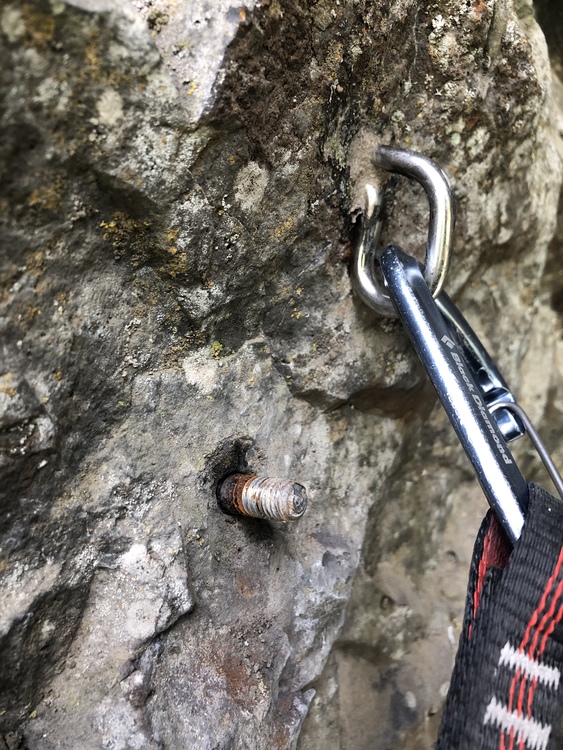
Some old junk
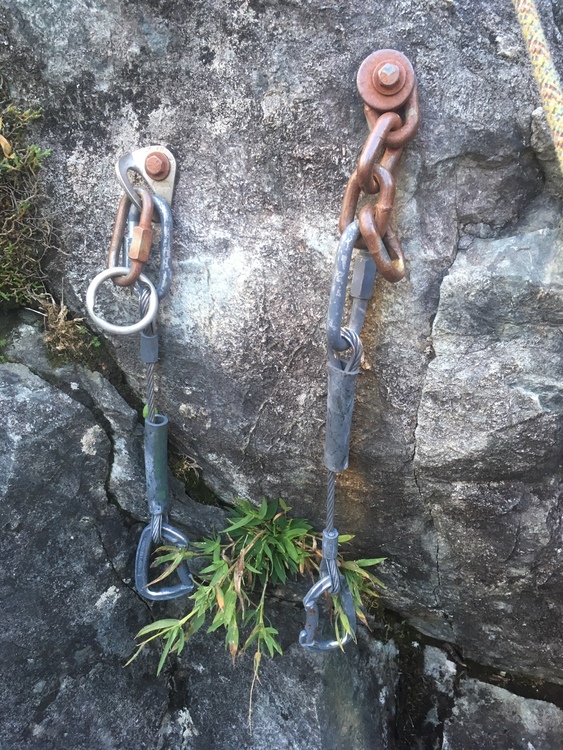
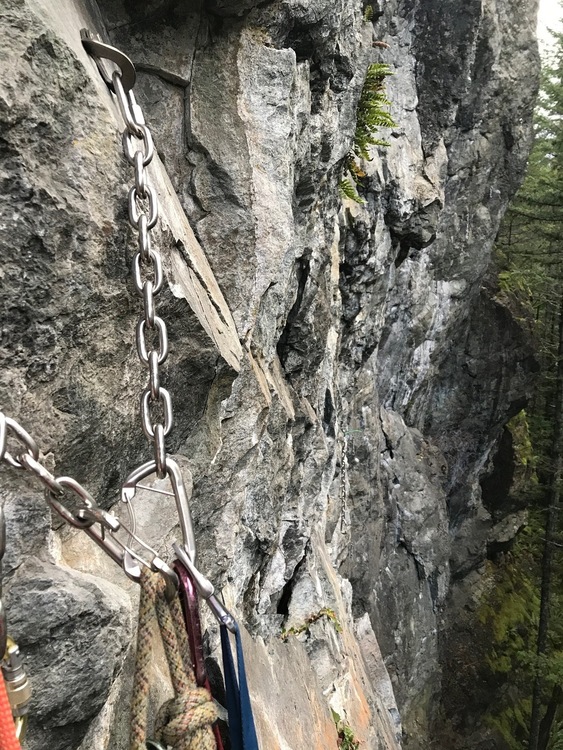
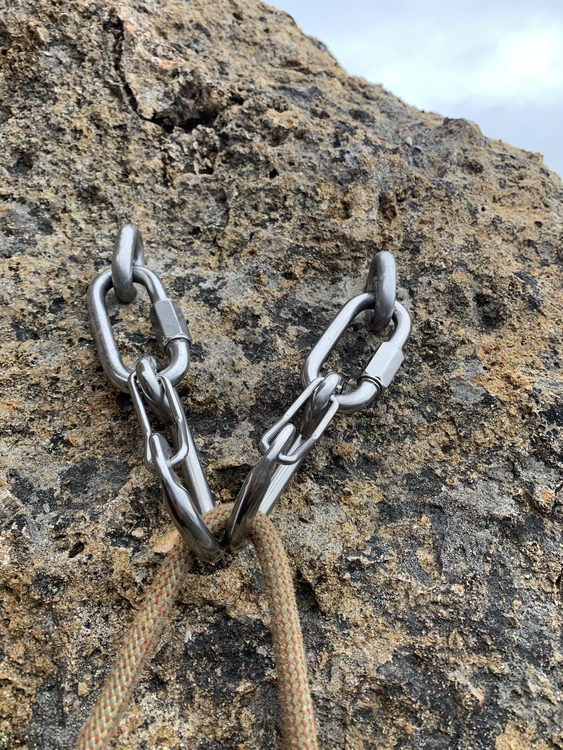
Aluminum ring had one wall worn through completely, not sure when the the steel rope draws were added and why this wasn't pulled off. The sleeve on the washer stack bolt was so rusted that it crumbled to dust in my finger tips. The tabs at the cone were not as rusted though, couldn't just pull it out from the cone. Tapping was a royal pita New set up, all SS including chain and lower off krabs. These aren't nearly as thick as the CT mussy, but for a medium traffic route that won't require replacement too often not having them rust is nice. The last photo shows the big drawback of the old horizontal placed anchors we've had in the US. When you're already lugging out 70+ lbs of gear for rebolting throwing an angle grinder on top of that isn't reasonable and I flat out didn't have room in my 65L pack. Thankfully this route has easy top access from a large tree so I can go out and cut off those extra links later this month while doing another route, but on things you have to lead/stick clip and ascend up it's that much more of a PITA. The only possible downside I can see to the vertical anchors is that we're not doing 1 for 1 on replacement with them, but when you're drill a new hole you've got more than enough dust to patch up the other horizontal with epoxy.
|
|
|
Nick Drake
·
Nov 14, 2019
·
Kent, WA
· Joined Jan 2015
· Points: 651
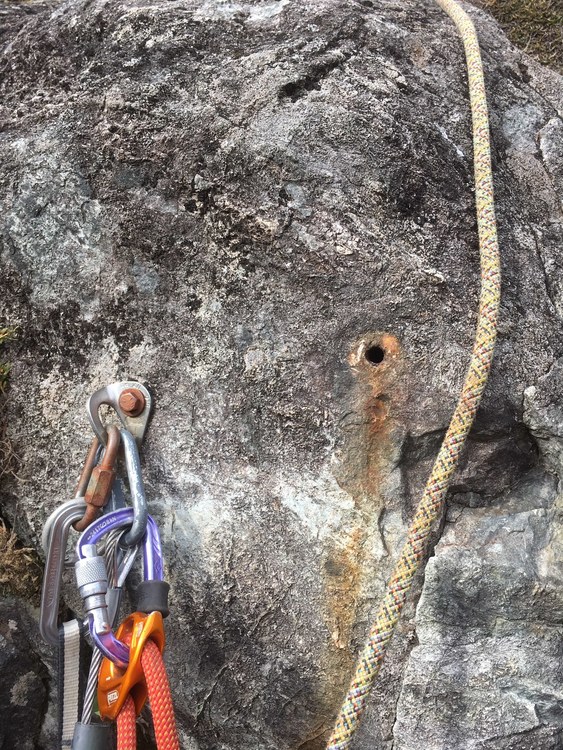
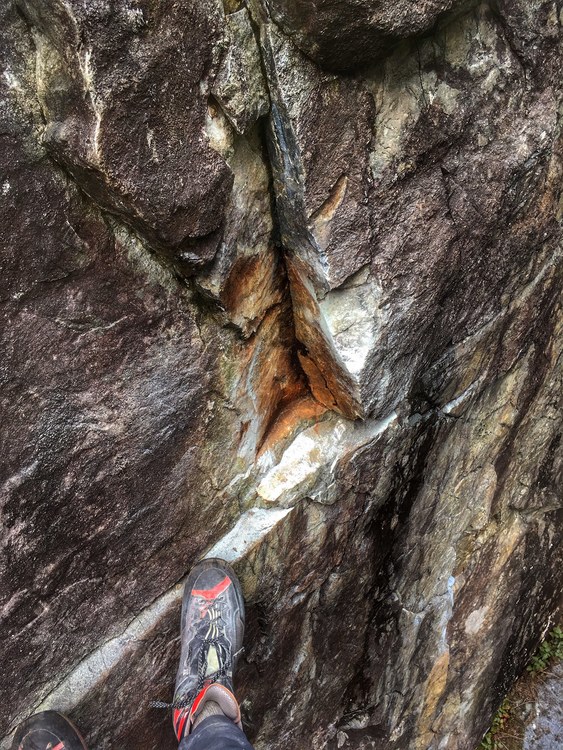
Had a very loose flake directly above one of the bolts on that route, comments about the "death flake" ran back a few years. It was damn hard to avoid using the flake both as a hand and foot while keeping the route a 10b.
Flake was only pinned in at the top by an acute angle, not solidly resting on anything below. I considered drilling through it and into the main wall then running in rebar with epoxy and patching the holes given how large the flake was, but It seemed like there had been water behind it. So I put tape on the top, waited for the next rain and went back to look. Sure enough it was seeping heavily under the flake, even if I tried to epoxy this thing in water was seeping out behind it and with freeze thaws eventually it would give. Gotta pull it.
Figured I would run in an elcheapo bolt to hold the heavy flake and lower it to the ground so as to not damage any hangers on the adjacent routes I just replaced.
![]() Then I busted out the 3' pry bar and while I could rock the sucker around and out nearly an inch it was just pinned at the top enough to not pry out. Back to the drawing board, I got some wedges and figured I would split off the top 4" or so where the flake was pinned. I couldn't get a weekday to do the deed, had to go back this time on a weekend and talk to people at the base of the crag first, get everyone clear a couple routes to each side. Appointed a party at the access trail to stop anyone walking by. Ran a couple holes in the top of the flake and drove in the wedges, seemed to be splitting well and like it would work. You can guess what happens next, the pressure from the expansion bolt I put in splits the rock in every direction. I get my thighs under the flake and manage to squeeze it to hold them in place long enough to grab each 10-20lb chunk and throw it far off from the base of the cliff into the woods. What a stressful pain in the ass. Death flake is gone now, glad I pulled it because it clearly had heavy water flow/seepage from the crack in the main wall here. The new hangers below and more importantly belayers are now safe.
|
|
|
Mark Hudon
·
Nov 17, 2019
·
Lives on the road
· Joined Jul 2009
· Points: 420
Bobby Hutton wrote: I snapped a few pics when I was out putting in a new route today. Excuse the fact that the bolts aren't glued in yet and my static work rope.
This setup looks great but it’s going to be a total mindfuck for a lot of climbers (You know who I’m talking about when I say “a lot of climbers”.)
|
|
|
Kemper Brightman
·
Nov 17, 2019
·
The Old Pueblo, AZ
· Joined Dec 2011
· Points: 2,971
Mark Hudon wrote: This setup looks great but it’s going to be a total mindfuck for a lot of climbers (You know who I’m talking about when I say “a lot of climbers”.) Yeah, I actually bet a bunch of those climbers just lower off the single biner since it's familiar...
|
|
|
Mark Hudon
·
Nov 17, 2019
·
Lives on the road
· Joined Jul 2009
· Points: 420
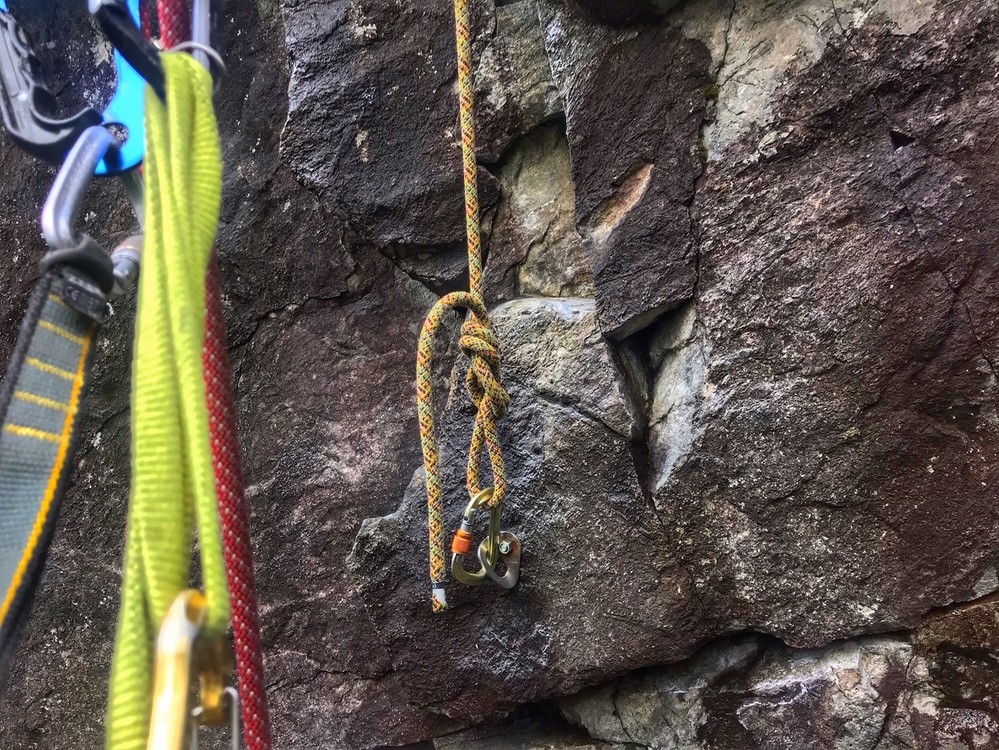
Someone is going to leave a sling connecting the top bolt to the lower one and then rap off the biner, guaranteed.
|
|
|
climber pat
·
Nov 17, 2019
·
Las Cruces NM
· Joined Feb 2006
· Points: 286
Mark Hudon wrote: Someone is going to leave a sling connecting the top bolt to the lower one and then rap off the biner, guaranteed. That's happened to me. And they stole the hardware they could get off. I used locktite when i replaced it.
|
|
|
Jim Titt
·
Nov 18, 2019
·
Germany
· Joined Nov 2009
· Points: 490
Mark Hudon wrote: Someone is going to leave a sling connecting the top bolt to the lower one and then rap off the biner, guaranteed. They learn in the end, some faster than others.
|
|
|
Adam Wood
·
Nov 18, 2019
·
seattle
· Joined Jun 2017
· Points: 1,428
|
|
|
Nick Drake
·
Dec 9, 2019
·
Kent, WA
· Joined Jan 2015
· Points: 651
Did a route that was all washer stacks on chain from around 90 this weekend. Half the bolts were bent, all extremely rusted and 3 of the 7 snapped off in the hole trying to remove. I've drilled through rusty sleeves/cones before, but didn't have the guts to try going through a whole bolt with only two bits and two batteries on us, any one have luck drilling through an actual bolt to reuse a hole?
|
|
|
Matthew Jaggers
·
Dec 9, 2019
·
Red River Gorge
· Joined Sep 2017
· Points: 695
My new setup as of late. Gives the convenience of a quick clip, mixed with the durability of a hard wearing pig tail for the lower off. Twist Bolts, Stainless QL and Pigtail, galvanized chain, and a cheap biner.
|
|
|
DrRockso RRG
·
Dec 9, 2019
·
Red River Gorge, KY
· Joined Sep 2013
· Points: 815
Ma Ja wrote:
My new setup as of late. Gives the convenience of a quick clip, mixed with the durability of a hard wearing pig tail for the lower off. Twist Bolts, Stainless QL and Pigtail, galvanized chain, and a cheap biner. Is this at the Red? Where at?
|
|
|
Matthew Jaggers
·
Dec 9, 2019
·
Red River Gorge
· Joined Sep 2017
· Points: 695
DrRockso wrote: Is this at the Red? Where at? Yeah, it's in the gorge. Locals only crag currently (not my rules, just following orders), but we may post something in the future.
|
|
|
Patrick Miller
·
Dec 9, 2019
·
Indiana
· Joined May 2017
· Points: 340
Ma Ja wrote: Yeah, it's in the gorge. Locals only crag currently (not my rules, just following orders), but we may post something in the future. Ha funny. I’d say the doc. Is as local as it gets. Guy’s been bolting and rebolting for some time now.
|
|
|
z t
·
Dec 9, 2019
·
Spokane, WA
· Joined Dec 2011
· Points: 1,112
|
|
|
DrRockso RRG
·
Dec 9, 2019
·
Red River Gorge, KY
· Joined Sep 2013
· Points: 815
Ma Ja wrote: Yeah, it's in the gorge. Locals only crag currently (not my rules, just following orders), but we may post something in the future. I live full time in Campton and my backyard is adjacent to Red River Gorge geological area, does this count for local
|
|
|
Matthew Jaggers
·
Dec 9, 2019
·
Red River Gorge
· Joined Sep 2017
· Points: 695
DrRockso wrote: I live full time in Campton and my backyard is adjacent to Red River Gorge geological area, does this count for local Sounds local enough.
|
|
|
Ed Henicle
·
Dec 10, 2019
·
Santa Rosa, CA
· Joined Aug 2010
· Points: 2,369
My new favorite sport climbing anchor set-up. Fixe SS 12mm X 8cm Glue-ins, ClimbTech SS 3/8 Quick Link, Team Tough SS 10mm Closed Eye Wire Gate Carabiner. Edit: You can source all the components from Team Tough/Bolt Products - I just had a mix of hardware in the bag that day.
|

 Continue with onX Maps
 Continue with Facebook