Continue with onX Maps
 Continue with Facebook


Bolt removal tools - resources, tips, how-to videos


|
Can't make it a sticky thread, but let's see if we can keep it informative and on-topic - PM me if you have questions. This is a video for assembling the Doodad 3.0: Here is the Doodad shopping list:
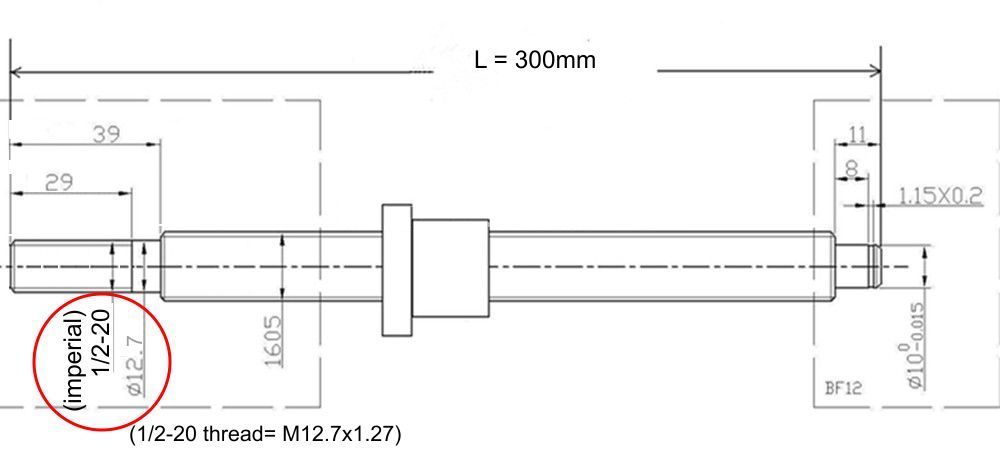
I cut and bent the ends of the spacer tube to make the footprint less likely to make an impression on soft sandstone. This is optional, but it might make the spacer last a little longer before needing to be replaced. The end can get mashed up by uneven rock. I drilled 1/8" holes into each corner approximately 1/2" from the tip, then cut with a hacksaw along the corners from the end to each hole. Fold the resulting tabs back against the outside to create a rounded foot on each wall end. Without the drilled holes the jagged end of a hacksaw cut might split/tear the tubing over time. YMMV. I cut some excess tubing to be the width of the bracket and marked two hole locations with a Sharpie pen. I drilled all the way through the tubing, but you could use shorter screws with the screw heads inside the tube (would be a pain to tighten them, tho). An alternative is to cut a wooden handle about the dimensions of a hammer handle but with a rectangular end and use all 4 bolt holes to attach it to the bracket. The bracket will work fine as it is, but I cut mine in half to save weight. Do as you will. edit to add: Since the end of the ball screw is threaded for 29 mm and you only need about 8 threads to do the job, if you ever strip the threads you can simply lop off the stripped end with a hacksaw. Wouldn't be fun, but it could even be done in the field while hanging on a rope. I have used a file on my Leatherman tool to chamfer away the last thread (while hanging) when the coupling nut wouldn't screw on. I had mangled a thread due to operator error.
Spinner tool shopping list:
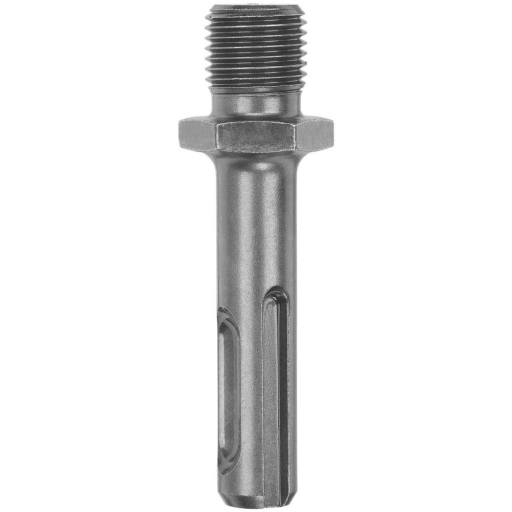
I shorten the coupling nut with a hacksaw to the minimum length for screwing on the SDS adapter. Otherwise you need an internal set screw or a stop pin. 5-Piece bolt removal [9/30/2018 update:] Geir Hundal has come up with a different method that can work some of the time- If you have a draw stud that is 5/16" along its entire length, you simply remove the center bolt and screw the draw stud in instead. Keep turning until you can tell you are rotating the cone because you have engaged all the threads. Start pulling - if the cone and sleeve are a little bit rusty, the cone will push the sleeve out ahead of it rather than cleanly re-insert itself (if the hanger were in place, the sleeve would be sandwiched between the cone and bolt head, but with nothing but air outside the hole, there is room for the sleeve to slide out.) This method is more likely to work on slightly rusty bolts than on new ones. 5-piece bolts usually require these steps - After unscrewing the center bolt, use a 3/8-16 tap to cut threads on the inside of the sleeve. Disengage the cone by re-inserting the original bolt, screwing it in two or three turns, then hitting the bolt head with a hammer to move the cone to the back of the hole and out of the sleeve. Unscrew the original bolt, then screw in a 3/8-16 draw stud to connect it to the new threads you just cut in the sleeve. Attach the puller and see if you can get it to budge. If it moves at all, back off on the tension and attempt to screw the stud in deeper before continuing. Repeat that process several times. If/when the sleeve rips apart, go back to tapping new threads. You can get a working draw stud for 3/8" bolts at O'Reilly Auto Parts for $1.69 (I called Advance and AutoZone and NAPA, but they don't stock this part). Or search the internet for 'Dorman 675-006' and purchase something that looks like this: 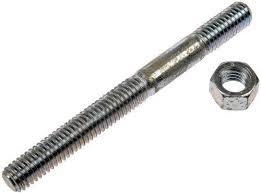 Although it has a zinc finish it is Grade 8. This unmodified stud will not help you get the cone part out, but you could use the original bolt and hanger and a funkness device instead. The ideal draw stud would also have a 5/16 reduction at the working end to screw into the cone. This modification will take you less than 5 minutes: For 1/2" 5-piece sleeves: Acme Industrial makes a high strength thin-wall insert that can be permanently screwed onto one of the unmodified 3/8" automotive studs above with some LocTite to keep it in place. Voila: you have a draw stud for removing 1/2" sleeves, no machining necessary. Acme part number 225-022376L [As of today there are about ~75 of these inserts at the factory and that is the only place in the world where you will find one. This is an exotic aerospace hardware part, so it isn't cheap: $9.00 each + shipping if you order them individually. That is the price you pay if you don't want to machine a stepped draw stud yourself. Put the knurled locking threads on the tool side as in the photo below. Carefully screw it on using two 7/16-20 nuts on the outside of the insert so you don't damage the threads with pliers! ] http://www.acmeindustrial.com/swage-sert.php 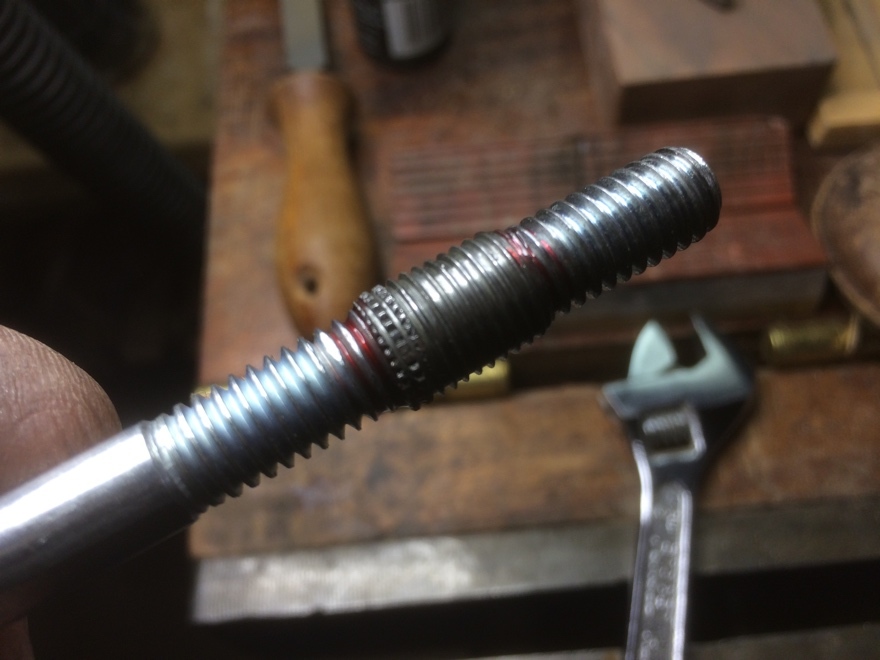 Taps: You will need a tap wrench and a tap to cut threads on the inside of the sleeve. For 3/8" bolts, use a 3/8-16 tap with a heavy duty spiral, 7/16-20 for 1/2" sleeves. They look like this: 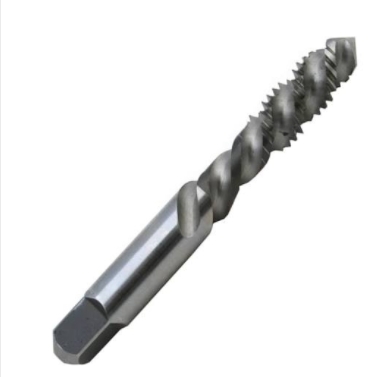 Here Dan Merrick shows off the efficiency of his version of a ball screw puller - over 600lbs of thrust by twisting the ball nut with fingers alone. Easily pulls 5,680lbs to break some 3/8 threaded rod with a wrench.
|

|
Holy shit thats a lot of work. Consider selling them? |
|
|
Fair point Tristan, but then he’d either have to donate tons of time to keep them at the same price, or mark them up quite a bit for it to be worth is time, and that would cost everyone else more. As it is, he’s giving a way all of his experimented and learned knowledge. Thanks Gregger Man! This is a great in-depth write up |
|
|
Greg - thanks so much for all of your hard work on the design and documentation of this tool! The detailed parts lists and sources are a huge help! I'm looking forward to putting one together later this spring to get to some rebolting projects for the summer! |
|
|
This is what I would call doodad 1.5 maybe? I brought one of my doodad version1 s to spain with me a few years ago, it ended up being used as a template for this one in the video that was created by a local ferrer (machinist) in mallorca to be used by the rebolting community on the island. They hold regular workshops on sustainable bolting, which to them means using titanium glue ins, and one guy (Jozua, minute 3 of the video) is really pushing the community to embrace the idea of removing the old bolts and reusing the holes if possible. Sustainable bolting in Mallorca One thing to keep in mind for you people looking to remove bolts from limestone.. In mallorca we have found the spinner to be the most important part of removing bolts. Especially with old rusty galvanized bolts, the spinner is the only thing that is needed, the rust will spin off and the bolt usually just slips right out. I would say that the doodad is only needed in the most rare cases (in limestone), and in fact is a detriment to the goal of removing the bolt. I think it is because the spinning action causes the collar to wear on the limestone, instead of on the shaft of the wedge bolt. So the groove in the shaft never forms no matter how long you spin, and then the collar doesn't catch when you pull, and then the bolt breaks (this actually happens in the video). If you're lucky, the collar is so rusty that it just .. sublimes? after a few seconds of spinning and the bolt slips right out. If you're unlucky, the collar stays in tact and wears down the limestone during the spin cycle all the way from the back of the hole to the front, until the whole thing comes out and the hole ends up just a little bit wider. It uses a lot of battery (they talk about this in the video), but nobody said sustainable bolting was cheap, or easy, right? Again, the above description applies to limestone, and possibly other soft rock. I have had great success with the doodad in granite, and in fact still use my version1 at granite crags in catalunya. Sorry to post a video in a foreign language, hopefully it is useful to the those of you in Mexico. If people are interested I would be willing to write out a translation. Happy rebolting :) |
|
|
This should be the URL for the storefront |
|
|
This tool is pretty amazing. It is incredibly easy to remove wedge bolts with this. With my inaugural use, I did have some difficulty getting a couple of bolts to start spinning with the spinner tool (maybe my drill is weak?), but once I got them spinning and then popped on the doodad, they came out with remarkable ease! It’s now actually easier to remove wedge bolts than it is to remove 5 piece bolts. |
|
|
|
|
|
Bump for more info on 1/2" draw studs added above. |
|
|
A few links from AliExpress: |
|
|
Can someone point me to a source for an appropriate quality tap for removing 5pc sleeves. I came across this one recommened in some thread but it is forever OOS. |
|
|
Jeremy Lubkin wrote: Can someone point me to a source for an appropriate quality tap for removing 5pc sleeves. This one has worked for me: https://www.amazon.com/gp/aw/d/B00F8T6F0M?psc=1&ref=yo_pop_mb_pd_title |
|
|
Ryan Swanson wrote: If a 3/8 bolt slips through the sleeve, how is a 3/8 tap going to grab the sleeve? I would think a 7/16 would be minimum, or even a 1/2 taper tap. The 3/8" is the drill size - and OD of the unit. As is 1/2" for the nice new 1/2" SS bolts being put up. The stud that goes thru is obviously less. See '5-Piece bolt removal' in the top post. I have heard they break a fair bit thus I want to get good quality and a few spares. |
|
|
Ryan Swanson wrote: If a 3/8 bolt slips through the sleeve, how is a 3/8 tap going to grab the sleeve? I would think a 7/16 would be minimum, or even a 1/2 taper tap. A 3/8 bolt doesn't slip through the sleeve, a 5/16 bolt slips through the sleeve. |
|
|
Ryan Swanson wrote: Oh you are talking about the 3/8" 5 piece. I'm sitting here wondering how the hell you guys were pulling 1/2" 5-piece bolts with a 3/8 tap, and why for that matter. I eat too many paint chips. Yep, most 5 piece bolts that need to be replaced are 3/8"ers since that was the standard bolt 20 years ago, at this point in time it is pretty rare to find a 1/2" 5 piece that needs to be replaced (at least in dry areas). |
|
|
Jeremy Lubkin wrote: Can someone point me to a source for an appropriate quality tap for removing 5pc sleeves. I came across this one recommened in some thread but it is forever OOS... Gregger Man linked to this one a while back: http://discount-tools.com/rfn-106fb.cfm (he indicated the H3, part # RFN-28577) See his discussion of it here: mountainproject.com/forum/t… |
|
|
Thanks for this information. Why not use the drill/spinner tool to remove the bolt rather than building the doodad? |
|
|
Jayson Nissen wrote: Thanks for this information. Why not use the drill/spinner tool to remove the bolt rather than building the doodad? And how would you do that? |
|
|
Ken-
I figured that Gregger has already tried this out and it didn't work for some reason. The doodad seems like it would give a lot more control over the application of torque, making it less likely to snap the bolt shaft or to shear the threads. |
|
|
I might give it a shot. I place wedge bolts because they are a lot cheaper than sleeve bolts. A friend I respect doesn't think very highly of placing wedge bolts. I figure if I pull a couple of them then I could assuage any concerns I have about placing them or decide that it is worth the extra money for sleeve bolts. |
|
|
Jayson- |