Continue with onX Maps
 Continue with Facebook


What does your Woody look like???


|
|
I've used a similar product. Really toxic to apply, and the substrate must be really well prepped or it peels. As in roughed up (60 grit paper) and primed. |
|
|
I prefer real rock or cultured stone for a crack: |

|
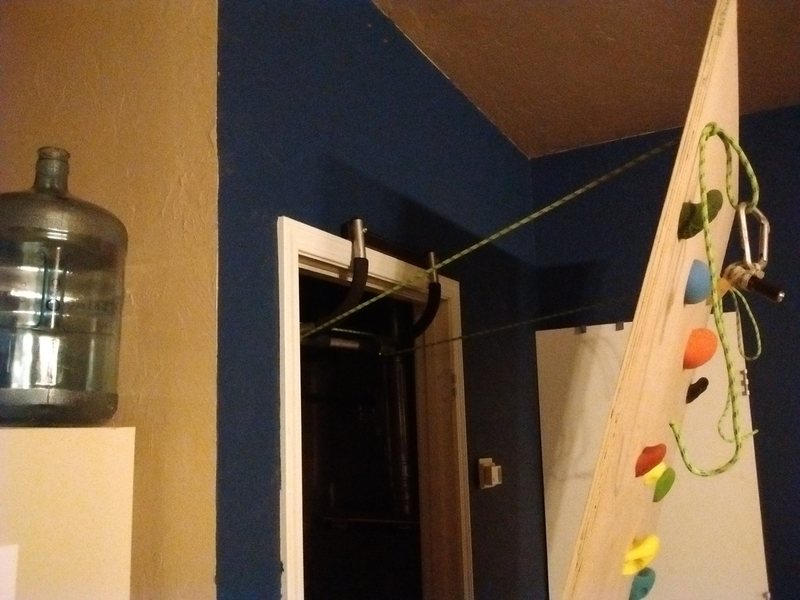
My son (2 1/2) asked for his own climbing wall for Christmas. As soon as my wife gave me the ok to build it, I immediately began trying to figure out how to make it functional for me as well. Unfortunately I built the panel first so he could have it by Christmas and hadn't decided quite how to anchor it yet. I think I've figured it out. Need to add a couple of braces to eliminate the flexing, but it climbs, the angle is adjustable, and can be stored out of the way. |

|
KevinCO wrote:I prefer real rock or cultured stone for a crackHi Kevin nice crack, have a two questions How do you avoid the sides from expanding when you jam? does it still bend a little? |
|
|
I've got a 16' long horizontal roof crack (hand crack and hand stack). I was going to use that Boat Deck stuff, but instead I found the most amazing stuff for decks/pools. Restore 10x resurfacing ($25/gallon at Home Depot). |
|
|
First we were talking about a woody now we are talking about cracks. An outsider would feel uncomfortable in this conversation. |
|
|
Check all the forum, cracks have been discussed before. i think this has trend in to try and failure community of woody builders which is great. |
|
|
Ray Lovestead wrote:I've got a 16' long horizontal roof crack (hand crack and hand stack). I was going to use that Boat Deck stuff, but instead I found the most amazing stuff for decks/pools. Restore 10x resurfacing ($25/gallon at Home Depot). This stuff is amazing. Goes on with the consistency of chocolate pudding. Hardens rock hard and bone dry grit. Looks and feels exactly like sandstone. I'll get some photos when it dries and I've got the roof crack back together.Oh do report....one is quite curious. Feel, texture, endurance (your skin and the wear and tear on the woodie), coverage (i see that it covers 40sq'/g.) !!Ouch!! That's 1/g per sheet on a woodie. I'll still use paint and sand....but....on the crack machine, this stuff sounds awesome. Oh, and how happy are you with the horizontal crack? I know you are training for the veda, I am torn as to it's benefits (i seldom climb cracks past 20º past vert.) ? |
|
|
OK I finally got this torture device (roof crack) finished! |
|
|
I can vouch for the restore paint, it holds up well on old decks in marine environments. |
|
|
How is the texture feel? not like sand paper? |
|
|
It feels exactly like it looks. It has a dry flat paint feel. Like sandstone really. But bumpy. |
|
|
Sanllan wrote: Hi Kevin nice crack, have a two questions How do you avoid the sides from expanding when you jam? does it still bend a little?It is a standard Crack Machine with 2x10s and all thread for adjustability. The all thread keeps it rigid, and I screwed angle iron to both sides to improve rigidity. I glued cultured stone (L shaped so that it wraps around the boards) onto the 2x10s with PL Premium. The cultured stone also contributes to rigidity. The different thicknesses of the stone present different size jams. Also, the edges of the stone can be used for face climbing. Ray, that is a great idea to use that product. I probably would have used that instead, since my crack weighs over 400 pounds and if I move, I am not looking forward to relocating it. |
|
|
Having had a brutal first go at it, I have to point out that it is TOO gritty. I'll be sanding it down a little in areas where my hands go vs. where my shoes go. |
|
|
For the crack guys, I have found that the really fine grained hobby sand mixed into a good flat exterior acrylic latex paint produces a very nice fine-grained texture reminiscent of very fine-grained sandstone. Its mild enough to go tapeless, and not too hard on shoes and other equipment, especially when compared to the larger grained hobby sand or other larger grained sands. |
|
|
This thread is awesome! |
|
|
Mine is currently just flat, and I wish I had some variety to it. I'll add a good-sized volume to accomplish it instead of rebuilding, but I'll add it on there. Hope that helps. |
|
|
I have a lot of home wall, my suggestion is go with one angle. If you mix it in so small a space you really end up with 2 narrow walls, fewer problems within that confine. I would also, if you are asking, go with the steeper wall. Gives you a little more length (another row of t-nuts?) and as you get stronger, and the holds feel larger, you will be glad. I have over the last 2 years increased the pitch on most of my sections. |
|
|
Thanks for the info, I think I will just stick to a single angle for now and add volumes down the road for more variety. Plus, that should be much easier to build. |
|
|
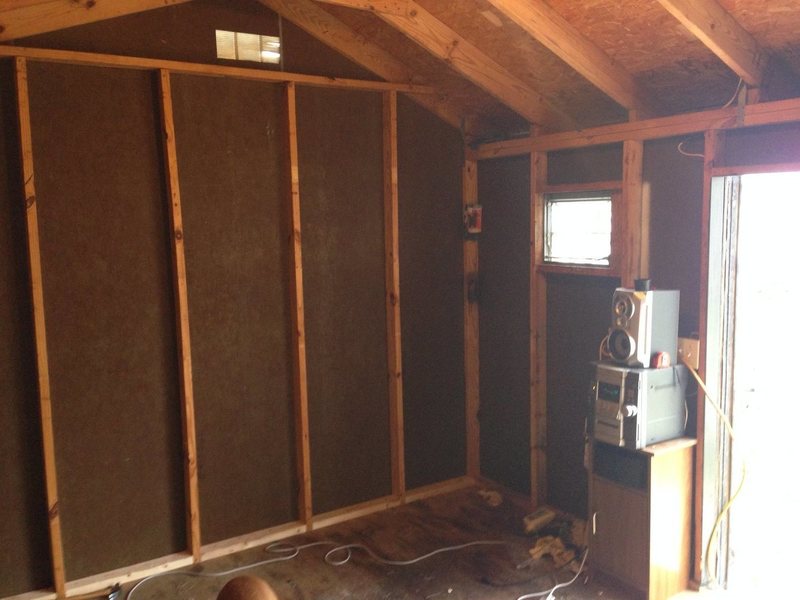
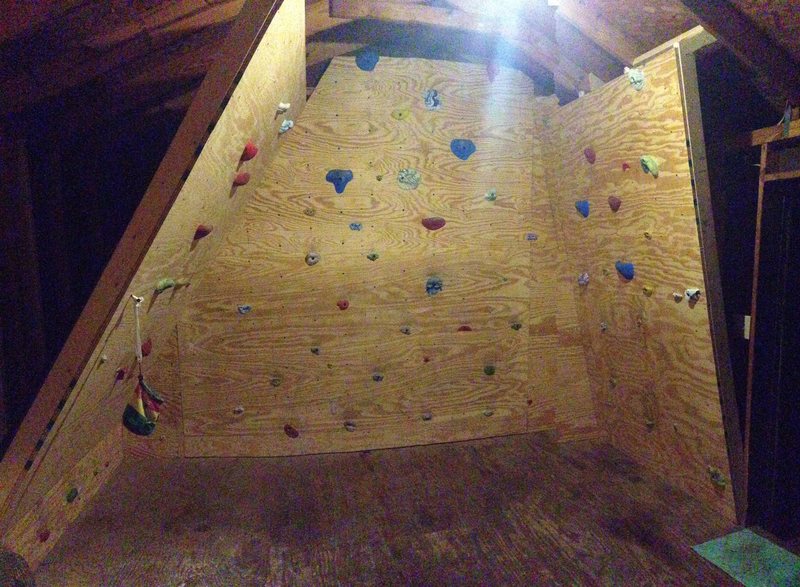
What's going on fellow climbers, first time poster here. Looking forward to going back and reading this entire thread but just got the first stage of my cave finished and looking for a little feedback. It's in a 16x12 storage shed and the goal is have the whole thing climbable. Couple before and after pics. Left side, 18 inch kicker to 35 degrees 6 ft across back wall, 8 ft of angle, right 15 degrees 5 ft across front to edge of door, 8 ft of angle. Next will be a 4 ft roof (approx. 75 degrees) coming off 35 then small transition back down to 15. And at least a volume or 2 will be added soon. Will post pics as it progresses. |