To save paper & ink, use the [Hide] controls next to photos and comments
so you only print what you need.
Kühlochfelsen
International
> Europe
> Germany
> Frankenjura
Description
This is a nice crag that is completely in the shade because of the trees. It has mostly routes in the harder ranges (8 and above) but there are still a few easy ones for beginners on the side. I stick clip is need for a lot of these climbs unless you feel good 30 feet off the ground with ankle rollers everywhere!
Getting There
The easiest way to the crag is to go from Pruihausen. Coming into Pruihausen turn right if your coming from B87 and left if your coming from Breitenstein at the only major turn in town. 20 meters after this turn you will keep to the left of a tourist map and keep going on the main road onto a field path. Once in the field you will take a left at the first fork and a right at the second continuing on the right side of the field. When the field path starts turning left and enters the forest again park on the right or left side. Walking in the same direction you were driving turn right and start walking up a slight hill on a path marked with white letters on the the trees. Continue up the hill and start going left at a small outcropping of rocks. The crag will appear on the right side!
[Hide Photo] This is to the right of the large cave when walking to the left side of the crag.
[Hide Photo] The climbs furthest to the right on the left side (passing the cave and keep walking.
[Hide Photo] Next section further to the right. Bordered on one side by a big mossy crack.
[Hide Photo] Next crag to the right bordered on the left by a big mossy crack with two routes on the face.
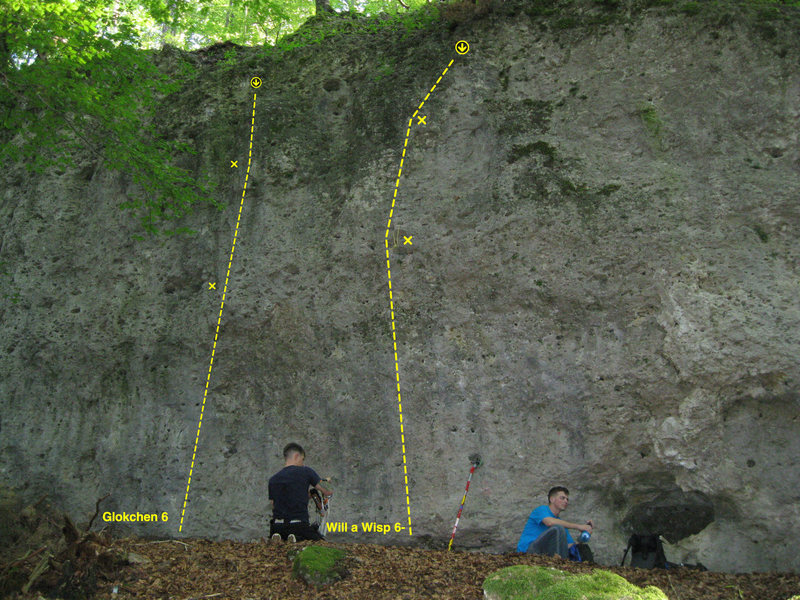
[Hide Photo] The next 2 routes further right on the crag. This one is bordered on the left side by a very mossy section dividing the first 2 routes on the wall.
[Hide Photo] The first two routes on the far left side of the crag
[Hide Photo] This bench will be on the left of the path.
[Hide Photo] The white mark on the trees next to the trail.
[Hide Photo] Looking from where the path leads into the crag.


 Continue with onX Maps
 Continue with Facebook