|
|
Xam
·
Jan 27, 2015
·
Boulder, Co
· Joined Dec 2011
· Points: 76
Warbonnet wrote:(Not sure what Xam is saying: are you suggesting that the thicker climbing rope will also melt through? All things being equal, it might do so but in the Jurassic. Are you suggesting the melting ice will freeze the rope (if doing a rope pull) such that it would be hard to pull? Not the case. No, not saying anything like that. Just trying to present a physical explanation that is more precise then the one presented above. Just pointing out that fundamentally, it is the constant pressure that causes the cord to melt out and the thinner it is the faster the melt out will occur, all other things being equal. The phrase 'ice is not a solid (in pure physics terms), rather, it's WATER (a liquid) w/o a lot of heat in it; by stressing it, you are turning the ice into water' struck me as something that it might be nice to clarify, as the statement 'ice is not a solid (in pure physics terms)' is a bit odd.
|
|
|
Warbonnet
·
Jan 27, 2015
·
Utah, India and Cambodia
· Joined Nov 2013
· Points: 630
Xam,
I completely take your point re: my saying ice is not a solid....of course it is. Poor wording & pretty stupid statement. What I was trying to emphasize (and should have worded it differently) to the forum is that ice climbers should "think beyond the ice concept" and consider that water is involved and creating such is likely not the best tactic. Not sure that is intuitive to some people. Saying it another way, "ice is in a form "wanting' to be water". It's the scientific concept of "specific heat". It's like carbon dioxide trying to be carbon dioxide and not dry ice - it's "happier" and has more flexibility doing a number of things. Thanks for pointing that out.
Re: your comment:
"This causes the ice to change back from solid to liquid. Under the pressure, the liquid water then moves to the side out from under the rope and rope moves down.
You obviously understand ice physics given your comment re: ("interesting & useful properties...and not being so straightforward"). As you know, water (all 3 phases) are in a material class by itself. But I'll disagree that the "liquid water then moves to the side out from under the rope.....". I'd have to see data on that; if you had a very sensitive instrument directly beneath the rope where it contacts the ice, you should see a rise in temperature because the rope is still generating energy (heat), hence, the rest of your sentence is correct ("rope moves down"). In fact, it's being lubricated by the 'warmer' water directly beneath it. These forces have measured constant factors; if you want the source, contact me through MP & I'll send you the link. You did make me think, however, what an iced up rope would do in terms of measured 'lubrication' due to downward pressure of the rope. Being a scientist is a terrible affliction.
_____________________
Here's a more detailed description of how, why and the consequences of ice melting (Xam, weigh in here):
While a bit scientifically jargon-esque you’ll get the idea by reading thru this; I’ve added where/why this is important to ice climbers, especially those learning to “read the ice” (or have failed to do so – which we all do at some point in our climbing careers).
Basically, water is found in three “phases”: liquid, solid & gas. Many substances (but not all) can exist in 3 phases (& also move from solid directly to a gas, by-passing the liquid form: – “sublimation” – that’s partially what causes your screws/hangers to melt out when the sun is directly on them).
All 3 phases should be of interest to climbers in terms of safety, conditions, route success, retreating, in “reading the ice” and in SETTING UP RAPPEL STATIONS, BACKING OFF THEM AND MAKING THE FULL RAP (OR NOT).
Why and under what circumstances ice melts is scientifically complex. When it melts, it absorbs a certain amount of energy. In the example of an ice climber relying on ‘V” or “A” threads, it is the downward “pull” or “force” (energy/temperature) through the hole edges, the holes themselves and the 'rear junction" of the two screw holes that is stressing the ice (esp. if a hanging rappel).
The rope (“A” thread) or the 6-8 ml ”V” threads are actually generating heat (specifically the load, not the threads themselves) even though they are static. While melting, any energy (temperature/heat) added breaks the hydrogen bonds between ice (frozen water) molecules. This is known as “PLASTIC DEFORMATION” or “CREEP”; what’s going on at your ice rap station is the same thing (basically) going on with glaciers (and the same terms are used).
This is but one reason rappels should be smooth, avoiding/minimizing the “Rambo style bounce”: that adds big-time stress to the anchor. The amount of energy consumed in breaking hydrogen bonds in the transition from ice to water is known as the “heat of fusion”, “pressure melting” and/or “friction heating”. The energy can be measured (in lab/research settings) and that partially depends on ice conditions (aerated, wet, even color, etc.)
From a physics viewpoint, ice is a solid; the crystallized solid form of liquid water. (I always like this question because it’s like asking the Q: “Is glass a liquid or solid”? Answer is not so clear-cut – many diff scientific opinions).
If I’m rapping ice & need to stop for some reason, (all things being equal), I’ll unweight the rope (if possible) by just a bit. If others (in my party) are to follow, theoretically the anchor would have weakened but that’s academic and I would not worry at all. But if I’m not first down, I’m watching and listening to that anchor. If at night, I have my headlight shining on it. That said, I’m happy to have other parties rap on my rock route ropes/stations (well, sort of), however, if there is a gang of ice climbers wanting to use my “A” or “V” (I use “A’s” and not “V’s” system), I’ll politely ixnay that.
I think all of you know this: “the faster ice melts, the faster it melts”. Why? Part of the simple answer is because there is more water (warmer than the ice) ‘lubrication’, the ice itself is warmer and the longer the season, the greater the sun-cupping. New research shows that glaciers several hundred feet deep have 'transferred' heat to the bottom of the glacier as it grinds along rock strata. How many times do you hear “glaciers are melting faster than predicted”?
Which brings me back to setting up rap stations, especially in thin ice: it's likely warmer 'back there' and if you place a screw and water gushes out, well, you might re-think it all.
|
|
|
Warbonnet
·
Jan 28, 2015
·
Utah, India and Cambodia
· Joined Nov 2013
· Points: 630
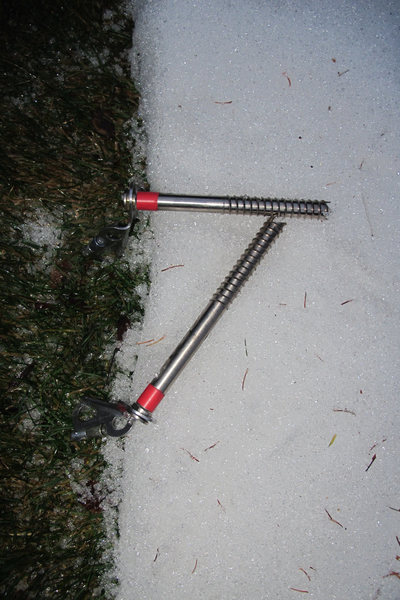
The "HOW TO" details of constructing DOUBLE "A's" ("Anderson's")
Drawing followed by step-by-step.
More detailed drawing of a double "A"
I carry this with me when ice climbing so I don't have to build any kind of thread at all.
Blockhead!!
The "HOW TO"
Double “A” thread (or the “thread-less thread”) if using the rope as the “thread”. If using cord, then it’s somewhat like a “V”, however, it will be much easier to thread thru the “A” because you are pushing the cord "downhill" and not sideways.
1. Evaluate ice conditions; prepare if necessary, i.e., hack rotten ice out;
2. Locate hole positions (all vertical or each thread slightly (2"-3") offset (ideal) – see drawing;
3. Drill holes (either set first – doesn’t matter; I use longer than shorter screws (NO STUBBIES) when I can because the protrusion helps me line up the correct angle; start both screws before drilling all the way – screw them in about 3” and look sideways at the screw angles. Top-most hole is the shortest, bottom hole the longest. I try to keep about 6" vertical distance between the top-most hole and the bottom one.
Take care that you do NOT drill the top (downward slanting) hole deeper than the junction with the longer, bottom hole because when you try to thread the rope into the top hole, it probably will not make the turn, rather, it will tend to go straight into a "dead end" of a too-deep upper hole. Others will differ, but I leave the bottom screw all the way in the hole (and don't back it out) while I drill the upper hole. I guesstimate how far it is until the upper screw will touch the first screw, then slow down. I don't mind it touching the longer screw -- with practice you'll know when it's close -- and then touch the lower screw -- you won't ding it if you are careful. Doing this assures you will not drill the upper hole too deep and create that "dead end".
A Candella makes it even easier, assuming it's long enough (they fit into a 22 cm screw, so they are about that long) to grab the end of the rope as it is fed into the upper hole, however, it's one more piece of gear to fish around for, drop, retrieve, clip back onto your harness. I would rather get the business done quickly, i.e., two screws properly placed and that's it. (I love Candella's but over time, they weaken or break easily, esp. where the mini-saw blade is). Other tools will grab the rope end but still better to not create the "dead end" or you might be fishing around for awhile.
Avoid matching the same angle, i.e., don’t do two 45 degrees, otherwise you will not be able to pull the rope with ease. If you use 22 cm screws, for example, that does NOT mean the holes will be 22 cm deep; one may be (bottom-most) but top one is shorter. Lay your screws of different lengths on the floor and in different configurations that mirror the bored holes. Picture imaginary ice (the angle of which will vary of course), perhaps vertical as a "benchmark", and lay two screws against the imaginary line. The 'protrusion angle' of the screws can serve as a rough idea of what you should aim for on the real ice.
Depending on ice conditions, I’ve found 30 to 50 degrees (down) for the top hole is best; 60 to 65 degrees (up) for the bottom hole. Try to keep the difference around 10 degrees.
I drill the bottom-most hole (the longer one, angled up) first because when the top-most (shorter) is properly lined up, ice will fall down the bottom “chute”. Just a tip.
Another one: depending on ice color and the color of the sky (either light, meaning daytime, or dark, meaning nighttime in which case you are hating it), you can shine your headlamp into one of the holes and if you’re lucky, the translucence of the beam can help you re-align a half-drilled, second hole but once you get good at it, this will be unnecessary (except it can be handy when pitch dark).
4. Smooth the bottom lip of the top-most hole (if using two “A’s”; one “A”, same thing). This is the top-most hole of the system and the first hole to thread the rope into and through. If the edge is sharp, it will not ease the rope pull, so just chip away at it with an ice screw or better yet, simply use the threads of a screw as a "saw" for about 10 seconds – this is not crucial (unless bullet ice then the rope can get hung up there). Sawing it with the screw threads puts a nice round bottom edge on the lip, perfect as a "cradle" for the rope.
5. Thread the rope through the top hole (helps to have some slack so you aren’t pulling up rope weight), make the turn and down the longer hole and out. If you can’t make the junction turn, just stick a plastic ice screw cap over the rope end….will be like a greased pig. (Catch it as the rope exits the hole because you might need it again). Some put electrical tape on the rope end but I’ve found it doesn’t stick very well.
6. “Floss” the hole by pulling a 2 ft section of the rope back and forth (up and down); goal is to decrease (smooth out) the angle of the screw junction – helps the rope pull. If done correctly, when you pull the rope after rappelling, it will practically fall of its own accord. This is not tedious; depending on the quality of ice, do it 5-10 times....10-15 seconds.
Tip: if doing two sets of holes, do not try to floss the entire system at the same time, however, if two rope-mates are working seamlessly, it’s possible for one to be flossing the upper hole while the other partner is doing the bottom one after threading the entire thing. If you can get this down, you’ve just set up your rappel in minutes (all things being equal).
If mastered, an “A” can be constructed faster than a “V”; no cord to mess with, tie with gloved hands (possibly), etc. and etc. Bonus: you get to keep a biner. Double bonus: you do not have to equalize double “A's” (if both are relatively lined up; if not, then time for equality, however, you can angle the holes of two "A's" such that they are lined up for the rope pull but they may be way off the same vertical plane).
Tip: Some people take 8 ml cord (for example) to quickly thread it thru the holes and THEN floss it with the smaller diameter. Follow that with the main rope.
7. If you are using double ropes that are tied together for a longer rappel, make absolutely sure that the knot is located BELOW the bottom-most exit hole. If you have not done this, make sure there is plenty of toilet paper at the next rappel station for your climbing team. While it’s possible to pull the rope if the knot is jammed up against the top-most hole but it’s not the best way to go.
8. You can back up an “A” & test it (somewhat) by weighting, or, in the case of the first person (the heaviest) weighting the rope, by placing a screw ABOVE the upper-most “A” set. If anything fails (I’ve never seen it happen nor heard of it), it will not be shock loaded; don’t place the screw below the whole system. I trust “A’s” so much that I never back them up – maybe I should but I don’t. Like most of us, I've never heard of a "V" failing when someone was on rappel, however, I've seen them poorly (even dangerously) constructed. There is usually(?) someone nearby to point that out.
9. Final ‘lobbying’ tip re: “A’s” v. “V”s: if someone has to go back up a stuck rope, an “A” is in structurally stronger ice than a “V”. I’ve had to do that, all the while (a long while) thinking “please do NOT melt out”.
10. PRACTICE, PRACTICE, PRACTICE and you will be converted.
|
|
|
Warbonnet
·
Jan 28, 2015
·
Utah, India and Cambodia
· Joined Nov 2013
· Points: 630
|
|
|
Macwood Fleet
·
Jan 29, 2015
·
Unknown Hometown
· Joined Jan 2015
· Points: 40
|
|
|
Macwood Fleet
·
Jan 29, 2015
·
Unknown Hometown
· Joined Jan 2015
· Points: 40
Warbonnet wrote:THIS is my real secret....... Alaska???? Ice growing out of the screw What is causing this? Is the screw compromised when this happens?
|
|
|
Jon H
·
Jan 29, 2015
·
PC, UT
· Joined Nov 2009
· Points: 118
Warbonnet - I enjoy your thoughts and I would like to subscribe to your newsletter. Please continue to post genius techniques about climbing or life in general. Do you offer employment advice or marriage counseling as well?
|
|
|
Buff Johnson
·
Jan 29, 2015
·
Unknown Hometown
· Joined Dec 2005
· Points: 1,145
Macwood Fleet wrote: What is causing this? Is the screw compromised when this happens? That's frozatius hemorrhagicus ebola. Deadly serious, mate.
|
|
|
Sergey
·
Jan 29, 2015
·
San Francisco, CA
· Joined Dec 2011
· Points: 1
I disagree that ice melting under pressure is a concern here. While in theory Xam/Warbonnet's point about ice melting point dropping with pressure is valid, the pressures involved are unrealistic for any climbing scenario. See en.wikipedia.org/wiki/Regel… for the numbers and a good example. Bottom line of the example is that for a 1mm wire and 5cm (~2 inches) of contact length with the ice at -4C (25F) it would take a ~250kg/~550 lb climber hanging off it for the ice to start melting. I use 5mm cord myself and I am yet to meet anyone using anything thinner than that. I would hazard a guess that most people in the 500lb range don't climb ice.
(Friction is a different matter, but again I would think that since you're likely not toproping through your Abolakov thread, you should be fine.)
Awesome drawings btw!
|
|
|
Warbonnet
·
Jan 30, 2015
·
Utah, India and Cambodia
· Joined Nov 2013
· Points: 630
Mac,
Thanks for your Q and your drawing....it reminded me of a few additional tips that may be of use.
More detailed drawing than the ones earlier in the string but I've been asked the question before (or that you implied with your drawing showing a horizontal hole). Beating around the bush a bit, the answer is no, don't drill horizontals; it sets up a cascade of problems that, for the most part, can't be corrected. Start over.
My marked up copy of your drawing, a few comments and then I've attached photos of screw alignment; those should make visualizing it all super simple.
While seemingly complicated (esp. since I've written it up to seem so), A's are so simple to set up, once familiar & practiced, they can (if you're lucky, desirable ice conditions, etc.) BE SET UP WITH ONE TOOL: A 22 cm SCREW. Double "A's" are almost overly strong and I don't do two unless conditions call for it. The harder learning curve is getting the screws to line up, however, with a bit of practice, you won't miss.
Double A's in more detail. Macwood Fleet's borings are in yellow, my comments answer his question as to whether his alignment is OK. "A" thread drawing makes them look complicated but actually super simple to do.
With the configuration (in yellow) you posted above, you drilled 'flat", horizontal, non-downward angled borings(s). The horizontal hole is also drilled WAY too far in; this means that when you try to thread the rope, it will go straight into the 'dead end' -- the rope will not make the bend into the
lower, slanted hole (which should be drilled first) no matter how hard you try.
As the drawing shows (enlarge to read), there is a desired drill order: #1st slants upwards, then drill #2 downwards (then #3, #4 if doing two “A’s”)…..easier to line up visually (look straight on, then sideways).
After top two holes are properly aligned (not as in the yellow above) and drilled and ROUGHLY joining (doesn’t need to be perfect), the rope may still not make the turn because it hasn’t been smoothed (flossed) but it usually will (easier than "V's" will, IMO). Try threading the rope 1st….it might go, then you can use the rope to smooth the joining bore angle. If the rope won’t go (my skinnies have no problem), sometimes I use 7-8 ml accessory cord first, floss the screw junction with that, then thread the rope….it will almost fall thru the downward hole.
A useful tip for drilling too far and creating a “dead end”: drill the screw back into the hole, put a bit of ice in the barrel and push it in with something (a Candella is perfect – fits the barrel and has a flat end). It is easy to drill too far, however, as the photos show, the only “dead end” you need to be concerned about is the top-most hole; doesn’t matter if the upward slanting, longer hole is over-drilled and that is WHY the first hole drilled should be the upwards slanting one. Then, it’s a matter of drilling the upper-most hole to meet the longer one --- you will know when you’ve hit the sweet spot because it will suddenly be easier. Drill no further. If you’ve left your 22 cm in the upward hole (which I do), then you know the two borings are aligned. The photos show how this works.
Most ice climbers who build “V” or “A” threads have some sort of hooking device (like a Grivel Candella) to grab the rope. If you drill a horizontal hole as per your markup of the drawing, there is NO WAY you will be able to hook the rope, so not an option.
Earlier I suggested placing a plastic screw cap over the end of the rope to facilitate it moving thru the holes, however, the caps are SLIGHTLY larger in diameter than ice screws. If I think it needs enlarging, I deal with that by briefly sawing the hole with the screw threads and then it works but sawing longer holes to enlarge them is a drag. Some use waterproof electrical tape on the rope end.
Some worry that they might end up at the lower rappel station having forgotten to floss the holes, however, by the time you pull one entire rope (if using two ropes) thru the system, it will be like glass, so no worries. Before the first belayer takes off, pull the ends to make sure it's smooth....it will be.
If there is water flowing behind the ice when looking to place any kind of thread (or screw), that’s bad news, however, it’s yet another advantage of “A’s” over “V’s” (IMO). With care and using two “A’s”, it’s possible to configure a rappel anchor such that it bypasses undesirable nuisances (but it has limitations): rocks, a patch of rotten ice, water behind rocks, etc. The two “A’s” need to be mostly in the vertical plane, however, it’s possible (w/a bit of extra effort) to place them a meter apart (I’ve seen some spread them even further – up to 2 meters I think). Make sure the rope pulls easily thru the holes and past the object to be avoided, otherwise it might get stuck. The ability to do such a spread between two “A”s is, in my opinion, a major bonus. I’ve seen even more elaborate configurations that were amazingly brilliant and bomber.
Dead-ended boring (in an improperly angled hole); rope guaranteed to end up there
Proper downward angle for top-most hole but still dead-ended.
Wrong upper screw angle but not dead-ended. Impossible to floss
Upper boring proper angle but still dead-ended.
Not ideal (that would be when the boring ends touch at the same point - difficult to do). Lower, upward angled boring is dead-ended but DOES NOT MATTER....rope is being threaded downwards....will not travel upwards into the upward slanting dead end. THIS is the configuration I try to hit because it provides some leeway to drive the upper screw down to meet the upward boring -- that's the most important part.
Near ideal but the screw borings would have "touched" at the same spot. Angle could be better (steeper angle on lower boring). Screws are placed only to show angle as well as the "flossed" bend. Should be obvious that the screws are NOT left in the boring when threading the rope.
|
|
|
Xam
·
Jan 30, 2015
·
Boulder, Co
· Joined Dec 2011
· Points: 76
Sergey wrote:I disagree that ice melting under pressure is a concern here. While in theory Xam/Warbonnet's point about ice melting point dropping with pressure is valid, the pressures involved are unrealistic for any climbing scenario. See en.wikipedia.org/wiki/Regel… for the numbers and a good example. Bottom line of the example is that for a 1mm wire and 5cm (~2 inches) of contact length with the ice at -4C (25F) it would take a ~250kg/~550 lb climber hanging off it for the ice to start melting. I use 5mm cord myself and I am yet to meet anyone using anything thinner than that. I would hazard a guess that most people in the 500lb range don't climb ice. (Friction is a different matter, but again I would think that since you're likely not toproping through your Abolakov thread, you should be fine.) Awesome drawings btw! You are, of course, correct... melting out due to pressure melting alone is not really a concern. If it was, we would not rap off of treads as a matter of course. I would say that explaining a mechanism is important to understanding a failure mechanism even if the possibly of that failure is low. However, the pressure numbers given in the Wikipedia article understate the issue. The contact force due to the wire is assumed to distribute equally across the diameter of the wire and the overall contact pressure is low. This is an ok assumption in the case of the classical regelation demonstration where the wire has melted directly into the bulk of the ice. However, consider the situation where the wire is just starting to melt into the ice and is siting on the surface...the contact pressure is clearly much higher because the contact area is the flat ice surface and the curved surface of the wire. This is more akin to the thread issue since you have treaded a say (in your case) 5mm cord into about a 20mm bore hole. This is more in the initiation period...once the thread has entered the bulk of the ice, the pressure will drop. I was curious as to whether it is possible to get pressure melting to initiate at the 50 MPa level. Turns out, using a simple online contact stress calculator and assuming a worst case bouncy rappel (Force = 2 X climber weight) for a big climber (200 lbf) for 5 mm perlon cord (polyamide) inside a 20 mm bore hole, that you can get contact stresses above 50 MPa. I don't think this is really a concern in solid ice because once the cord enters the bulk the pressure will relax, but it is food for thought.
|
|
|
Macwood Fleet
·
Jan 31, 2015
·
Unknown Hometown
· Joined Jan 2015
· Points: 40
Very interesting. Thank u!
So I'm assuming the ice screw is uncompromised in the pic I posted.
Stay frozen!
|
|
|
Warbonnet
·
Feb 14, 2015
·
Utah, India and Cambodia
· Joined Nov 2013
· Points: 630
Sergey wrote:I disagree that ice melting under pressure is a concern here. While in theory Xam/Warbonnet's point about ice melting point dropping with pressure is valid, the pressures involved are unrealistic for any climbing scenario. See en.wikipedia.org/wiki/Regel… for the numbers and a good example. Bottom line of the example is that for a 1mm wire and 5cm (~2 inches) of contact length with the ice at -4C (25F) it would take a ~250kg/~550 lb climber hanging off it for the ice to start melting. I use 5mm cord myself and I am yet to meet anyone using anything thinner than that. I would hazard a guess that most people in the 500lb range don't climb ice. (Friction is a different matter, but again I would think that since you're likely not toproping through your Abolakov thread, you should be fine.) Awesome drawings btw! Sergey, catch up here, sorry for late post. Interesting physics aside, I think Xam's comment re: "food for thought" is right on. We all talk like a station will be built and used (and likely REUSED - at their own risk - if a V thread) and the raps will go seamlessly, However, I think enough of us have been in the situation (rock and/or ice) where things didn't go so smoothly. If a rope is stuck high above a rock route and won't pull, that's one kettle of fish -- that often requires someone to go back up and it's not without its risk. But I would argue ice climbing is a separate bucket of potential risks. Like many or you, I've been in situations in very big mountains and/or serious multi pitch climbs (and multi pitch rappels) where things didn't quite go as planned, i.e., the rappeller for one reasons(s) or another (injury, super iced up and twisted ropes, hairy overhanging rappels, esp. at night where navigation is a bit difficult) where keen attention is paid by all parties on the condition of, in this example, in "V" or "A" thread conditions and whether melting is a concern. Granted, this takes time to occur (but can/does accelerate), however, these things go into my hopper of thinking when a climbing team is caught in this situation. The recurring thought is "I hope to hell the thread(s) are holding". If that isn't at least part of what you are concerned about, well, maybe you're enjoying reading your Wall Street Journal at the rappel station. For those who have climbed Broken Hearts in Cody (or any of the "hall-like" fabulous climbs), you've seen the thread stations littered about. Doesn't take close attention to notice that many have melted out and not because of the sun, rather, over-use and at least one of the three types of deformation have occurred that Xam and I are talking about. Because Broken Hearts (by no means atypical) is a very long climb, it's often the case you are rapping in the dark (unless you know Aaron's secret path). I believe it was in the movie "Silverado" wherein Kevin Kostner is told by the judge "We're gonna give you a damn fair trial followed by a first class hanging". (May not be the exact movie or quote). I'll post some links below that may be of interest to the group re: what we are talking about. P.S. Sergey: I'd scale up your cordage a bit...
|
|
|
Warbonnet
·
Feb 14, 2015
·
Utah, India and Cambodia
· Joined Nov 2013
· Points: 630
Macwood Fleet wrote: Alaska???? What is causing this? Is the screw compromised when this happens? Macwood: First, I think you are correct -- ice coring in the Arctic. Second, no, your screw is not compromised but what is happening has been touched on by others in this forum. I'll post links to articles that may be of interest to you. Long & short of it (my guess) is that as the screw turned into the ice, it introduced air (however small -- doesn't matter -- read the articles) between the ice & screw. If you read one of the articles I'll link to "Why is Ice Slippery?", you'll get part of the idea. From the photo, it looks like it was placed in very wet ice. "Slipperiness", coupled by the tiny fraction of heat generated by screwing the placement, eventually led to this "oozing". In good ice, the core comes our readily.......this seems to be oozing, correct? "Slipperiness of ice" (something less straightforward & arguably less obvious than one might think) is something all ice climbers might be interested in. Nothing wrong with the screw, however, your pic helps make a point in this thread.
|
|
|
Warbonnet
·
Feb 14, 2015
·
Utah, India and Cambodia
· Joined Nov 2013
· Points: 630
“Catch up” replies to comments above:
Xam mentioned the “bouncy” rappels we’ve all seen (& at one time done them ourselves, hopefully on rock). All all know, such Rambo techniques are not good on rock anchors (and have resulted in fatalities), let alone the bouncy ice rappels Xam refers to. Adds pressure to anchors (whatever kind), dislodges ice/rock, etc.
While the thread got off the track of answering the first question (“how to protect rotten ice”), it wandered into related matters, i.e., techniques for building ice anchors, solidity, different types, etc.
A great deal of research has been done on ice & climate change (duh), however, several academic institutions have looked at ice deformation at microscopic levels; Syracuse, Univ. of Wisconsin and State University of Saint Petersburg (Russia).
Some of the research is focusing on stress fractures related to “sudden pulling with subsequent relaxation” and “tugging” (dead stop to 2 km/hour) XYZ size/weight/density/temperature of ice chunks. Will be interesting to watch.
Of course, this brings to mind Xam’s comment re: bouncy rappels. Melting out is one thing, stress fracturing is another. It’s surprising more ice climbers are not injuring or killed on rappel. I’ve followed this with a Canadian and Italian research group. The conclusion is that the anchors (for the most part) tend to be fixed (bolts, pins, slung trees/rocks, etc.) and/or ice climbers are more careful on rappels because of the ease in catching a crampon and other factors (like being scared of one’s phuquing mind.
|
|
|
Warbonnet
·
Feb 14, 2015
·
Utah, India and Cambodia
· Joined Nov 2013
· Points: 630
EXCELLENT ARTICLE (was sent around last year)
INFORMATION ON HOW ICE CLIMBS FORM, DEFORM AND FAIL
"Praise not…the ice until it has been crossed."
--From the Viking saga Havamal, circa 1000A.D.—
(AUTHOR UNKNOWN)
Can be found here: iceclimb.com (click on “links”)
|
|
|
Warbonnet
·
Feb 15, 2015
·
Utah, India and Cambodia
· Joined Nov 2013
· Points: 630
Rather than post a lengthy analysis addressing the question "Why is Ice Slippery?", I provided just a few links -- you do your research -- easy reading. It's quite fascinating and while not directly applicable to rappelling off rotten ice.....why ice is slippery very much has to do with its behavior under all circumstances. Like in my gin and tonic right now.
This issue has been looked at by science (Michael Faraday - mid-1800's) yet science has yet to fully explain it. I suspect this is why Macwood's ice screw looked "oozy; air introduced (between the ice and the OUTSIDE of the screw) and fractional heating of the screw itself as it generated energy being drilled in. The "slipperiness" then did it its thing. I think.
“Slippery All the Time”
exploratorium.edu/hockey/ic…
“What Causes Ice to be Slippery?”
dujs.dartmouth.edu/question…
Robert Rosenburg
lptms.u-psud.fr/membres/tri…
en.wikipedia.org/wiki/Ice
Wiki quote (paraphrased) from “Ice” article titled “Slipperiness”
|
|
|
Bill Kirby
·
Apr 21, 2015
·
Keene New York
· Joined Jul 2012
· Points: 480
So the screw just drops to the ground from a 100 feet in the air, more if you rap with doubles?.. Looks sketchy.
|
|
|
CCChanceR Ronemus
·
Apr 21, 2015
·
Bozeman, MT
· Joined Aug 2012
· Points: 130
Whoa that's pretty sweet!
|
|
|
Xam
·
Apr 21, 2015
·
Boulder, Co
· Joined Dec 2011
· Points: 76
Bill Kirby wrote:So the screw just drops to the ground from a 100 feet in the air, more if you rap with doubles?.. Looks sketchy. Are you afraid of microfractures or something else?
|

 Continue with onX Maps
 Continue with Facebook