Continue with onX Maps
 Continue with Facebook


Custom Carbon Ice Tool Build


|
|
I was driving home from the Ouray Ice Fest this winter thinking about how cool all those carbon ice tools out there are. However the price tags on them are astronomical in my opinion. I though to myself, "why don't I try and build one myself?" So I set out to do that. 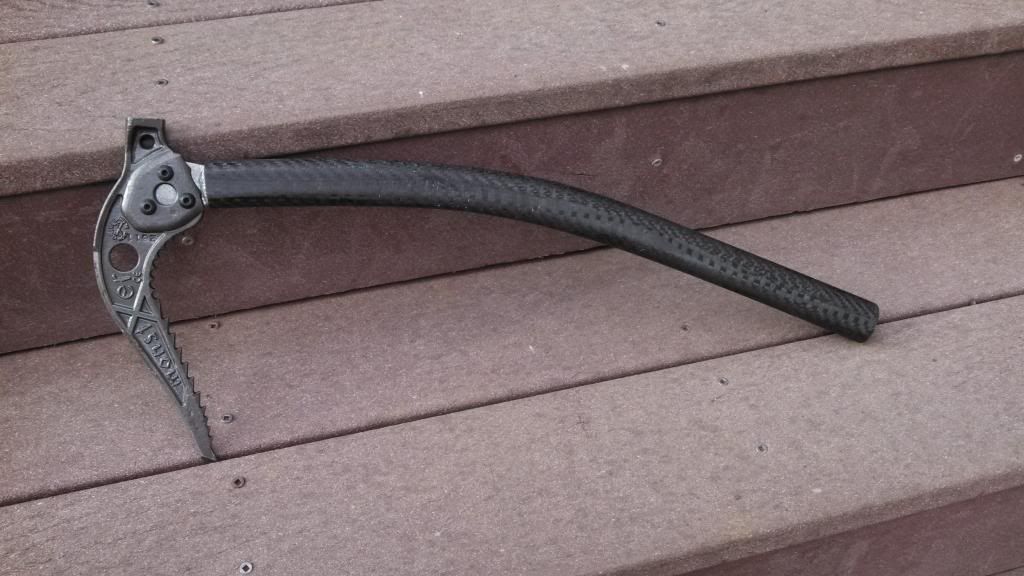 I began the process by constructing a plug. This served as a positive for the proposed tool handle (kinda like a wooden model). This was coated in a release wax so the mold wouldn't stick to it. 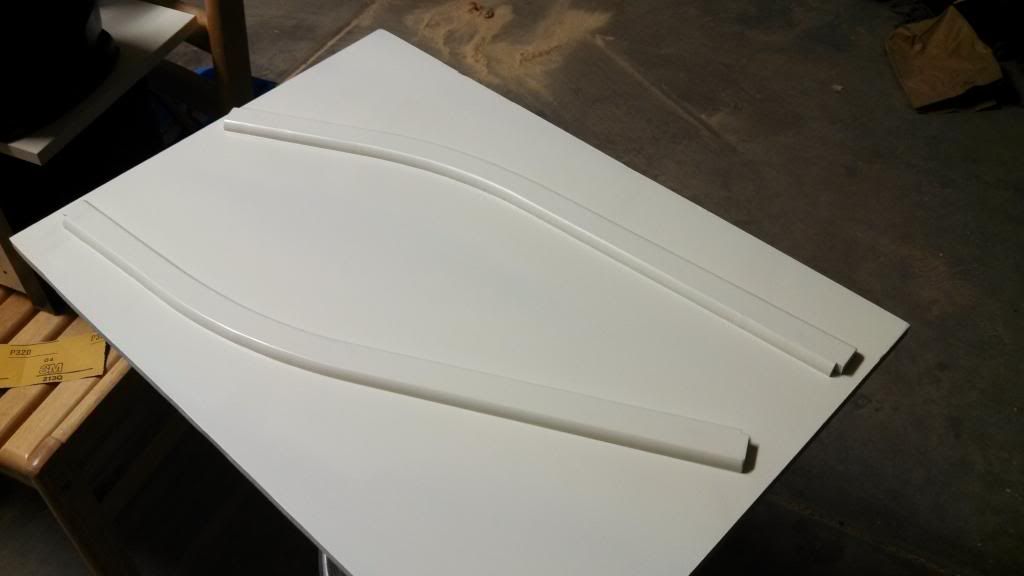 The mold was made two sided (think clam shell), with a hard surface made of a special epoxy to resist multiple uses. It was made by laying a gel coat and then layers of fiberglass and epoxy on to the plug. 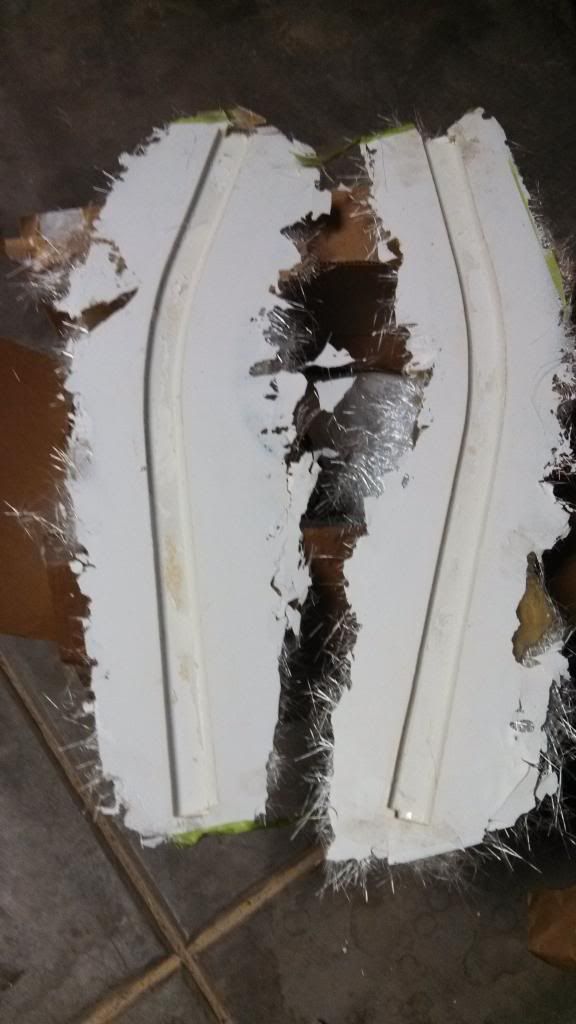 The mold was then trimmed and holes were drilled in it so could be bolted shut. After a several coats of release wax it's ready for the part lay up. 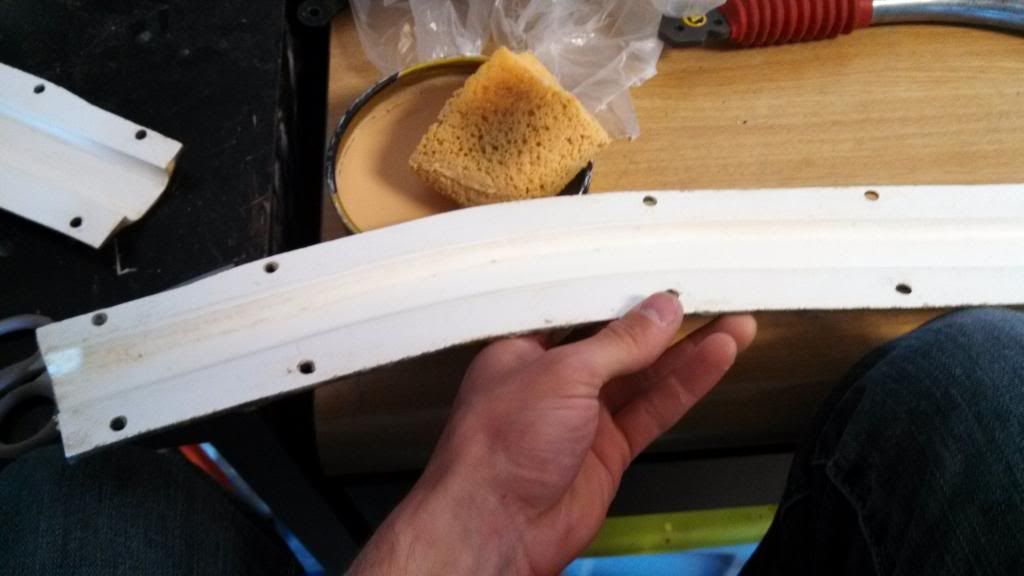 The layup consist of three feet of carbon fiber cloth, the width of the tool length. This cloth is a twill weave but I can't quite remember the weight off the top of my head. 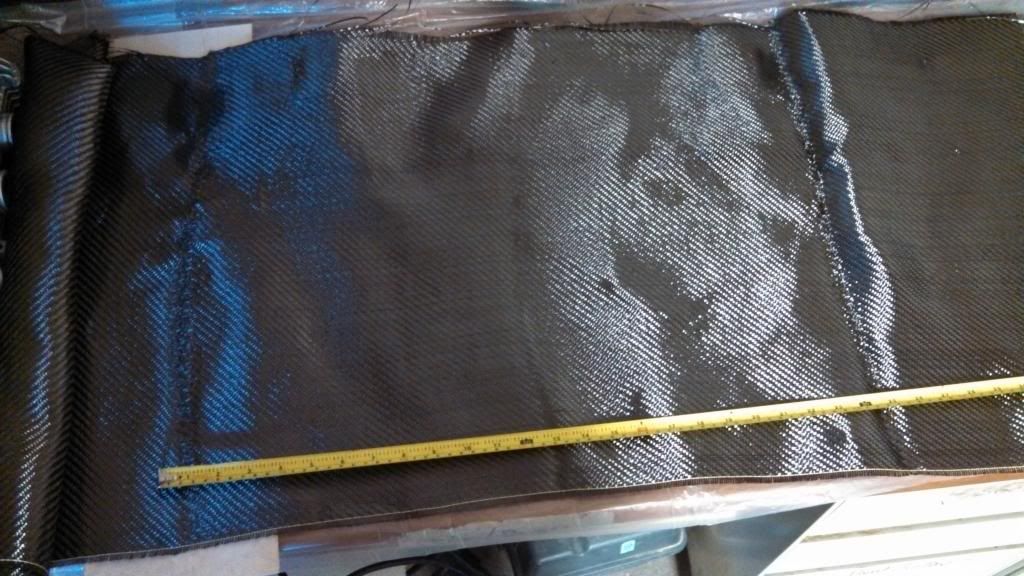 The cloth was wetted out with west systems epoxy, mixed by weight. I ensure the cloth is fully saturated before continuing on to the next step. 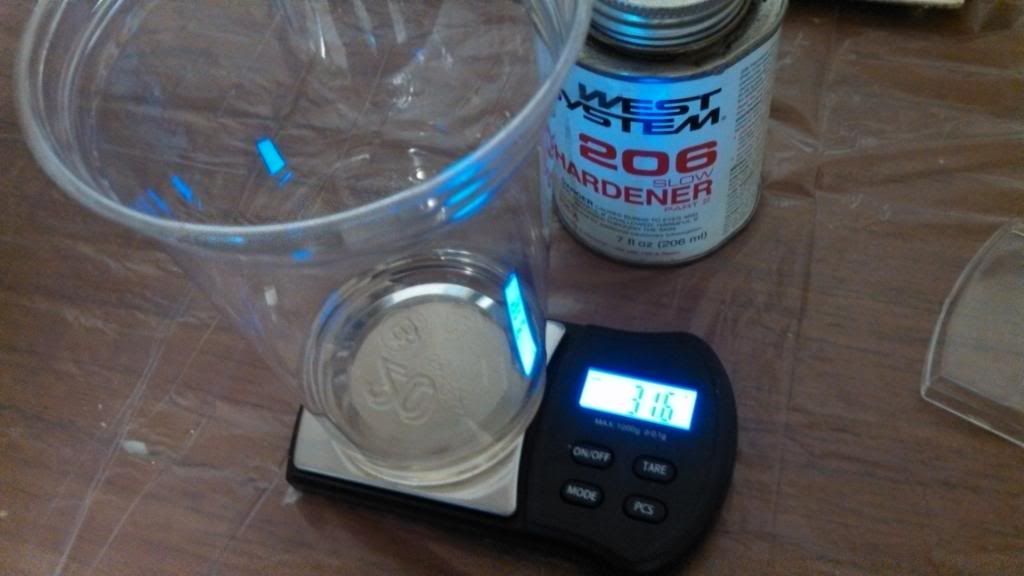 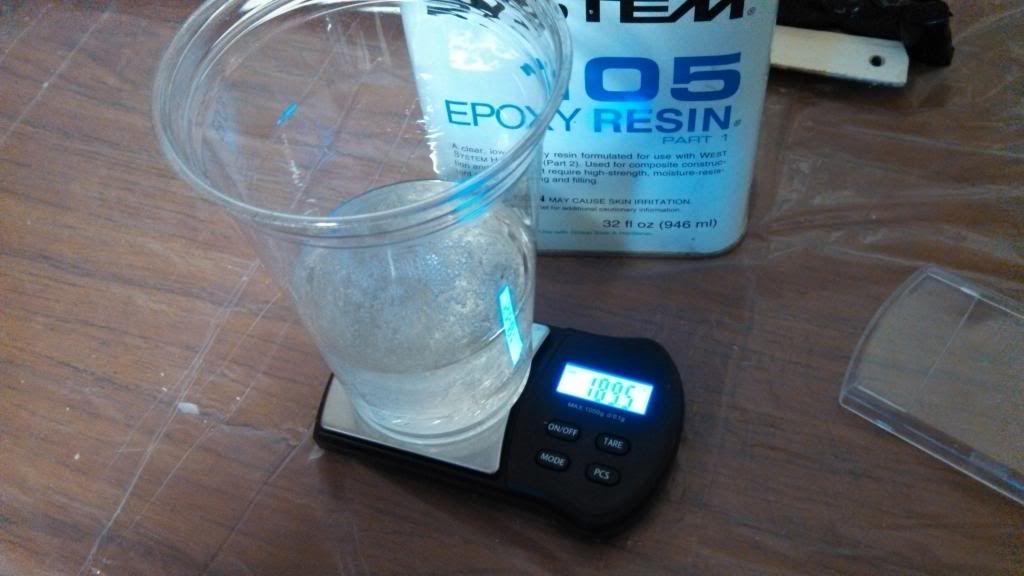 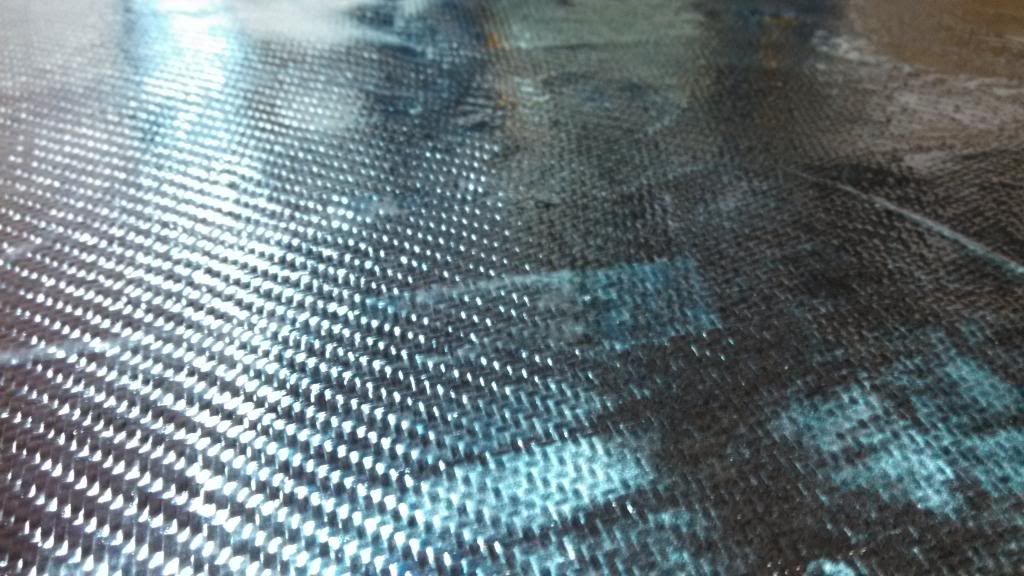 Now this next part was prepared before the epoxy was mixed, just so you know. I purchased a regular old bicycle tube. This tube is the inner bladder that forces the cloth to adhere to the mold. The tube is trimmed to length and sealed at either end with electrical tape (simple and effective). 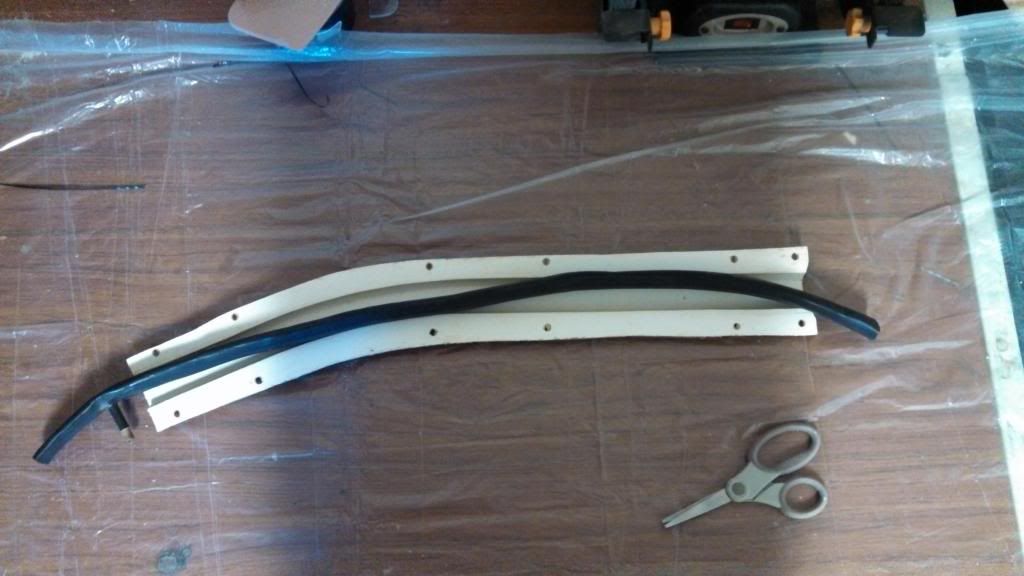 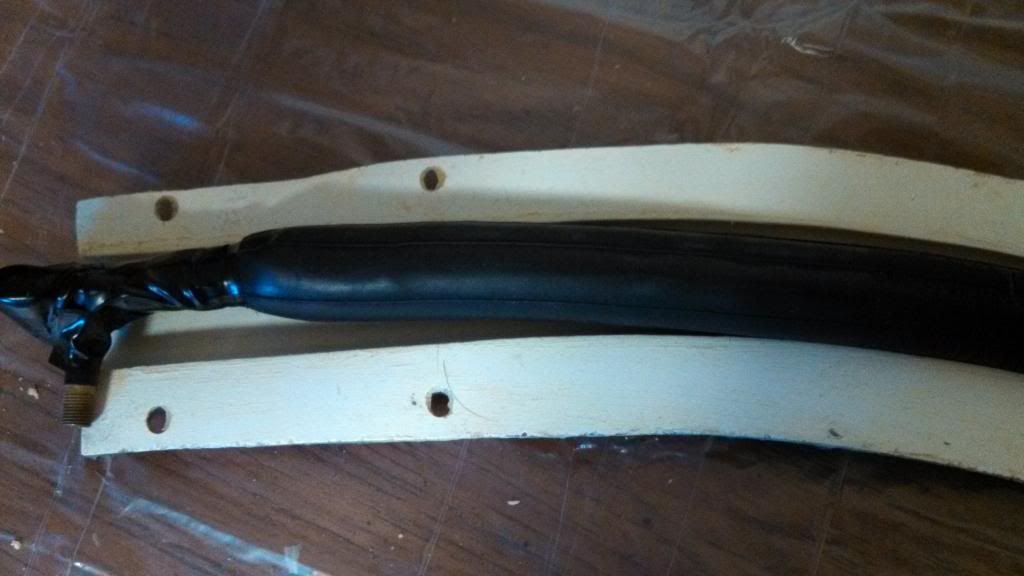 The tube was partially filled with air and the wet carbon fiber was rolled around it. Now this is where I though a lot about how I was going to do the lay up. This technique allows me to make the entire shaft from a single piece of carbon with no seems. That means more strength, less material, a shorter process and minimal weight. 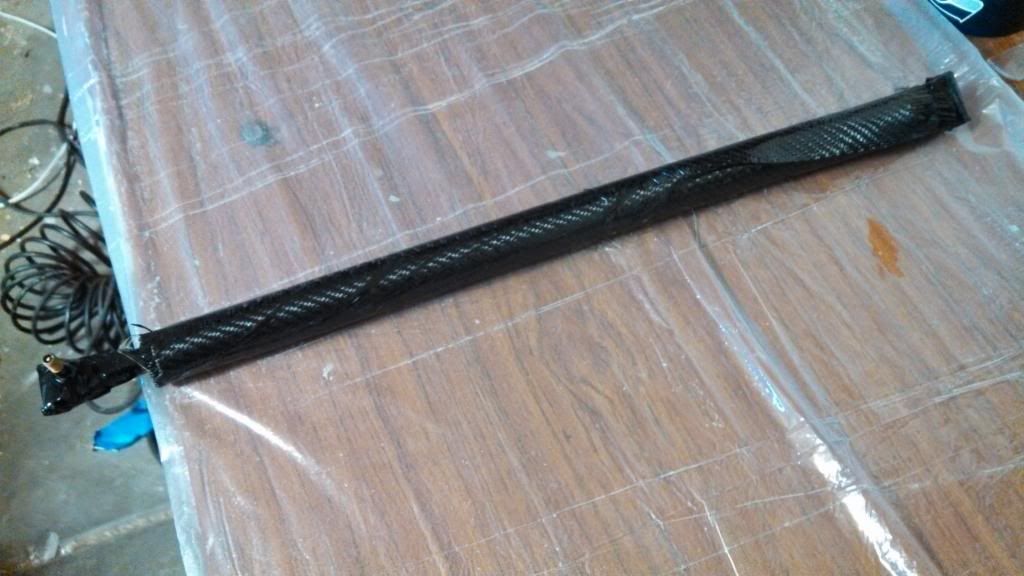 The next steps couldn't be photographed because my hands were covered in epoxy. Basically I laid the tube of wet carbon into one side of the clam shell mold. I then installed the other half of the mold and bolted the whole thing together. Once everything was together I added some duct tape (again simple and effective) to ensure the inner tube would not swell out the ends of the mold and burst.  The inner tube was inflated to ~5psi and the whole thing was placed in a heated box to speed the curing time. At the higher temperature the tool only took two hours before it could be de molded.  The excess material was trimmed off and the part was sanded. This is the core of the tool, a single piece of carbon fiber that creates the shaft.  I choose to go with the Grivel Monster X head for my tool since it would be the easiest interface for me to make. What it required was a tongue for the head to mount to. I made this from a heat treated aluminum alloy. I choose a thickness slightly greater than the stock Grivel tongue. The conbination of the high strength aluminum and increased thickness allows me to reduce weight from the Grivel design but still maintain plenty of strength. 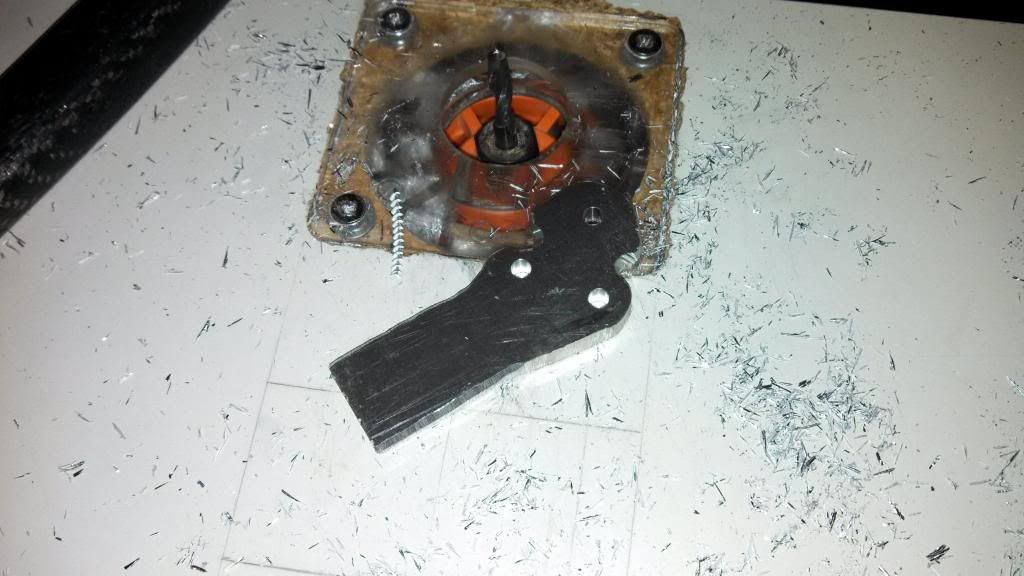 A foam plug was pressed into the top of the shaft and the tongue was clamped in place. I then poured epoxy around the head, cementing it in place.  The end result is pending on some last finishing touches but it is looking great so far. When it is all done I will post some pictures in this thread. I hope you find this project interesting, I know I did. Please feel free to ask any questions. (P.S. sorry for the giant post) |
|
|
This is really cool, thanks for taking the time to post this. |
|
|
Nice job, clearly you have some experience in working with carbon fiber. |
|
|
Very cool design. Have you done any strength tests? |
|
|
Pretty cool. Would be interesting to see them in action/know how strong they actually are. |
|
|
Very cool. Keep posting about the process. |


|
The mold making seems the most difficult, no? I acquired a pair of carbon skis from communityskis.com (well built custom skis-$450 base price,worth checking out) and have been interested in carbon manufacturing. Where does your carbon experience come from? What other things have you made from carbon fiber? Any other projects in mind? |
|
|
Innovative mandrel! I like it. Curious to know the decision process of why you chose to use regular sheet twill rather than a braided sleeve? One other thought, I'm assuming you were left with most of the mandrel stuck in the tube...or did it release ok? |
|
|
Ryan N wrote:Nice job, clearly you have some experience in working with carbon fiber. Out of curiosity, seems like the fiber and resin/epoxy would be fairly expensive? Do you have an estimate of how much you might have saved over a store bought tool? Sumtec's aren't horribly expensive (though not carbon fiber) Also what do you primarily plan on using these for? Seems more like a low angle ice/snow tool? Do you plan on using it on vertical ice? Nice work.I think I've spent approximately $300-$350 dollars for my material so far. This is about enough to make 8-10 tools. That's excluding the picks which are $50 a piece. The main design intent is for lower angle ice and alpine climbing. So far the first tool is really strong. Winter has come and gone here in Northern Arizona but with the completed tool I've climbed trees, done pull ups on it and practiced self arresting with my buddy yanking me down hill at the ski resort. Its holding up great. The current tool is made with more material and should be even more robust. Without the pick mounted the completed shaft weighs 197g, where the previous one weights 154g. |
|
|
Question about carbon tools from someone in a quantitative discipline (but not materials / engineering): How do you feel about whacking pickets in with carbon tools? |
|
|
This is beyond awesome. |
|
|
This might be the coolest thing I have seen on mountain project. Seriously, this is awesome. |
|
|
Nice work. The finished carbon looks flawless. With a skill set like this, I would bet that your time is valuable enough that aren't really saving any money making tools yourself! But a very fun project, and impressive. |
|
|
Excellent execution. Why such a low PSI? Were you limited by mold half strength? Did you control resin content? How did you bolt the aluminum shank into the head of the axe? I imagine the tool could be made even lighter after a couple iterations and some testing. |
|
|
Stiles wrote:The mold making seems the most difficult, no? I acquired a pair of carbon skis from communityskis.com (well built custom skis-$450 base price,worth checking out) and have been interested in carbon manufacturing. Where does your carbon experience come from? What other things have you made from carbon fiber? Any other projects in mind?My composite experience comes from building competitive downhill skateboards actually. The mold building was definitely the most challenging component and something I had very little experience with. I always have other projects in mind. Also I choose twill over braided tubing mainly because of familiarity with regular cloth and the price point. I also wasn't finding the weight I needed from braided tube. And the inner tube pulls cleanly out of the part. In the first prototypes I used a breather ply but it's not necessary. Haven't wacked any pickets yet but I think it will work fine. The carbon will absorb a lot of the shock and the tool is completely solid in the area where the head mounts. Previous iterations used a higher PSI but I kept running into bursting tubes. Also, higher pressure caused unequal wall thickness due to the inner tube being round and the mold being square. |
|
|
RobC2 wrote:Kids don't try this at home...Nope. TOTALLY want to do this at home. |
|
|
Dewray, if you put a release film between the layup and the inner tube do you think that the tube would be more likely to fill in the corners? Perhaps try a mountain bike tube? I know the scales are different but take a look at how ski builders use fire hoses for ski presses. Perhaps a similar clamping mechanism would be more resistant to failure. I imagine it shouldnt be that hard to get pressures > 20 psi. |
|
|
NateGfunk wrote:Dewray, if you put a release film between the layup and the inner tube do you think that the tube would be more likely to fill in the corners? Perhaps try a mountain bike tube? I know the scales are different but take a look at how ski builders use fire hoses for ski presses. Perhaps a similar clamping mechanism would be more resistant to failure. I imagine it shouldnt be that hard to get pressures > 20 psi. skibuilders.com/howto/equip…I dont think the release film would have much of an effect. The tube I'm currently using is really the largest my mold could accommodate. The issue is my mold is open on the ends, allowing the inner tube a place to bulge out. If it were fully enclosed I could avoid this problem and really crank up the pressure. |
|
|
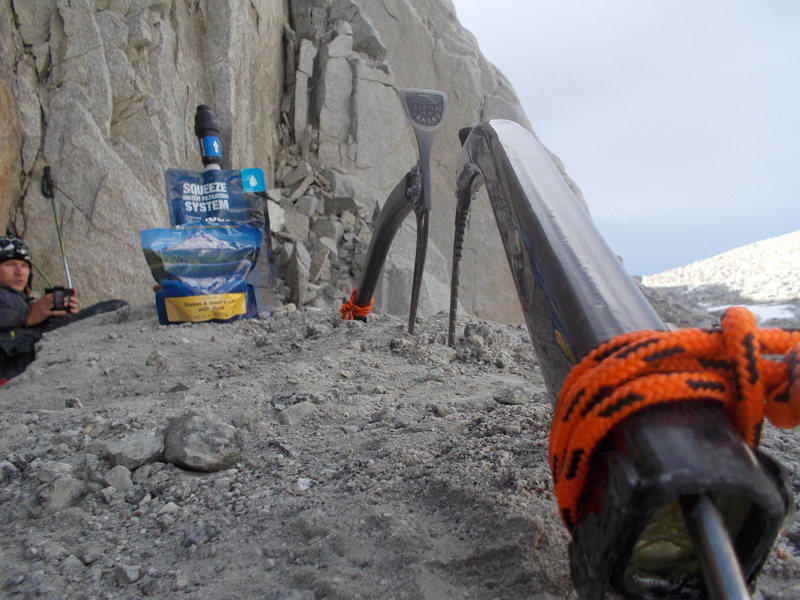
So LONG time since I've posted on here but I've been busy. Since I last posted I built a matching tool for the one posted in this topic and I've taken them climbing in the sierra. We climbed U-notch and V-notch in the palisades, topping out on Mt Sill for fun. The tools worked fantastic on blue Al3 and I'm getting better and better at making a glossy finish on the carbon. Thank for everyone's enthusiasm about this project. |
|
|
So flippin' cool! Congrats man! |
|
|
Sweet! I was wondering when some action shots would happen. Nice work man, those tools look great! glad to hear they work so well. |